Sunday, December 9, 2018

Merry - Funky Festive

Funky Festive is a fantastic die set to have for the holidays. It has everything - greenery, flowers, berries, bows - a definite must have die for holiday projects. I used it on so many of my Christmas samples. 
This simple, traditional card features the poinsettia a few greens and a bow from the Funky Festive. They are paired (yep I was all about pairing this year) with a staple holiday die, Candlelight.
I kept the background simple with just the 3-D Lumber Texture Fade cut out of the large Stacked Label and the sentiment was cut using the Holiday Words #2 set.
🎄🎄
I have another giveaway! It’s a pile of vintage ephemera and trinkets I got from shopping Tim Holtz’s Vintage Stash Sale at Carson. ❄️❄️
If you want to be entered, to win some of Tim’s Vintage Stash, comment on any of my posts here with #timholtzchristmas2018 ☃️☃️
🎄🎄
I’ll pick a couple of names on Monday Dec 10 at 12 noon PT. 🌟🌟

A Merry Christmas - Inventor 5

I think this one ended up being one of my favorite sample cards from the 2018 Christmas release from Tim Holtz and Stampers Anonymous. It features the Christmas Tree from the Inventor 5 CMS359 set.
I started by stamping two different pine boughs from the Winter Watercolor CMS354 around the edge of a piece of Distress Mixed Media Heavystock in Iced Spruce Distress Ink and Pine Needles Distress Ink.
For the tree background, I did the wrinkle-free distress technique on a piece of Alcohol Ink Cardstock with Ice Spruce and Pine Needles Distress Oxide. Then when dry I applied Distress Micro-glaze to boost the color and bring back the shine. Once it was dry I stamped the tree onto it with Black Soot Archival Ink.
The sentiment is really easier than it looks.  I cut a piece of Distress Mixed Media Heavy stock out of the Planks die. It needs to be a flat paper, not the woodgrain.  Then I stamped the sentiment onto the plank and embossed it with White Embossing Powder.
Once that was done, I took the plank and stained it brown with and brown Distress Stain. Then I ran it through the 3-D Lumber Embossing folder. To get a nice wood grain, I apply Ground Espresso Archival Ink to the raised grain areas of the top piece of the folder, then when I run it through the ink is applied to the depressed areas.
Now it looks like you stamped on an uneven surface, but you didn't so you can actually read the sentiment.

I finished it off with a couple of Pinecone Adornments and a File Clip.

🎄🎄
I have another giveaway! It’s a pile of vintage ephemera and trinkets I got from shopping Tim Holtz’s Vintage Stash Sale at Carson. ❄️❄️
If you want to be entered, to win some of Tim’s Vintage Stash, comment on any of my posts here with #timholtzchristmas2018 ☃️☃️
🎄🎄
I’ll pick a couple of names on Monday Dec 10 at 12 noon PT. 🌟🌟

Saturday, December 8, 2018

Merry Christmas and Happy New Year

Oh those delightful Christmas Overlay CMS357 stamps! I used them in two ways on this card and paired (there's that word again! LOL) them with the Music background stamp from Music & Advert CMS358 to make a card with a traditional Chrismas feel.
I started with stamping the wreath in Black Archival and watercoloring it with Distress Markers. Then I stamped the sentiment in Black archival and them in clear embossing with gold embossing powder.
The frame I made just by stamping the music in Black Soot Archival and adding Antique Linen.  I died some seam binding with Festive Berries.
The large background is stamped with the holly stamp from the Christmas Overlay in Black Soot Archival and then water colored with Distress Markers.  I completed the card by sewing around the edges with gold metallic thread.

🎄🎄
I have another giveaway! It’s a pile of vintage ephemera and trinkets I got from shopping Tim Holtz’s Vintage Stash Sale at Carson. ❄️❄️
If you want to be entered, to win some of Tim’s Vintage Stash, comment on any of my posts here with #timholtzchristmas2018 ☃️☃️
🎄🎄
I’ll pick a couple of names on Monday Dec 10 at 12 noon PT. 🌟🌟

Winter Wonderland - Branches and Funky Festive

I was so excited to see the Branches Bigz die from Tim Holtz Sizzix Alterations. I've wanted a substantial branch for a long time and there are several branches on this die. It's fabulous!
Since it was part of the Christmas 2018 release, I of course needed to do a Christmas/Winter card.  I cut this branch out of black chipboard and Distress Woodgrain Cardstock colored with brown Distress Stains. I then sealed it with Distress Collage Medium because I didn't want the Distress Stain to color the snow.
I spred Grit-Paste on the top edge of the branch to mimic snow and sprinkled a little bit of Dsitress Glitter on it too. Then I set it aside to dry. While that was drying I cut and colored the berries from the Funky Festive die set. I added Glossy accents to the tops of all the berries and set them aside to dry.
For the background, I embossed a piece of Distress Watercolor Cardstock with the Simple Snowflakes Embossing Folder. I liberally spread Ranger Opaque Crackle Texture Paste over it and set it aside to dry. When I was dry I Used a blending tool and colored the entire surface with Stormy Sky Distress Ink, making sure in went down into the cracks. Then I wiped off the excess with a slightly damp towel.

The last thing I did was to cut the title out of Distress Watercolor Cardstock using the Holiday Thin die set. I sprayed it with Distress Resist Spray and dusted it with Distress Rock Candy Glitter. Then backed it with the leftover piece of brown woodgrain cardstock.
The last thing to do is to assemble it and attach an Ideaology Index Clip with a bit of jute tied through it.
🎄🎄
I have another giveaway! It’s a pile of vintage ephemera and trinkets I got from shopping Tim Holtz’s Vintage Stash Sale at Carson. ❄️❄️
If you want to be entered, to win some of Tim’s Vintage Stash, comment on any of my posts here with #timholtzchristmas2018 ☃️☃️
🎄🎄
I’ll pick a couple of names on Monday Dec 10 at 12 noon PT. 🌟🌟

Season's Greetings - Glorious Gatherings

To showcase this colored portion of the Glorious Gatherings stamp, which was my most favorite stamp this season, I made a monochromatic mat out of it using a product I've had but never used.
I stamped on a 5x7 piece of Distress Mixed Media Heavystock then I inked the Glorious Gatherings stamp with Ranger Inkessentials Clear Watermark Resist  and let it dry. Once it was dry I used a blending tool with Brushed Corduroy and Vintage Photo Distress Inks and inked over the entire surface.  I don't know if this is how it was supposed to turn out, but it kind of grabbed the ink and  made a light patterned background. Nice and subtle. I love it!
I stamped the Glorious Gatherings in Ground Espresso Archival Ink and then watercolored it with Distress Inks.
I finished off the background by stamping the Music from the Music and Advent CMS358 in Ground Espresso Archival Ink, cut the piece into strips and then colored them coordinating Distress Inks to highlight some of the colors in the Glorious Gatherings focal piece.

I finished it off with some machine stitching and tied a bit of Crafter's Thread along the left side.

Have a creative day,

Tami

I am an affiliate with Simon Says Stamp. The links below send you to their store. If you wish to purchase something and use one of my links below, I get a small percentage of your order at no additional cost to you. This helps me to defray the costs of this blog and my YouTube channel, the time, the ideas and tutorials I post here. Your help is greatly appreciated! Thank you!

Season’s Greetings - Winter Watercolor


Winter Watercolor CMS354 is a lovely stamp that allows you to stamp in layers for added detail and dimension. It’s beginning to look like I did a lot of pairing on my sample card this year. I didn’t realize that until I started writing these blog posts. With that said, I paired the Winter Watercolor with Christmastime CMS352, which is a set of really lovely sentiments that can be a focal point on their own.
I stamped the very background with the Lace from the Lace and Ornate set, in Antique Linen Distress Ink. The poinsettia stamp is layered with Candied Apple Distress Oxide and the center is embossed gold.

The mat was lightly blended with Peeled Paint Distress Oxide and then stamped the watercolor holly leaf in the same. Then I sprayed both with Distress Resist Spray which is my new favorite thing to spray on everything. LOL  I love that stuff!
The sentiment was also stamped in Peeled Paint Distress Oxide and then embossed with Ranger Clear Super Fine Embossing Powder.

I have another giveaway! It’s a pile of vintage ephemera and trinkets I got from shopping Tim Holtz’s Vintage Stash Sale at Carson. ❄️❄️
If you want to be entered, to win some of Tim’s Vintage Stash, comment on any of my posts here and on my blog with #timholtzchristmas2018 ☃️☃️
🎄🎄
I’ll pick a couple of names on Monday Dec 10 at 12 noon PT. 🌟🌟

Friday, December 7, 2018

Winter Wonderland - December Doodles

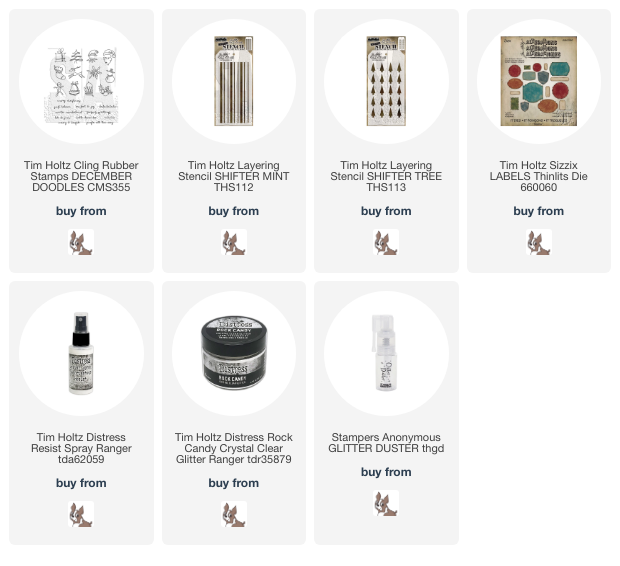
This was a quick card made with some of thr Tim Holtz Stampers Anonymous Christmas 2018 release. I used the Tree and Mint Shifter Stencils to make the backgrounds. On the main card background I used my Christmas 2018 signature design go-to, a sprinkling of Distress Resist Spray and a dusting of Rock Candy Glitter.It gives the background just a bit of shine and sparkle.

The December Doodles CMS355 Stamps provided the focal point and the sentiments. I cut the Mint Stenciled piece, the stamp for the holly doodle and the tab for the sentiment out of one of my favorite die sets, the Labels 660060 from Tim Holtz and Sizzix.

Sorry this isn't a proper tutorial, but I hope the infor I provided does help a bit.

Have a creative day! 

Tami 

 I am an affiliate with Simon Says Stamp. The links below send you to their store. If you wish to purchase something and use one of my links below, I get a small percentage of your order at no additional cost to you. This helps me to defray the costs of this blog and my YouTube channel, the time, the ideas and tutorials I post here. Your help is greatly appreciated! Thank you! 


Wish

This is a super simple card using just the Snowy Stars die and Vintage Tidings.
I gave it a little shimmer by coloring Distress Heavystock with Distress Ink and then spraying it with Distress Resist Spray.
I popped up one of the large Snowy stars in the center of the circle and used some of the pieces from the cicular cut out to go around the inset word Wish. So, so quick and simple!

Thursday, December 6, 2018

Vintage Phoropter Lense Winners

And the winners from the Milk Cap Tree post for the vintage phoropter lenses are

Blogger Carol said...
When Tim released the milk caps, I couldn't wait to get my hands on them...and I'm still hoarding them! They bring back such wonderful childhood memories of a move from a small town in Kansas to Lincoln, Nebraska when I was 5. We arrived late on a Friday night and the next morning, Bill, our Milkman arrived with gallon bottles of cream top whole milk and complementary ice cream. He became part of the family...so, as a Christmas fanatic, this is a great idea! Thanks for the idea and the tutorial, love that, too. My favorite cookies are Mexican Wedding Cakes or Russian Tea Cookies. Butter, pecans, flour and powdered sugar, very rich, and you can't eat just one.
December 5, 2018 at 7:13 PM

Blogger Sherry Tipton said...
What a fabulous way to use the Milk Caps...and the Foiled frame...a definite try in my book...
Cookies, cookies, cookies...never met a cookie I didn't like...LOL. I used to make dozens and dozens of cookies at Christmas...but Snickerdoodles I only made at Christmas for some odd reason and they are my all time favorites...but I have not made them in so many years, I could not find my recipe to share...oh well, saved you from gaining a couple of pounds that way...LOL...thanks for the give-a-way.
December 5, 2018 at 4:22 AM
Delete
 Please email me your mailing address at teatimetamera at yahoo dot com

Thanks to everyone who participated and for sharing about your favorite cookies! For those who would still like to make this or a wreath or a bell or whatever shape you choose, and wanted the addition of the phoropter lens texture, I know of two options you could try:

Ideaology Monocles

Assemblage Compass and Monacle Charms (both would be cool because Santa might need a compass!)


Delete

Wednesday, December 5, 2018

Let it Snow Trinket Tin

The little Ideaology Christmas Trinket Tins are so little and sweet and allow for tiny miniature scenes to play out. So I present to you two little snowy scenes
First, I opened the tin and set it on it's side so it is wide horizontally. to keep it open I attached some dimensional adhesive under the lid so it would sit flat on top of the tin and not flip closed. Then I spread some Distress Grit Paste on the top and adhere a Quote Chip. Once it was secure I adhered two Snowflake Adornments and then added more Grit Paste to the top of the Quote Chip and on the snowflakes.
I took one of the Icicles and trimmed the corners to fit the shape of the tin. Then I spread some Glossy Accents on it and dusted it with Distress Rock Candy Glitter. Once that was Dry I adhered it to the tin with Glossy Accents and held it there until it dried.
The first little scene is a snowball fight in the making. I covered the inside of the tin with the Red Snowflake paper from the Christmas Paper Stash. Then went around the inside of the tin with the Ideaology Black polka dot Christmas Design Tape. The back area has a tree, a snow poster, and a 25 ticket all from the Christmas Snippets.
I spread more Grit Paste along the bottom of the lid and dusted it with Distress Glitter. Cut one of the Wood Slices in half and attach that at the bottom of the tree and add more Grit Paste. I rolled some Baubles in Distress Collage Medium and then Rock Candy Distress Glitter to make snowballs.
The next step was to color some of the tiniest of the Christmas Paper Dolls and attach them around in the snow. I mostly just put a little Collage Medium on their feet and stuck them in the snow. The one little kid on the wood slice is attached to the long icicle.
For the second scene I covered the back and sides of the box with the black greenery paper. I covered the front edge of the tin with the red plaid Christmas Design Tape. Again I spread Grit paste over the bottom and dusted it with glitter.
The I added a few piece of the smaller Icicle that I had glittered previously. I put two small pieces on each corner and a tiny bit of the left over in the center. Then to cover the parts without icicles, I attached the red Icicles for decorating strio with Collage Medium.
I used the Birch die cut and cut it out of Distress Watercolor Paper so it was a nice, this white paper. I stamped over it with the Birch background stamp from Stampers Anonymous in Ground Espresso Archival. I did cut the piece to fin in the tin, but then cut it in half and attached on piece barely popped up from the back. The piece on the right is popped up quite a bit to add some dimension.
I sprayed one small and two mini Woodland Trees with Peeled Paint Distress Spray, and then added Collage Medium and dusted then with glitter. Then attached them to each side of the tin. I added two more of the smallest Christmas Paper Doll kiddos, and one tiny Salvaged Deer.
 Now all that is left is to make a base to display it on. I started with the large Vignette Base, rubbed some Picket Fence Distress Paint on it and then wiped any excess off.

Then I used one of my new favorite wintery dies, the Ice Flake Bigz die. I cut two out of the Ideaology Mirror Sheets and Sizzix White Mat Board. I adhered them to the board and then attached them to the base.
 In order to be able to see the two flakes, I attached a wood slice to the top of the Vignette Base. Then attached an Ice Flake. Then I attached another wood slice and the second Ice Flake.  Once it was dry, I sprayed it with Distress Resist Spray and dusted it with Glitter.

Lastly I attached the Trinket Box to the top Ice Flake and added a little more Grit Paste and glitter so you couldn't see the edge of the box too prominently.

The last touch was the bit of Seam Binding ribbon lightly colored with Brushed Pewter Distress Spray. 

In honor of the white, fluffy snow in this piece, I posted my grandmother's Divinity candy recipe on my recipe blog. It's a tough candy to make, but it has a special place in my childhood memories. I hope you take a look.

Tami

I am an affiliate with Simon Says Stamp and Scrapbook.com so the links below send you to one of those stores depending on which logo you choose.  If you wish to purchase something from either store and use one of my links below, I get a small percentage of your order, at no additional cost to you. This helps me to defray the costs of this blog, the time, the ideas and tutorials I post here. Your help is greatly appreciated! Thank you!