Saturday, April 23, 2022

Rupert's Razzle Dazzle Day


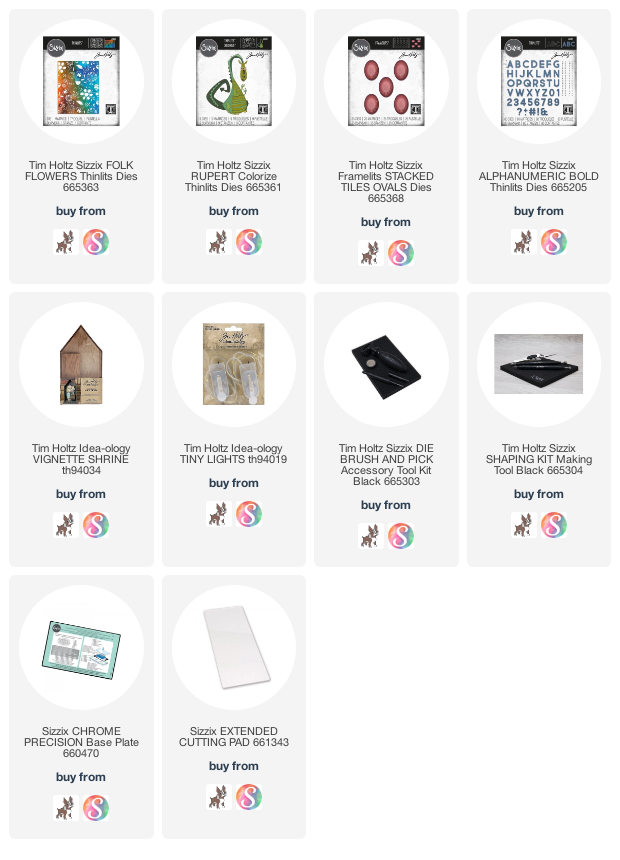
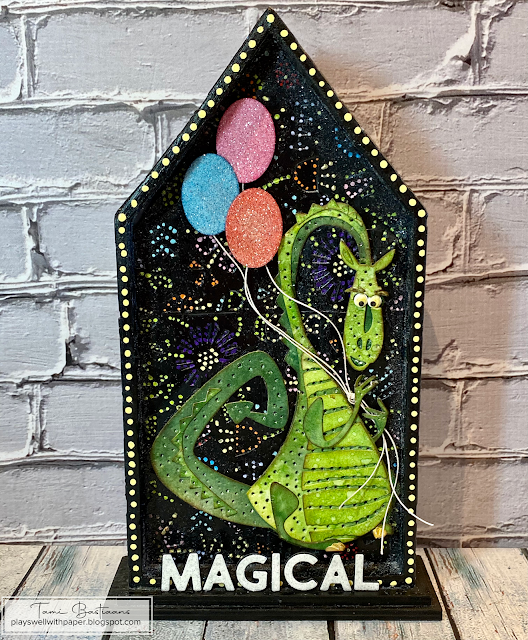
A year after the release of the Tim Holtz Sizzix Chapter 2 2021 dies, I am finally posting a walk through of this piece. It was inspired by Disneyland's Main Street Electrical Parade and I used the Rupert Colorize die and the Folk Flowers die to make this. 
I thought today would be a great day to post this video since it is once again the return of the Main Street Electrical Parade for its 50th Anniversary season, and the Elliot float, which inspired this make is on much of the merchandise. 
I didn't take too many step out photos, so I hope that my explanations in this video makes sense.  If not, feel free to contact me and I will do my best to answer your questions or clear up any confusion I caused.
 
Use the Vignette Shrines and a bone folder to etch the shape and dimensions on a piece of black cardstock.
Cut around the shape leavin about an inch on each side. Then miter the corners and fold it along the inside edge mark so you will be able to place this inside the vignete and have it stand away from the back panel by an inch to allow space for the Tiny Lights to be attached to the back panel.
Cut the main shape of Rupert out of the center. Cover this with the Folk Flowers cut from black cardstock and collage medium so they fuse perfectly. then use your scissors and trim the flowers from the shape of Rupert. Don't worry about the ears, feet, etc. just get the main areas of the body so that when you adhere vellum, frosted sheets or translucent Yupo to the back of this piece, the entire center of Rupert is open and will allow light to shine through. Use a poker tool or tool of your choice and multiple colors of Distress Paint to apply dots to the Folk Flowers background;
Assemble Rupert and then poke large holes in him where you want the light to shine through him.
Cut a few of the Stacked Ovals from glitter paper, then attach string or twine to make balloons.
Adhere Rupert over the opening making sure the edges of his body are sealed all the way around to the background. That will force the light to shine through the holes in his body. Attachthe strings into his hands and adhere the balloons over his shoiulder.
Now is the time to adhere the shrine platform piece into the shrine. and finish off the front by cutting the word Magical (or Dazzle) from black cardstock multiple times, and adhere them together, The last layer should be some white glitter paper and lastly attach them along the front bottom edge of thte Vignette Shrine. They should stand up.
You will want to add yellow dots along the outside edge of the front of the Vignette Shrine.
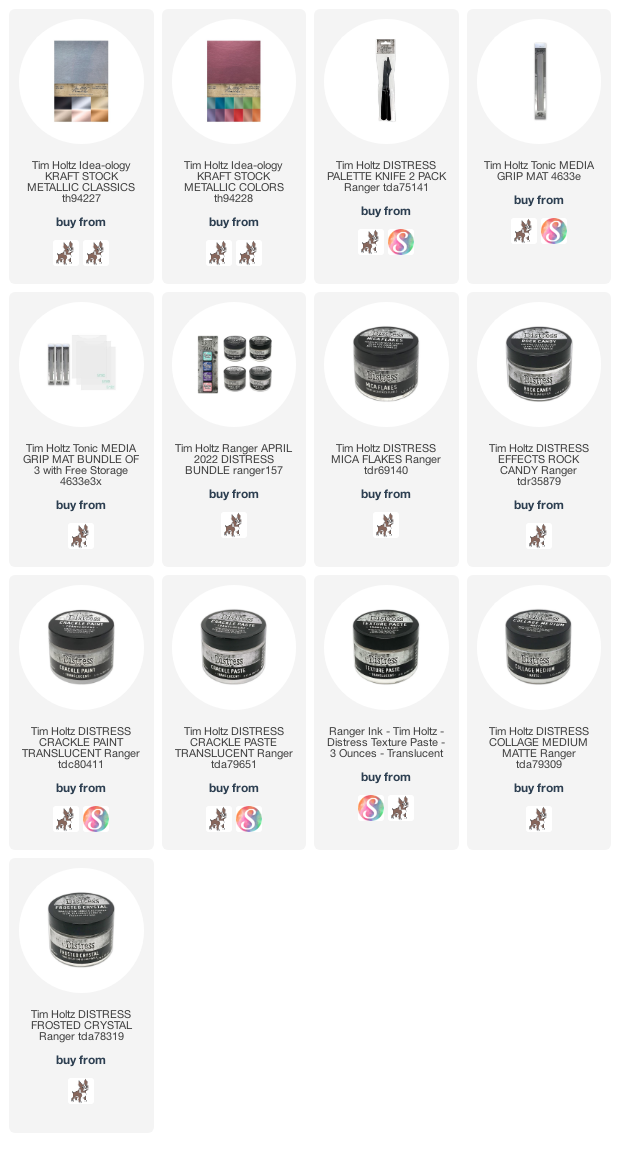
 Before you ever adhere the platform with Rupert intothe Shrine, cover the sides and back with pieces of Folk Flowers cut from black cardstock. Adhere it with Collage Medium, tnen pain the whole thing with Black Soot Distress Paint.
Using a poker tool or tool of your choice, again add dots to the Folk Flowers back ground in many different colors of Distress Paint. Be sure to drill a hole in the back of the Shrine to thread the Tiny lights through. Attach them to the back of the panel so they will shine through Rupert.

I am truly thankful for your support and that you took the time to stop by and check out this long overdue post about this make from last year. Thank you so much!

I hope you have a crafty day,

Tami

I am an affiliate with Simon Says Stamp and Scrapbook.com so the links below send you to one of those stores depending on which logo you choose.  If you wish to purchase something from either store and use one of my links below, I get a small percentage of your order, at no additional cost to youThis helps me to defray the costs of this blog, the time, the ideas and tutorials I post here. 

Your help is greatly appreciated! Thank you!

Saturday, April 16, 2022

3D Doily Easter Cones

I have had this idea since January, but I just haven't gotten around to making a tutorial for it and decided that I had better finish it today or it would be too late for this year. These little 3D Doily Easter Cones are a quick make and allow you to keep them simple like this or more elaborate depending on your time, supplies and style. These little cones could be used for May Day gifts, or even fun little flowery tussie mussies for a tea or bridal shower favor.


Here is a video tutorial walk through of this doily cone favor.
As you can see I used them as table decor favors for Easter, but as I said earlier, they could be filled with flowers or other things for tea parties, bridal showers or other occasions. Don't limit it just to Easter or spring for that matter. Doily cones can be for any pretty occasion.
I hope the video tutorial was clear, but as always I am happy to try and help if you still have questions. Just email me through the contact in the right hand column and I will do my best to help.

 I am, as always, incredible thankful for your support and for you taking the time to stop by and check out this craft.

I wish you all a lovely Easter,

Tami

I am an affiliate with Simon Says Stamp and Scrapbook.com so the links below send you to one of those stores depending on which logo you choose.  If you wish to purchase something from either store and use one of my links below, I get a small percentage of your order, at no additional cost to youThis helps me to defray the costs of this blog, the time, the ideas and tutorials I post here. 

Your help is greatly appreciated! Thank you!
 

Saturday, April 9, 2022

Love Your Scraps Card

This card came together very quickly using a bunch of leftover bits I had in my craftermath and I thought I would make it and send it along for the Tim Holtz Sizzix 2022 release. I used dies from Abstract Faces, Artsy Stems, Bold Text 2, and the Cracked Leather 3D texture fade.
Here is what started out as a very short video walk through of the card, but I had so many questions about the background that I added a quick tutorial in the middle for making the background.
So fun!
Love those Artsy Stems! I just cut them from Watercolor paper and colored them with Distress Inks and a Waterbrush.
I needed a little pop of aqua in this corner to make the title pop and coordinate.
I just used the one word from the Bold Text 2 die that said Love With All Your Heart
Isn't that cracked leather texture great?

Thank you very much for reading this post and supporting my art! I appreciate you!

Now go out there and have a creative day,

Tami

I am an affiliate with Simon Says Stamp and Scrapbook.com so the links below send you to one of those stores depending on which logo you choose.  If you wish to purchase something from either store and use one of my links below, I get a small percentage of your order, at no additional cost to youThis helps me to defray the costs of this blog, the time, the ideas and tutorials I post here. 

Your help is greatly appreciated! Thank you!

Experimenting with Distress Translucent Products

 
Are you as happy about the new Distress rebranding and products from Tiim Holtz and Ranger Ink as I am? I got to work right away experimenting and I am inviting you to join me in the video below. I added some still from the experiment below and my affiliate links to get your hands on the newness are at the end of the post.


I am always so thankful when you stop by my blog and grateful for your comments and support. Thanks you all so much!

Have a creative day,

Tami

I am an affiliate with Simon Says Stamp and Scrapbook.com so the links below send you to one of those stores depending on which logo you choose.  If you wish to purchase something from either store and use one of my links below, I get a small percentage of your order, at no additional cost to youThis helps me to defray the costs of this blog, the time, the ideas and tutorials I post here. 

Your help is greatly appreciated! Thank you!


Wednesday, April 6, 2022

Hobbit House Ideaology 2022

 This is a sample project I made with the new Tim Holtz Idea-ology 2022 release. I thought the new Curio Clock needed to be a Hobbit House, so I made it into one. I really enjoyed this make and hope you enjoy hearing about all the details that went into this make.  I have to confess that I have never read The Hobbit or Lord of the Rings or seen any of the movies. But my husband has watched the movies dozens and dozens of times as has my mom, who used to watch them with my sister and dad. So I leaned heavily on their knowledge of hobbits to complete this make. When they both approved then I knew I had done a good job. You may be asking yourself, "If she had never seen the movies or read the books why did she even think of a Hobbit House?" That is a very good question, and the answer is, I have no idea. I don't control the things that pop into my brain as inspiration and need to be made, it just happens and I go with it.

I am able to say more in the Youtube tutorials than I am in these blogs, so I hope you will pop over there and watch the video for more detailed explanations. Begin by popping the silver rim from the front of the clock, then cover the outside with a layer of Distress Grit Paste. I used the white Opaque Grit Paste, because I was out of the Transluscent, but either one will work. The Translucent may be better because it won't take so much paint to cover it.

      Once the entire clock is covered, set it aside to dry.  

There is no need to cover the back with grit paste, just pull it off and set it aside to make the door. Also, I almost used these Small Paper Dolls that were just released because they were the closest ones that looked like Hobbits because they had bare feet, but their scale against the door seemed off so I decided not to use them.Once the grit paste is dry, paint it with a brown Distress Paint. When the paint is completely dry, add some color variation with Distress Crayons. Smooth them out with a damp finger. The door begins by coloring some Woodgrain Cardstock green or whatever color you want your Hobbit door. Then paint the silver rim whatever color you want the door trim to be. You need to cut a piece of scrap paper the size of the rim and find the center for the Hitch Fastener door handle. Cut the woodgrain paper into 1/2" strips and then ink and distress the edges and adhere them to the paper circle. I followed the lines I used to find the center because I wanted the boards to be straight up and down on the door. When the woodgrain is adhered, attach the circle to the back of the painted rim and adhere the entire piece to the center of the back panel of the clock. It should look something like this at this point. Adhere some texture paste along the edge to place some faux bricks around the edge. Wait, where did the the faux bricks come from? Well, while you were waiting for the door to adhere to the clock, you made them like this...

Using brick colored Idea-ology Kraftstock, emboss a piece through the Tim Holtz Sizzix Brickwork 3D embossing folder. Cut out all of the whole bricks. Then I sanded the edges so they would look old and not like pieces with sharp edges cut from paper. I'm not gonna lie, the cutting and sanding was a bit tedious, but worth it. Then I ran the raised tops over the Hickory Smoke Distress pad. At that point the door was dry, so I put some of the Seasonal Grave Texture Paste on the outside edge of the clock and press the bricks into it. Let it completely dry then cover the whole back piece with a layer of Collage Medium and smooth it out with your fingers. Once that is dry, add some Walnut Stain Distress Crayon to the bricks, door frame and door to add age and dimension.

The inside of the back panel needs to be decorated so I added some Backdrops Vol 3 paper, Woodgrain paper, and two of the Baseboard Windows with a piece of the Vellum Scenes behind it.
I made several books out of scraps, old book paper, the new Design Tape, and Curator Snippets because I heard Hobbits like books.
I also heard that Hobbits like adventure and maps, so I took this circle map (there are two in the new Memoir Ephemera packs) and torn it into pieces, inked the edges, rolled them up, and tied them with some string.

  I felt the Hobbit in the house needed a broom to clean up, so I took one from my Halloween stash and cut  off the bottom stitching and then trimmed it short for a Hobbit. Next I made a little desk for the Hobbit out of an Idea-ology Matchbox. I cut it in half and covered the front of the "drawers" with some of the new Patchwork Fabric Tape. The outside of the matchbox pieces was covered with the Marbled Design Tape.  

I drilled a hole in the bottom of the clock with my Dremmel, and then built up a flat base around it with foam and chipboard for the floor of the hobbit house. It's time to thread the lights through the bottom, attach the battery pack with foam tape, and foam dots to the underneath of the bottom base of the clock.

Here you can see the flat floor created for the house.
 
 I needed a channel to thread the lights up through so I could light the clock from the top. So I layered foam tape on the front and back all the way around the clock.
 
 I attached all of the lights in the top of the clock and covered them part of one of the vellum scenes.
 
 Here you can see the lights rolled up behind the vellum and between the foam tape.

 I covered the sides with a piece of the Backdrops Vol 3 paper that looks like burl wood. This helped finish the inside and cover the lights on the one side.
 
Here it is with the lights on so that you can see the lights only go on one side.
 
 Next I covered the bottom of the clock with additional strips of the brown woodgrain cardstock that I used on the back panel.

It's now lit up and has walls and a floor so we are ready to start moving our Hobbit in.
I put the desk in the center with the smallest book made with the Curator Snippets, and I added a Key addornment and a drippy candle.
Here is a close-up to show how it looks with the window in the background.
I place the broom in the corner.
And I had a vial from a garden shed project a couple of years ago that I added a Curator Snippets label to and then added the rolled up maps. You can see the technique I used to make the vial look old in this post.
That's it for the details and explanations. If I missed something you were curious about, please contact me through the form at the right. I cannot figure out a way to reply to your comments so that you see them. I do read them all. I've searched and tried everything in this platform and just can't see why it's not possible. But I can reply to your contacts through the form at the right.

I am always so thankful when you stop by my blog and grateful for your comments and support. Thanks you all so much!

Have a creative day,

Tami

I am an affiliate with Simon Says Stamp and Scrapbook.com so the links below send you to one of those stores depending on which logo you choose.  If you wish to purchase something from either store and use one of my links below, I get a small percentage of your order, at no additional cost to youThis helps me to defray the costs of this blog, the time, the ideas and tutorials I post here. 

Your help is greatly appreciated! Thank you!