As you may know, in the last tutorial video I made some Halloween Cards
in March for the Tim Holtz Stamper's Anonymous April Release. In that
video I hinted at some Christmas ideas for the Note Quote Stamp set and
Everyday Art Elements Stencil set. They are perfect for pairing together
to make cards all year long. I challenged my self to make three Christmas cards
using only the Note Quotes stamps and Elements stencils. So if money is
tight right now, I recommend these stamps and stencils to start.
This tutorial is mostly demo. I show how I made the focal pieces with the stencils and show how I stamped the backgrounds. I hope you enjoy!.
I had so much fun experimenting with these stamps and I hope you
enjoyed the ideas for using these for Halloween...and other celebrations
throughout the year.
Have a very creative day!
Tami
I am an affiliate with Simon Says Stamp, Scrapbook.com. The links below
send you to one of those stores. If you wish to purchase something and
use one of my links below, I get a small percentage of your order at no
additional cost to you. This helps me to defray the costs of this
channel, the time, the ideas and tutorials I post here. Your help is
greatly appreciated! Thank you!
Yes, I made some Halloween Cards in March for the Tim Holtz Stamper's
Anonymous April Release. I got an eye-dea and I just couldn't help
myself. (See what I did there?)
Anyway, the Note Quote Stamp set and Everyday Art Elements Stencil set
are perfect for pairing together to make cards all year long. You can
make cards for holidays as well as just to say hello. So if money is
tight right now, I recommend these stamps and stencils to start.
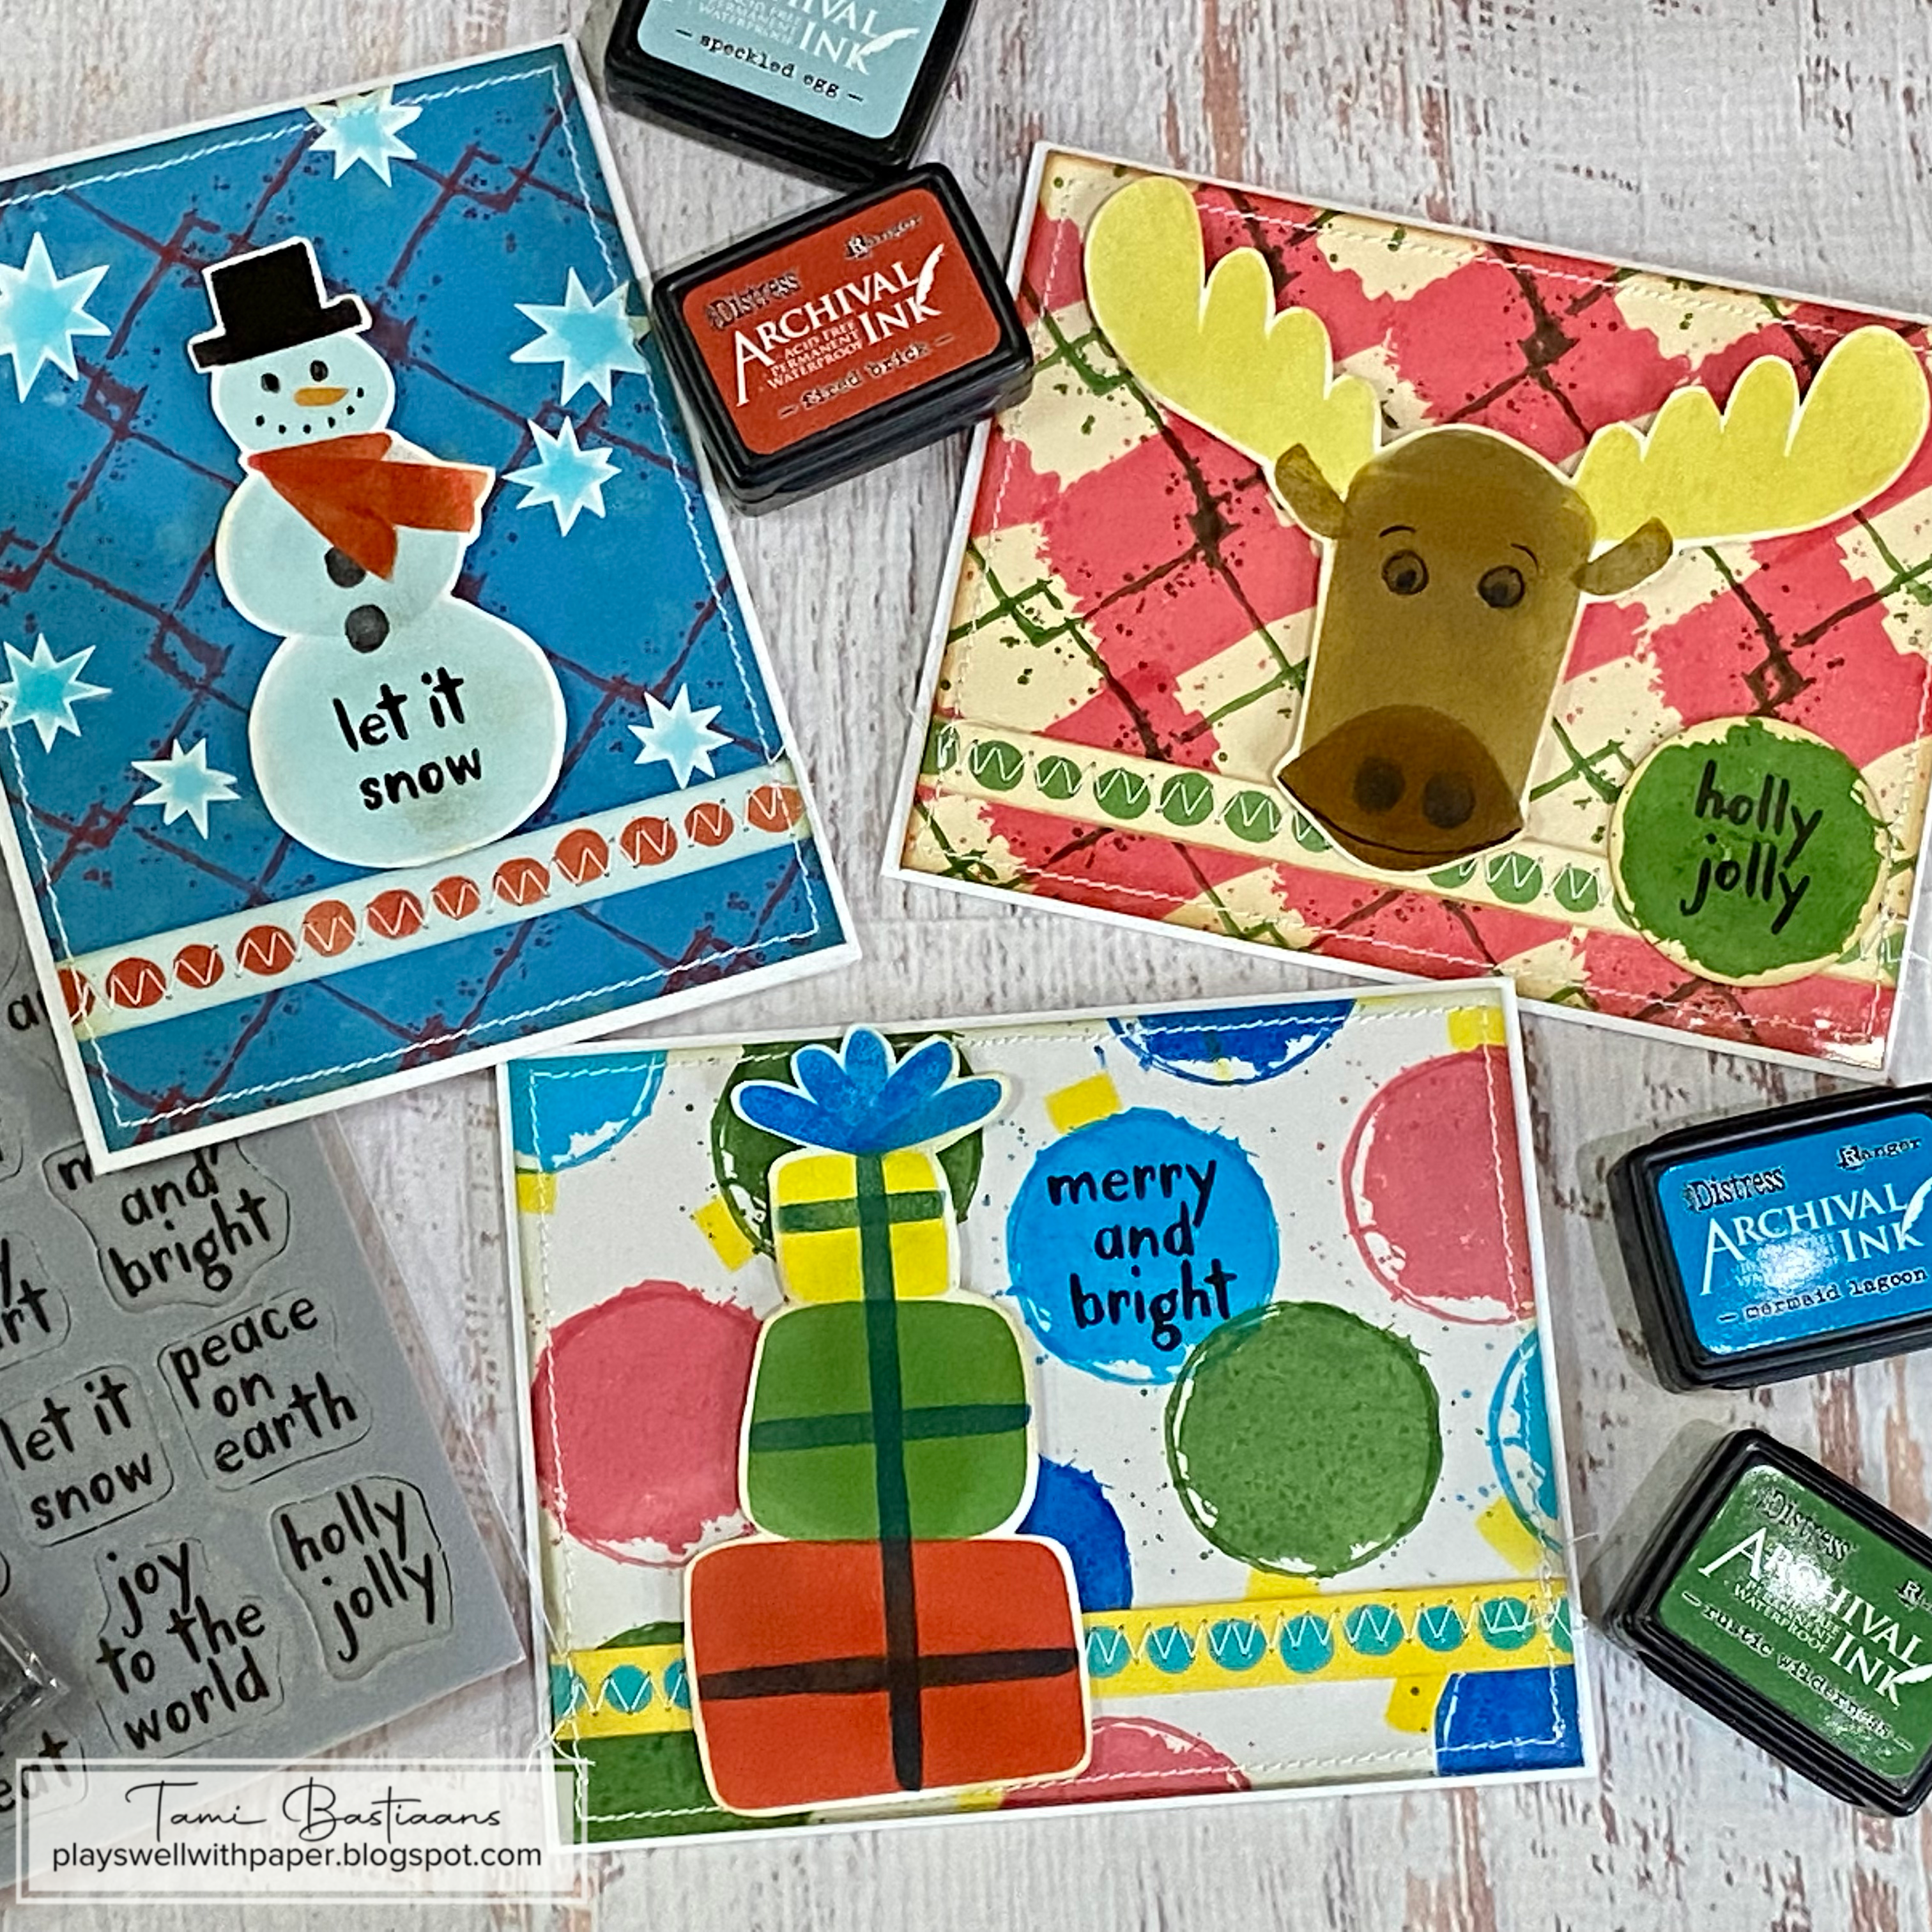
The video tutorial above shows how I made the eyeballs and the plaid. Enjoy!
The eyeball card was made with the circles from Note Quotes and two small circle stencils from Everyday Art Elements Stencils. To keep the white areas around the outside of the solid circles, I carefully applied Micro Glaze just inside the circle outline before applying the Distress Ink.
The argyle plaid was made by stamping the square and square outline from Note Quotes on an angle and overlapping. The solid was stamped in Spiced Marmalade Archival and the outline was Crackling Campfire.
This card was made the same way as the orange argyle plaid but with Peeled Paint Archival for the solid and Villainous Potion for the outline,
This one isn't a very successful plaid LOL! It's the same idea as the green argyle above but just with the circles.
I had so much fun experimenting with these stamps and I hope you enjoyed the ideas for using these for Halloween...and other celebrations throughout the year.
Have a very creative day!
Tami
I am an affiliate with Simon Says Stamp, Scrapbook.com. The links below
send you to one of those stores. If you wish to purchase something and
use one of my links below, I get a small percentage of your order at no
additional cost to you. This helps me to defray the costs of this
channel, the time, the ideas and tutorials I post here. Your help is
greatly appreciated! Thank you!
Hooray for some Creative Blocks that are actually useful! These delightful little square art stamps are from Tim Holtz and Stampers Anonymous. I wanted to use them as a background for some of the other stamps in the new release, so I made a mixed media mosaic background, seen above, and a basic card paper background seen below so that this basic design could be used by different types of crafters.
These cards are made with the Creative blocks stamped the exact same way, they just aren't as messy as the mosaic background on the clipboard. Here is the tutorial for both of these makes using the Creative Blocks. Please enjoy!
Here is part of the mosaic background before I put the Inspector over it. I stamped the images in Distress Archival ink in Hickory Smoke, Ground Espresso and Black Soot. Then sprinkled Distress Stain in Antique Linen, Lost Shadow, and Uncharted Mariner over it before cutting the tiles apart and spraying them with Distress Resist Spray. Once that was done I attached the tiles to the chipboard with Collage Medium and then pressed them into a layer of Grit Paste to mimic grout.
I love the subtle bits of color the splatters of Distress stain left and how the Distress Resist Spray really blended it all together to make the Blocks look like handmade tiles.
I really love it!
You can see behind the inspector that I added some of the Layers Organic from the Idea-ology 2023 release.
My inspector is a building inspector and he brought his clipboard to the job site to make sure the builders are completing their work according to the laws. The homemade tiles are representative of the artisans building the project he's inspecting.
I love that there are bits of architecture in here and there.
The handmade tiles just went too perfectly with this sentiment.
The cards were made the same way, but less messy.
I cut the tiles using the small guillotine Trimmer from Tim Holtz and Tonic.
These tiles have a very different look. Although they were stamped the same way with the same colors, but the hand coloring really makes a difference. I only used Antique Linen and Lost Shadow to splatter these and then I colored them all in with the same stains and a water brush.
To make the stamping stand out, I added Micro Glaze on them to make the Archival Ink pop on the images.
This flower was colored with Crackling Campfire and Crushed Olive.
The sentiment is colored in Crackling Campfire.
This card is made exactly the same way as the one above.
The only difference is the flower stamp from Bold Botanics and the color is Abandoned Coral.
more architectural details....
and more... a great set!
Thank you so much for stopping by! I hope you found the tutorial to be helpful and maybe inspiring!
I hope you have a very Creative Day!
Tami
I am an affiliate with Simon Says Stamp, Scrapbook.com. The links below
send you to one of those stores. If you wish to purchase something and
use one of my links below, I get a small percentage of your order at no
additional cost to you. This helps me to defray the costs of this
channel, the time, the ideas and tutorials I post here. Your help is
greatly appreciated! Thank you!
I am so excited to have a new addition to the Etcetera family from Tim Holtz and Stampers Anonymous!
Introducing the new Facades and Stacking Strips. These can be attached
to Etcetera Tags, Vignette Boxes, or anything similar as well as other
fun uses you can dream up. I used one of the Facades on a Vignette box
that I attached to a tag to create a little Potting Shed Vignette
complete with a roof made of stacking strips and a crate made of
Etcetera Trim pieces and Stacking Strips. I hope you will join me for
the details!
This is a bit of a long tutorial, but if you have made vignettes before there will be spots where you can FF through me applying paper, or paint or sanding or whatever. I just wanted to be sure to show me doing some of the things I often do off camera for makers who are new to Vignette Mixed Media making. Also, for cat lovers, one of my kitties make a partial appearance. LOL
The Facades! Love how they completely transform a vignette box. So easy! I mean, Come On! :) Love, Love, Love! Thanks for the Facades Tim and Stampers! I can see myself reaching for them time and again!
I stamped with the new Tiny Prints in Victorian Velvet.
Added some Crackle Texture Paste on the Adornments Foliage
Here you can see how I made a roof out of them. They are so versatile!.....so good! I need a package of them. LOL!
Crackle Paste and Distress Crayon make them look old and peeling.
Crackle Paste on a Salvaged Rabbit....again, I love that crackle texture!
Stacking Strips crate! See, I love them so much!!
Here are my gardening tools with Adornments Silverware (and a furry bit from X Atencio.
A Corked Vial is turned into a cool enamel jar with some crackle paste, paint, diamond stamp from The Inspector, and a rub on. And look and the crackle tecture on that bee from Idea-ology Entomology Adornments.
I had fun making some moss garden balls from baubles and Green Grass from the miniature or scenery section in the hobby store. And then making flowers from the Idea-ology Bouquet
What a happy little potting shed for spring!
I hope you were inspired to give the new facades a try! I love that they totally change a square or rectangle shape to something new. So great!
I hope you have a very creative day!
Tami
I am an affiliate with Simon Says Stamp, Scrapbook.com. The links below
send you to one of those stores. If you wish to purchase something and
use one of my links below, I get a small percentage of your order at no
additional cost to you. This helps me to defray the costs of this
channel, the time, the ideas and tutorials I post here. Your help is
greatly appreciated! Thank you!


 t
t