Wednesday, December 9, 2020

Joy on Thin Ice

I was reminded last week that I had never blogged or posted this project, so here is the best I can do. There is a funny story behind it. 

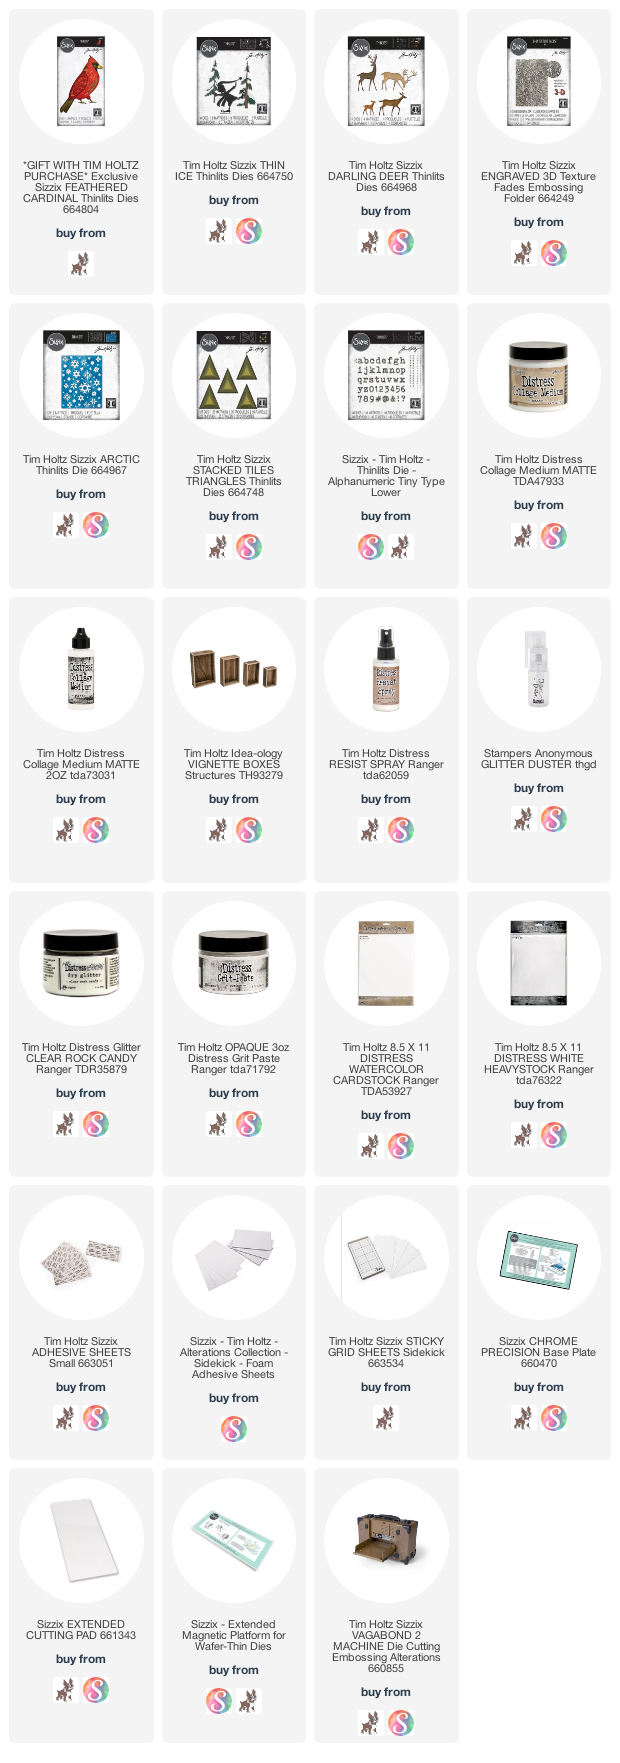
Last spring when I was working on Halloween and Christmas sample projects for Tim Holtz Sizzix dies, I made an error and used a Chapter 4 release with it.... the Engraved Texture Fade that makes the amazing snowy drifts on the sides of the Vignette Boxes. UGH! So I made something else with the Thin Ice dies for the Ch 3 release, and left this project on a shelf in my studio for several months until it was time for Sizzix Chapter 4. I made a few additional changes, adding the Darling Deer and the little snowflakes from Arctic background die and sent it to Tim. 

Anyway, by the time the reveal finally came, I was in the throes of getting ready for our first trip ever to Walt Disney World, and posting Halloween projects. In preparation for WDW, I deleted a bunch of photos from my phone to make room for my vacation pics, including anything for this project.

Last week when someone asked about it, I realized that not only did I not have a blog post, but I had no photos of it. I was able to find these from a backup photo drive, so nothing in progress but I hope this helps!

The elf is from the Thin Ice die set. He is in silhouette form, but just like with the Santa's Helper die from last year, you can cut him up and let him wear fun outfits. I posted directions in this blog post from my Chapter 3 Thin Ice Treat Boxes.  
Let's talk about the base now. It is two Vignette Boxes. I painted the tops with Picket Fence Distress Paint. Then covered the sides with Distress Watercolor paper that had been colored lightly with a little Weathered Wood Distress Ink. Ran it through the Engraved Texture Fade, then cut the the textured papers into pieces that fit the sides of the boxes. Lastly attach the papers to them with Distress Collage Medium, and then attach the boxes on top of each other with collage medium.

On the top box, I used an older die to make the skating rink. It's called Splat. I cut it out of smooth White Heavystock, colored the pieces with very light blue Tumbled Glass Distress Ink, then put them together and sprayed them with a layer of Distress Resist Spray to make it look smooth and shiny like ice on a frozen lake.

Then I put it on the top of the top box with Collage Medium. I used a pallette knife to smooth Distress Grit Paste all around it on the top box and then all around the top edge of the bottom box. Then while it was still wet I quickly used to Distress Glitter Duster and Rock Candy Distress Glitter to add some sparkle to the snow. 

You can see that I used some Baubles and I globbed some Collage medium onto them and rolled them into Distress Rock Candy Glitter to make some snowballs. Once they were glued and secured in place, I adhered some of the trees in the top of the upper box and attached them to the snowballs. The snowballs really helped to give them stability.

I attached one elf on the front of the upper box and added some Stacked Triangles as pennants with the little snowflakes from the Arctic background die, in between them. The letters are from the Tiny Type Lowercase Alphanumeric set.

Next I assembled many trees from the Thin Ice die, and adhered them around the upper box to mimic a forest and these two on the bottom front corner with two of the Darling Deer.

To get the one skater to stand up, I added Collage Medium to the bottom of his skate and made sure the one tree and one snowball were attached close enough to him that his skate could be attached to the tree and his hat pom pom could be attached to a snowball. That made three areas of contact so he could be upright.

Sorry I don't have any step out photos to show the process, but I hope the photos with my explanations will help a little bit.

Tami

I am an affiliate with Simon Says Stamp and Scrapbook.com so the links below send you to one of those stores depending on which logo you choose.  If you wish to purchase something from either store and use one of my links below, I get a small percentage of your order, at no additional cost to you. This helps me to defray the costs of this blog, the time, the ideas and tutorials I post here. Your help is greatly appreciated! Thank you!
 

Idea-ology Christmas Candy Shop - Part 3

Today's final post on this Candy Shop project so we can put it all together. If you missed Part 1 or Part 2, be sure to check them out for ideas as to how to make the sugared letters, candies and "chocolates."

I used an Idea-ology Divided Box and I took the top divider and trimmed a tiny bit off so that it fit vertically along the left side. I measured the Stencil Chip letters from Post 1 and made sure that it was just wide enough that they woul fit over it, and the side and divider would support them . You can see it made a very narrow box along the left side. I glued it in place with Distress Collage Mediu.

Then I lined both the vertical space and the bottom space with the metallic wrapper that I covere the Santa and bells with in Post 2. I did this because I wanted them to reflect the tiny lights. I added a few of the screw from the Idea-ology Vignette Hardware for me to wrap the Tiny Light wires around.
Here you can see I drilled a hole in the bottom box and in the divider separating the two sections. I threaded one strand of tiny lights through the bottom hole and wound half the strand around the screws inthe bottom section, then threaded it through the hole into the lond vertical section and wound the remaining half around the screws in that section as well.
I adhered the candy Idea-ology Christmas Vellum Scene to a Sizzix Permanent Adhesive sheet, then adhered it to a piece of vellum for some stability and to diffuse the Tiny Lights. Then I adhered it to the edges around the bottom section of the Divided Box.
I attached the numbers 25 from the Idea-ology Christmas Layers pack in the bottom fright corner with Distress Collage Medium. After I attached the CANDY letters, I covered all of the frontedges around each section with the black text Christmas Design Tape
Now to the back and sides of the Divided Box. I cut some of the various Christmas Papers into 1.5x4" strips and then I attached them onto the back and sides of the box with Distress Collage Medium, staggering the seams as shown above.
Once all the papers were attached, I adhered the battery packs from the Tiny Lights to the back of the box.
I colored a Curio Knob with Alcohol Ink and added it to the top of the box.
You may have noticed that there were two battery packs on the back of the box. That is because I wanted to be sure the tree would light up. So, after I covered the large section in the front of the Divided Box with white snowflake paper from the Christmas Paper Pack, I started to add the candy to the Candy Shop.
I colored a large Woodland Tree with Brushed Pewter Distress Stain so it had kind of a metallic look to it. For it to fit into the box I had to trim off part of the back of the tree so that it would fit. Then I worked a strand of Tiny Christmas Lights into it. The Christmas Tiny Lights are multi colored. Next I had to adhere it into place, so I used a hotglue gun to be sure it was very secure and stayed in place.
Then I went about adding some of the glittered baubles we talked about in Post 2. Use the unwrapped ones I told you to set aside. I used the hotglue for these as well. It sets up so quickly that it really is perfect for this job. Adhere most of the covered bells to the tree as well. We made these in Post 1.

That brings us to the finished product. If you have any questions about something I didn't cover, please shoot me and email by using the contact box in the right column. I cannot reply to comments on here for whatever reason. 

May you have a sweet Holiday Season!

Tami

I am an affiliate with Simon Says Stamp and Scrapbook.com so the links below send you to one of those stores depending on which logo you choose.  If you wish to purchase something from either store and use one of my links below, I get a small percentage of your order, at no additional cost to you. This helps me to defray the costs of this blog, the time, the ideas and tutorials I post here. Your help is greatly appreciated! Thank you!

Thursday, December 3, 2020

Die-cember 2020 Just Got Merrier!

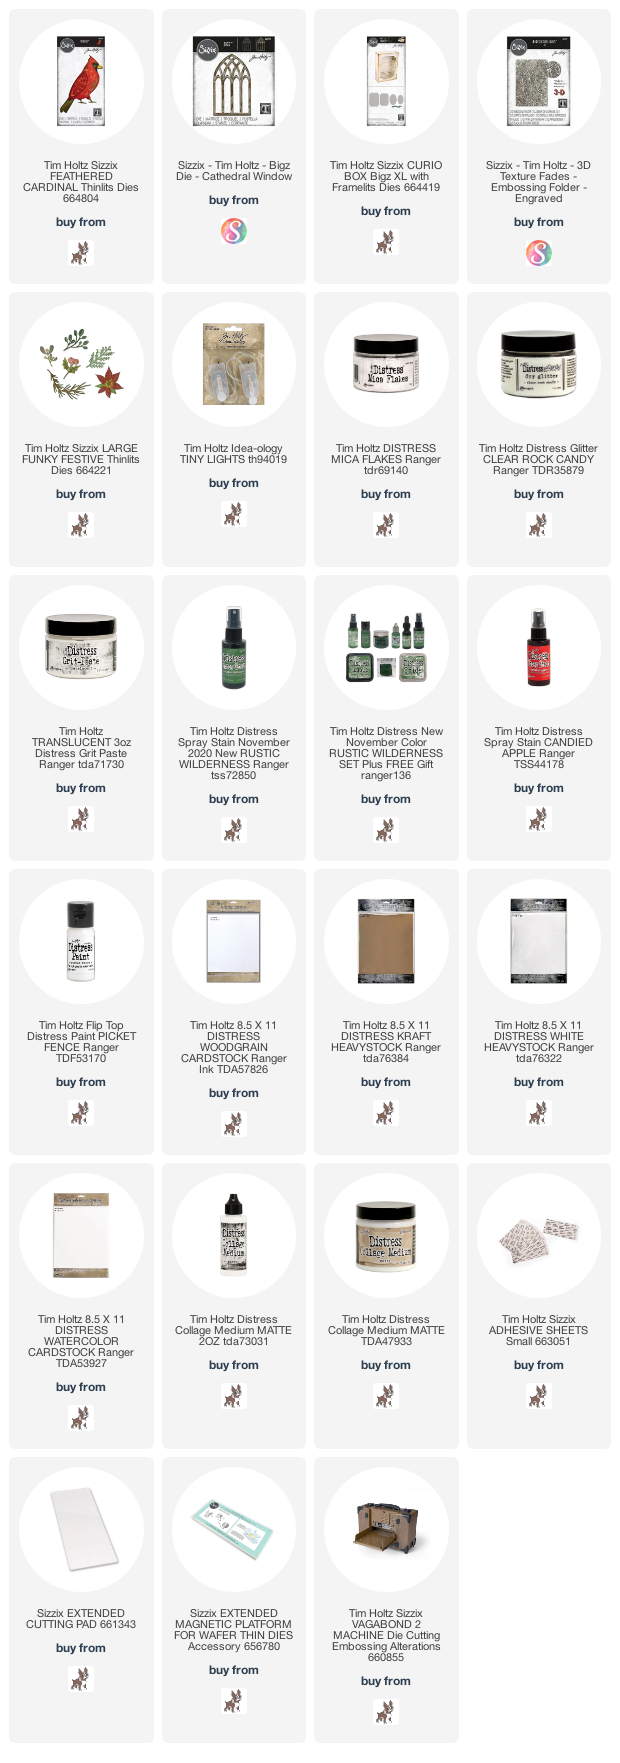
 This beautiful cardinal die by Tim Holtz Sizzix can be yours FREE from Simon Says Stamp, with any Tim Holtz product purchase this month, while supplies last. It's it darling?
This is an exclusive die to Simon Says Stamp so you can't purchase it anywhere and when it is gone, it is gone. so if you want it, don't delay. I have links below to Simon Says Stamp for the products I used in this product today.

For the back of this piece, I cut two of the Cathedral Window dies from Woodgrain Cardstock colored with various brown Distress Stains, and two from chipboard. I adhered the woodgrain to the chipboard. Then I attached one window to a large sheet of Mica. I wanted it to be kind of frosted looking, so I brushed Distress Collage Medium on it, then I attached the second window to the back so the mica was sandwiched between.

I colored some Distress Watercolor Cardstock with the new Distress Rustic Wilderness Distress Stain,
then cut greenery out with the Large Funky Festive dies.

Once I had them in place, I added some Distress Collage Medium to hold the Mica Flakes and Distress Rock Candy Glitter.

The pinecones were made after watching Tim Holtz's Holiday Demo Part 3. His demo is much better than one I could do here and well  worth watching if you havent.

To make the light up drippy candles, you will need to follow a different demo than the one I posted on here. Mine don't light up. Tim Holtz took the idea to a whole new level! You can see the light up drippy candle demo here.

To make these, I used white heavy stock, and painted them with Distress Picket Fence paint, then sprayed them with Distress Resist Spray and Distress Rock Candy Glitter.
The base of the piece is a Curio Box made from Chipboard and Distress Kraft Heavystock. I cut two covers and embossed the second one.
I highlighted the detail from the Engraved 3D Texture Fade with some Walnut Stain Distress Paint.
Then cut it apart, inked it, and glued it onto the outside of the curio box once it was built.
I then drilled a hole in the top and back of the box to thread the Tiny lights through and into the drippy candles. Before I adhered them to the top of the box, I hand cut a piece of white heavystock and adhered it to the top to look like snow.
Then attached the lights, put some Translucent Grit Paste onto the heavystock and sprayed it with Distress Glitter. I made sure to flick the entire piece with tiny drops of Distress Picket Fence Paint.
I made sure to attach the battery pack for the Tiny Lights onto the back of the box.

Lastly, I attached more of the greenery then the delightful cardinals, and propped them up with a few more pinecones. 

To make the front cardinal look like it was sitting, I cut off the legs and part of the tail. I adhered the Cathedral Window, Cardinals, and three more pinecones, all with a glue gun. A quick spray of Distress Glitter before the glue dries, helps to cover it and makes it look like snow.

Just a reminder that this cardinal die is FREE from Simon Says Stamp with the purchase of any Tim Holtz products, while supplies last. Once it is gone it is gone, so don't wait. You can use any of my affiliate links below for any of Tim's products to make your own little vignette like the one above.

Merry Die-cember to you all!

Tami
I am an affiliate with Simon Says Stamp, so the links below send you to their store.  If you wish to purchase something from them and use one of my links below, I get a small percentage of your order, at no additional cost to you. This helps me to defray the costs of this blog, the time, the ideas and tutorials I post here. Your help is greatly appreciated! Thank you!


Saturday, November 28, 2020

Idea-ology Christmas Candy Shop - Part 2

Alright! Post number two of the Christmas Candy Shop! In the first post, I covered how to make the sugared letters, and the faux chocolate Santa and bells. Today we are going to cover two more candies and then I will address how to pull the entire thing together in the last post.
For the peppermint candies, I bought some lollipop sticks from the candy area of my local hobby store.

Then attach the peppermint stripe Design Tape from the Idea-ology Christmas 2020 Design Tape down one side of the Lollipop stick.
Do your best to line up the stripes and attach another piece down the other side of the lollipop stick.

 Mine had a bit of a gap in the back, but I really wasn't worried about it. Once I put the candy cane sticks into the piece, I just made sure that part was facing the back on all of them.

 I cut the sticks into 3 pieces, but you might want to measure and cut the size that will fit wherever you are putting the candy.

To make them really look like candy, they need to be in a wrapper. So I cut apart the packaging from some Distress Paper and made the wrappers for my candies. It is very easy to do and is a perfect way to recycle.

For this packaging, only the front was clear, but that was enough for what I needed. I did a rough measure with one stick and cut enough for the candy cane sticks I had made.

Next, roll the candy cane up in a piece of the cello paper, and twist the end around very tight, so that it keeps the wrapper closed. If it is too long, trim off the end once it is twisted.

Here you can see that the little gap in the back of these didn’t show at all.

The next candy I used Idea-ology Baubles, colored them with the same alcohol inks as the glitters. To attach the glitter, I rolled the colored baubles in some Distress Collage Medium, then I quickly rolled it in the matching Distress Glitter that I used for the letters. You need to set them aside to completely dry.

Once they are dry, cut some more cello to wrap these as well.

Wrapping these is a little different. You have to fold the cello in so that one side lays over the other on the Bauble. As you see above, you have to hold it in place.

Again, you need to twist one end the same way you did with the peppermints. If it is too long, then trim it.
When you have a little pile of them to put in the corner, they look so yummy! 

Don’t wrap all of the sugared baubles because you will want to use some of the silver metallic tree.

That's all there is to two more types of candy to make. Tomorrow it is on to assembling this project.

 I'm always so very, very grateful for the support you show me by visiting here, leave comments, send messages, and such. I truly appreciate it!

Tami

I am an affiliate with Simon Says Stamp and Scrapbook.com so the links below send you to one of those stores depending on which logo you choose.  If you wish to purchase something from either store and use one of my links below, I get a small percentage of your order, at no additional cost to you. This helps me to defray the costs of this blog, the time, the ideas and tutorials I post here. Your help is greatly appreciated! Thank you!