Santa's Helper Part 3 - Snow, Santa Sack, and Assembly
I'm finishing up with the remaining techniques on this card today, including the snow sewing as I was asked about that. If I don't cover something you were curious about, please check the previous two posts and see if I covered it in those.
To make the card you need a base piece in 5x7, an inside piece at 4 3/4" x 6 3/4" and the front piece that starts out the same size as the inside but is scored along the top and 3/4" and will get cut up into two pieces.
I used Distress Watercolor Cardstock on this card, BUT for my stepout photos here, I just used some printer cardstock. You can tell it is cheap paper because you can see the ink doesn't blend well on it. TIP: If you are going to go to the trouble of making a beautiful card for someone, it really starts with the paper. Don't skimp on it! It's worth it to get the good stuff. I only use the Distress Mixed Media Heavystock, Distress Watercolor, or other papers in Tim's line as they are specifically designed to work with the Distress products and really allow the inks, oxides and other products to do what they were meant to do.
Here you can see that the inside piece will eventually be adhered to the 5x7 base. But first we have some work to do.
Fold the top piece along the score line at 3/4" Then hand cut some clouds as shown. With the remaining piece, hand cut some snow drifts. You want some space between the two because they will be attached by the gifts and Santa sack later on. Throw away the left over middle piece.
At this point I sewed around the outside edge of the clouds and along the top below the fold. Then trim the corners of the fold so they don't show on the next step.
You are going to adhere the inside to the flap by lining it up with the crease of the fold.
It should look like this when it is done.
This is what it will look like when it is done, except I had sewn on the clouds on my card.
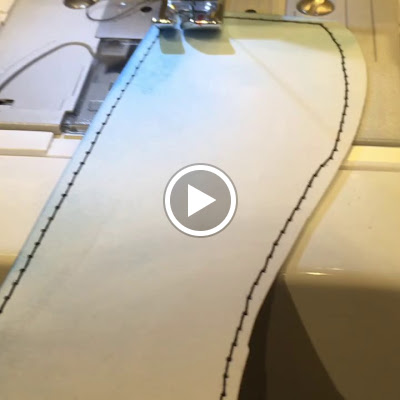
I had some ask me to show how I sewed the snow drifts on my card. I tried to make a video to show you but didn't realize how hard it would be to hold my phone and sew. LOL!
Hopefully you can get the idea from this less than perfect video. I sewed in black so you could get the basic idea.
When the sewing is in white on white paper, and much of it is covered with gifts and the Santa sack, you won't see the errors so don't stress about getting it perfect. Just have fun with the crazy sewing.
Before we put the card together we need to make the sack to hold all the gifts we made in the last post. I used the Sizzix adhesive sheets. I didn't want to waste them, so I cut the 6x6 down to 4x4 and saved the extra pieces for smaller things another time. Also I purchased some red corduroy from Hobby Lobby.
Peel back the printed adhesive cover and adhere it adhesive side down to the back side of the corduroy fabric. SAVE THE NON-STICK COVER SHEET! We will use it later.
I love to use my Tim Holtz Haberdashery scissors to cut fabric, ribbons etc. They cut so beautifully and cleanly. I trimmed around the adhesive square so I had an adhesive backed piece of corduroy.
You could die cut it right now if you were just adhering it to a card, but we aren't. Even if we were, I always do this next step. It just makes a huge difference in how fabric looks when it is die cut adhered to cardstock.
So peel back the other non-stick cover on the back of the corduroy and adhere it to some cardstock.
Trim away the excess cardstock and run it through the Cauldron die in the die cut machine. You will come away with a very cleanly cut Santa Sack.
Now we need to assemble the rest of the card. You will need to align the bottom of the snow drift with the bottom of the inside piece.
Remember that leftover piece of non-stick sheet I had you save? Place that over the background, but under the clouds and under the snow drift in the area where you will be attaching the Santa sack and the gifts. This keeps any stray adhesive from causing the front of the card to stick to the inside of the card. When the adhesive is dry, you will remove the non-stick sheet and you'll be good to go.
To hold all the pieces in place while I adhered the front pieces, I used Judikins low-tack tape as shown in the picture.
I put adhesive at the bottom of the cauldron where it would attach to the snow drift, and only on the very top lip where it would attach to the clouds. I wanted to be sure that the bottom lip of the cauldron was not adhered and I wanted to be able to tuck some gifts into it.
Here is what it looked like when I put it down onto the front of the card,
Once dry I removed the tape and sheet and you can see that the Santa Sack is holding the top and bottom together and allows us to see through to the inside. I love this Split Card technique from Jennifer McGuire. She is a genius!
At this point you would add the gifts and the elf in the same manner as the Santa Sack. Once the front is done, you will need to finish the inside. If you haven't see the inspiration video for this type of card, please be sure to watch Jennifer McGuire's tutorial below.
I hope these three posts were helpful in figuring out some ways to make your own Santa's Helper card or home decor piece.
Have fun!
Tami
I am an affiliate with Simon Says Stamp and Scrapbook.com so the links below send you to one of those stores depending on which logo you choose. If you wish to purchase something from either store and use one of my links below, I get a small percentage of your order, at no additional cost to you. This helps me to defray the costs of this blog and the ideas and tutorials I post here, and your help is greatly appreciated! Thank you!


1 comment:
It does make a very cute, fun card...who wouldn't want to receive a card like this one??? thanks for the fabulous tutorials...
Post a Comment