This miniature Trinket Tin Garden was made using Shrink Plastic with Tim Holtz dies from Sizzix Chapters 1 and 2. I started this in January but had set it aside until this last weekend. I chose to finish it as a mini tribute to my sister. She loved little miniature gardens, fairy gardens, container gardens, anything tiny that inspired the imagination. In the picture below, we carried the living moss, little gardening tools, wheelbarrow, birdbath and arbor from Gettysburg, PA when we were there on one of her trips to see her oncologist in Philadelphia.
Sunday marked seven years since she stepped into Heaven. I miss her so much, but find joy in so many memories and so much time spent doing things we loved. As with most of my projects, the details in this piece all have meaning to me, but are probably things that will be overlooked by most. That's fine with me this time. I'll keep them as special little reminders just for me.
I will however explain a few things about how I made this piece. Shrink Plastic is the key. It is a really fun medium to work with. I used a couple of types that I had on hand from Darcie and Judikins, but Sizzix has some as well. I used white shrink plastic for most of these pieces.
Begin by cutting the shapes you want with your die cuts. Both thinlits and Bigz dies will cut shrink plastic. Once they are cut, then I color them with Distress Inks. Keep the color fairly light as it will darken as it shrinks. With large pieces like Potted, I will color by going ink pad to surface as in this photo. But with others I color them with the brush end of my Distress Markers.
The shrink plastic will come with directions for shrinking. I do it this way. I hold the piece and shrink it with a heat tool.
As it is shrinking it tends to curl up, so I use scissors or a poker tool to hold it down and keep it as flat as possible. Sometimes I like to try and shape it a little as well to give the piece some character or leave a little curl in it.
I put the pieces in an Ideaology Trinket Tin. Part of the Tim Holtz Sizzix Chapter 2 release included a die called Trinket Frames. It is made up of two dies that make this bracket shape and a bracket frame that fits perfectly inside the lip of the tin side. I cut it from Distress Woodgrain Cardstock and included a little sentiment cut from the Alphanumeric Label Dies.
The flowers are from the Stems Sizzix die. You get two flower stems and one greenery stem. I cut them out a couple of times so I had options for this piece. I also cut several Terra Cotta pots from the Potted Sizzix die. Then I was careful to shape the pots while they were still warm. As you can see, moss covers empty spots and places where the pots don't exactly meet the tin and maybe have a gap.
Here you can see the frame portion of the Trinket frame in wood that is adhered just behind the lip. But on the back of the tin you can see both the frame and the inside that had been cut from the Intricate Lace die. I popped the inside portion from the frame by cutting one from chipboard as well and using it to give the back some dimension.
The Geo Hummingbird was cut from clear shrink plastic. It gave him a more delicate feeling. This one was tough to work with due to all the curling so that is why a few parts are a little crooked, but it turned out pretty well. I'm very happy with it!

The potted die set is a favorite so I cut several and even broke them to use bits and so it looked like a pile of Terra Cotta pots in a green house. After I got the pots and lips to shrink, I shaped them a little while still warm. This takes patience and a couple of needle nose pliers to hold them because they get a little warm. To finish them off, I adhered the lips to the pots with Collage Medium. Once they were dry I tapped some grit paste on the edges of the pots using my finger, to simulate moss. When it was dry, I colored it with a little bit of green Distress Paint. Try to arrange them so the edges of the pots don't show, against the wall or behind another die. Add in some of the flower stems and leaves where desired, then fill in any spots with moss.

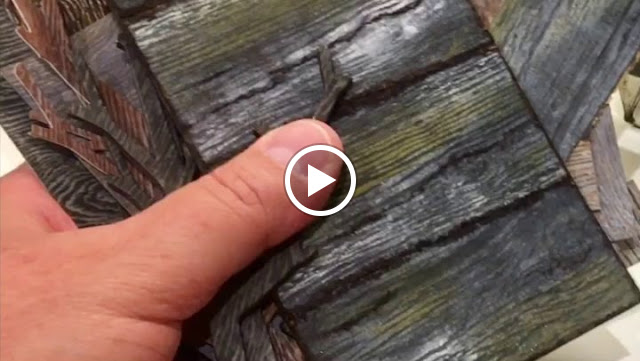
I attached the tin to a base I made from 4 pieces of thick chipboard cut 3x6 and adhered together and then covered with 1/2"strips of various colors of 3-D Lumber texture fade paper. I stuck it to the chipboard with Collage Medium and then added Collage Medium over the top as well. I just wanted it to have a rustic table top feel to it. You may be wondering how in the world I always seem to have some little bit of woodgrain here and there in my projects. Well, this might explain it.
Well, I practice with the Woodgrain Cardstock and the 3-D Lumber Texture fade and various colors of Distress paint, stain and inks to get different woodgrain finishes. It's a lot of fun, but it's also helpful when I am making something because I can pull from the stash and not have to take the time to get everything out to make woodgrain.
Lastly, the outside of the tin was covered roughly with grit paste, covered with a layer of Collage Medium, Distress Paint and Collage Medium.
I love this little reminder of my sister and her fascination with miniatures and gardening.
Tami
I am an affiliate with Simon Says Stamp and Scrapbook.com so the links
below send you to one of those stores depending on which logo you
choose. If you wish to purchase something
from either store and use one of my links below, I get a small
percentage of your order, at no additional cost to you. This
helps me to defray the costs of this blog, the time, the ideas and tutorials I
post here. Your help is greatly appreciated! Thank you!


4 comments:
Such a fun "little" project full of cherished memories. I have never used Shrink Plastic and am stunned at just how much it shrinks...amazing!
Tami, this is a really sweet tribute to your sister and beautifully finished! Love all the "terra cotta" pot details!!! Going to go dig out my shrink plastic stash now..... TFS :)
A gloriously tiny project so beautifully executed and crafted! The sentiment is an all time favorite of mine; it reminds me to make the best of every situation and put down roots each and everytime we are uprooted and moved, both figuratively and literally speaking! Thanks for the wonderfully tiny inspiration. 😉
I just love this and the special memories it brings back to you!
Thanks for sharing.
I have a question can you link which Kraft paper you use to make your wood planks.
There are too many choices on amazon.
Thanks again for sharing the story and your creative talents.
Denise
Post a Comment