Friday, November 30, 2018

Fragment Charm Winners

Thanks to those who posted!
Winners, please send your mailing address to teatimetamera at yahoo dot com

I randomly pulled names and the winners are:

Blogger Ann Barnes said...
For Christ is born of Mary
and gathered all above,
while mortals sleep, the angels keep
their watch of wondering love
o morning stars together
proclaim the holy birth
and praises sing to god the king
and peace to men on earth.
(O little town of Bethlehem)

I loved this project the first time I saw it, what a wonderful countdown calendar, I love how you’ve used the fragment charms, what a treat it would be to win, thank you for sharing! xx
November 29, 2018 at 5:22 PM

I absolutely adore your tag, very ingenious! One of my favorites carols is "Hark! The herald angels sing, Glory to the new born King!" Thanks for sharing your inspiration and generosity!
November 29, 2018 at 4:41 PM
Please sendDelete your mailing address to teatimetamera at yahoo dot comDelete

Jolly Ol St Nick

I don't make too many cards featuring the jolly old elf, himself, but these stamps just called for it. I used the Yuletide CMS356 set and paired it with the Inventor 6 CMS360 stamps to make the mat.
The background mat was made using the Mint Stripe Shifter Stencil THS112 with Fired Brick and Black Soot Distress Inks and a Blending Brushes.
The frame I made by cutting the center out of the mat piece with one of the smaller Stacked Label dies. Once that was finished I stamped both of the stamps from the Inventor 6 in Hickory Smoke Distress Ink, making sure that the images were visable along the sides of the mat.
I added another very thin Fired Brick mat just slightly larger than the Inventor Mat that I adhered when I assembled the card at the end.
The focal image was this fabulous vintage Santa from the Yultide set. I stamped him on a piece of Distress Mixed Media Heavystock in Black Soot Archival Ink and then watercolored him with Distress Markers.
I finished the card with a silver embossed sentiment from Yultide and then I tied a bow with a piece of Crafter's Thread in red.

I also added additional metallic touches by cutting the largest mat from Ideaology silver metallic kraftstock and added two silver Long Fasteners to the sentiment.

Thursday, November 29, 2018

Charming Christmas Countdown


Charming Christmas Countdown was made for a small class I taught last December 2017. It focused on using the Countdown Brads and a stash of the retired Ideaology Fragment Charms. I have a couple of packages of these wonderful charms that I would LOVE to gift to a couple of my followers. Info on the give away is at the end of the post.


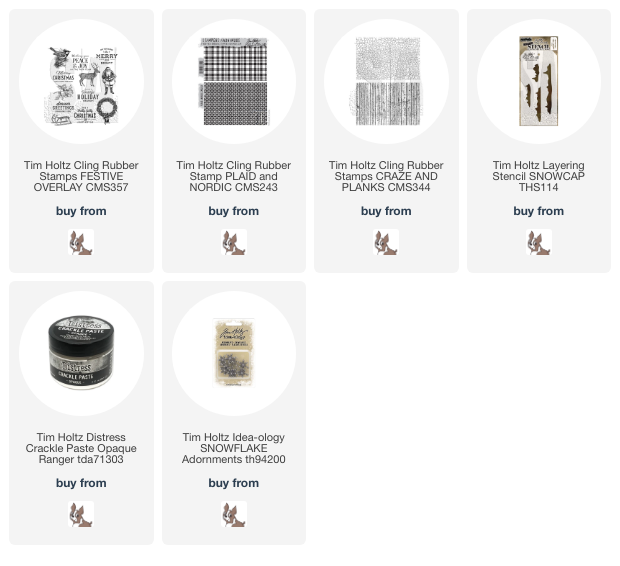
To make a countdown similar to mine, you need a Medium Etcetera Tag. Cover it with paper and I went around the edges with Design Tape as well. I attached the paper and secured the design tape with Distress Collage Medium.
Then I attached paper to the back of all of the fragments with Glossy Accents. Once they were dry I trimmed around the edges and then pounced a little Mushroom Alcohol Ink on the top edges of the fragment to age them.
It's important to lay the fragments out so that you can make sure they fit, then attach the Countdown Brads through the hole, but only bend back the tips of the brad prongs and secure with a sticky dot or some Glossy Accents and hold until dry. There needs to be enough of the brad prong sticking out on the front of the fragment that you can easily slip the Loop Pin over the number and let it hang on the day of the month, as seen below.
At this point, take a picture because you want to remember where they go.
 I added a 26th tiny fragment with a Pinecone Adornment on a Loop Pin to be the thing I move each day to indicate the date. You can see it hanging on the Dec 2nd fragment in the picture above and December 10 below.
If you have some of the silver or gold Gilded Christmas Remnant Rubs from last year, this is a great opportunity to use them! I used the silver rub ons on this sample and put bits on each of the fragments. You can see them all in the photo below. The bottom four fragments I placed side by side on my workspace and then put the sleigh and reindeer across the last four heading toward the 25th.
 Here are some close ups of the fragments, the papers I used, rub ons, adornments, and also the orientation,  as some are horizontal and some are vertical.


 To put the top together I got out my Sizzix Sidekick, Mini Festive Greens and Festive Greens as well as various green and red cardstock. I cut the various pieces out, inked, and then arranged across the top of the tag.
 Lastly I added some ribbon in the center of the greenery.

 There you have it! A Christmas Countdown that won't ruin your diet. LOL!
I'd love to share a package of Retired Fragment Charms with a couple of followers, so if you would like to qualify, just leave a comment that includes a line from one of your favorite Christmas Carols by 4pm PT Nov. 29, 2018.  Then check back on my blog tomorrow evening and I will post the winners.
 

Tuesday, November 27, 2018

Merry and Bright -Whimsical Decor

 Oh my was this project a labor of love! When I was planning out how I wanted to use the wonderful Whimsy Decor ornament dies from Tim Holtz Sizzix Alterations, I was looking at them I thought of the garlands that decorate the outside of It's a Small World in Disneyland, and decided to make my own version.
 This garland and wreath adorns the Castmember station on the loading dock.
 This is what those garlands look like at night.
 Here are some similar garlands adorning the entrance arch to the attraction, You can see they have white greenery and colorful ornaments.
 To make my version I first set out to make the ornaments. I die cut multiples of each ornament and the decor pieces.  I colored all of the pieces for each of the three ornaments in the same color scheme. Then I very methodically attached the different pieces onto the various ornaments so that each ornament had a variety of colors throughout.
 The easiest way to do this was to lay the base ornaments in order and then go through and attach the same piece to each ornament in a different color. I did this with a pre-planned order in mind, and I only laid them on the base ornament (as above) to make sure that they were all varied equally before I adhered the pieces.
 I really love how they turned out.  I chose all of the bright Distress Ink colors so that these Whimsy Decor ornaments would be truly whimsical, fun and in the spirit of It's a Small World Holiday.
 To attach them to something, I took a large vignette tray and painted it white, then covered it in pieces of It's a Small World sheet music with Distress Collage Medium. Once it was dry, I then covered it in Picket Fence Distress Paint and then lightly wiped it off with a damp cloth so that the title and some of the music still showed through.
I colored two pieces of Disress Watercolor Cardstock with Wilted Violet, Picked Raspberry, Broken China, and Twisted Citron.  I cut the small scalloped edge from the Stitched Ovals die set from the Wilted Violet paper and attached them all around the edge of the Vignette Panel.
Then I used the other colors to cut the title from the Wonderland Bigz XL alphabet. Because it is steel rule, I also cut each letter out in chipboard too and attached them along the bottom of the piece
 I poked a hole through the top right corner of the Vignette tray that was large enough to thread some small fairy lights through to the front. Once all the lights were on the front of the tray, I stretched them across to the other side, then back, and I attached it in place with the Tiny Attacher.

I used some of the Mini Festive Greenery and cut it from white cardstock. Then I sprayed the white greenery with Distress Resist Spray and lighty glittered it with Clear Rock Candy Distress Glitter. 
To finish it off, I layered the white greenery and the ornaments over the lights.  Make sure to lay all the pieces onto the lights before you adhere them so you can make adjustments until it looks just right. When you are happy, then secure all the pieces. Lastly you will want to fluff the white greenery and get a tool that allows you to make sure the lights shine between all of the ornaments.
I don't know if you can see the lights shining in this picture:
That all there is to this. It's mainly just assembly, not really any technique to speak of. I hope you enjoyed looking at some close-ups and I hope I explained the steps clearly.       

Thank you for stopping by and to keep with my Twelve Days tradition, here is one of my favorite seasonal cookies my grandma used to make: Grandma's Persimmon Cookies
Tami                                                                                                           

Sunday, November 25, 2018

May Your Season Be Merry

What a great weekend of 2018 Holiday Hacks from Tim Holtz! So much fun! In today's Holiday Hacks Part 2, he discussed the Festive Overlay CMS357 Stamps. I'm admitting right here and right now that when I got these stamps in August to make samples, I had no clue they were made to have the sentiment stamped over the image.  But I did like that they were similar in size, so I stamped many of them aligned vertically as I did on this card. But to see how they were designed to be used, you must watch Tim's 2018 Holiday Hacks Part 2 video.
To make this card I stamped both images in Distress Archival Ground Espresso onto Distress Mixed Media Heavystock. Then I aged it a little with Antique Linen Distress Ink and cut it out using one of the Stacked Deckle dies.
Then it was simply a matter of layering it on some mats. The first mat was made by stamping the Planks CMS344 background stamp onto some Heavystock and coloring it brown with Distress Ink. I added a few dots on each plank to mimic nail holes.

The larger mat was stamped using the Plaid CMS243 background stamp with black archival ink and then coloring it with Candied Apple Distress Ink.
The snow was made by putting Opaque Crackle Texture Paste through one of the snow drifts on the SnowCap THS114 Layering Stencil onto a piece of Distress Watercolor Cardstock. Once it was dry and cracked I cut it out and glued it on.

I finished off the piece by machine stitching around the outside and then tying a little bit of red Crafter's Thread with a snowflake adornment.

Have a creative day! 

Tami 

 I am an affiliate with Simon Says Stamp. The links below send you to their store. If you wish to purchase something and use one of my links below, I get a small percentage of your order at no additional cost to you. This helps me to defray the costs of this blog and my YouTube channel, the time, the ideas and tutorials I post here. Your help is greatly appreciated! Thank you!

Saturday, November 24, 2018

Merry Christmoose - Merry Moose

This Merry Moose is so cool just merrily trotting through the wintry forest on his way to bring Christmas Cheer to his Merry Moose family.
The Merry Moose comes with is festive attire that is really simple to assemble.  I cut it all from Distress Mixed Media Heavystock and then colored it with Distress Inks before putting it all together.
The tiny bare trees and the snow drifts are from the Home for the Holidays die set. I cut three snow drifts from plain white Distress Watercolor Cardstock. Once they were cut, I sprayed them with Distress Resist Spray and then sprinkled a little bit of Distress Rock Candy Glitter over it so the snow drifts had a little sparkle. Then I layered them and popped each layer up a little.
The sentiment on this card is made from the Alphanumeric Cut Out Script. It is a thinlit die set that is the perfect size for cards.
These tall trees come with the Merry Moose. Aren't they fabulous?
The background wintery night sky is Distress Watercolor cardstock colored with Chipped Sapphire Distress Ink. Then I repeat cut the straight die from the Snowy Stars so that it fills the entire background. I layered this piece over a white card base so the stars showed through.

Tuesday, November 20, 2018

Winter Wishes - Glorious Gatherings

The Glorious Gatherings CMS351 stamp is just gorgeous! It was my favorite stamp in the 2018 holiday release from Tim Holtz and Stampers Anonymous!
I stamped the image onto Distress Mixed Media Heavystock in Archival ink.  I often experiment with large, detailed stamps like this and stamp them in all four Distress Archival colors: Black Soot, Ground Espresso, Vintage Photo and Hickory Smoke.  If you plan on watercoloring this image, I highly recommend doing this because you will be surprised at how the different Archival ink colors react with the Distress Inks when you watercolor. Some colors allow for more shading and show more detail than others.
The background has the Music background stamp  and I stamped it with Antique Linen onto the Distress Mixed Media Heavystock.  I did sew around the outside edge and added an Ideaology Index Clip and Adornment Star for a bit of detail in the top right corner.

When you are watercoloring, I put ink from my Distress Markers and Distress Inks onto my Glass Media Mat, then pick the color up with my waterbrush and color.  Sometimes I will go direct to the paper with my Distress Markers and then blend it with my water brush for a deeper color.
With this stamp it is a lot of fun to use lots of greens and browns when you watercolor.

Thanks you for stopping by.

Have a creative day,

Tami

 I am an affiliate with Simon Says Stamp. The links below send you to their store. If you wish to purchase something and use one of my links below, I get a small percentage of your order at no additional cost to you. This helps me to defray the costs of this blog and my YouTube channel, the time, the ideas and tutorials I post here. Your help is greatly appreciated! Thank you!  


Monday, November 19, 2018

Sense of Wonder

With Thanksgiving in the US this week, I thought I would go back to a few fall themed things before I go all-in with the Christmas stuff.

This card was made with the Nature's Wonder CMS343 stamp set from Tim Holtz Stampers Anonymous.
The sentiments is on the same stamp set as the leaves.
The background is the Planks and Crackle CMS344 set. I stamped and inked in Hickory Smoke so that it looked like an old, weathered barn side.