Friday, January 29, 2021

Lucky Peter Rabbit - Sizzix Ch 1 2021


Last year I made a rolling cart of Mr MacGregor’s Garden, with, Flopsy, Mopsy, and Cottontail. This year I made another scene from Mr MacGregor’s Garden with Peter Rabbit sans his coat as Mr MacGregor had put it on the scarecrow. But carrots and cabbages needed to make another appearance this spring and I was so happy that I had dies to use for them this time. Let’s hop right in to the how to’s of this make with some of Tim Holtz’s Sizzix chapter 1 2021 dies.


To begin with, I painted a large Vignette Frame and the inside of a large Vignette box with Speckled Egg Distress Paint. I rubbed on a layer of Distress Collage Medium and then rubbed a bit of Walnut Stain Distress Crayon over the frame so that it went down into the detail crevices.

When the paint was dry, I cut some Distress Woodgrain Cardstock into 1/2” strips and trimmed the ends to look like a picket fence. Then I just adhered them with a little space between so that it gave the impression of the fence Peter had to scurry under to get into the garden. Although I think it was probably stone in the story. Peter was cut from chipboard and then some Distress Kraft Heavystock that I colored with brown Distress Inks and stamped lightly with the Linen stamp from Linen and Mesh CMS.  .I adhered them together and then set him aside until I was ready to assemble the piece. 

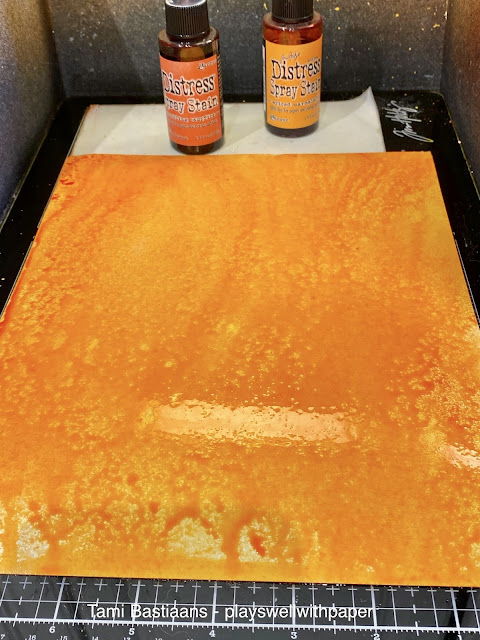
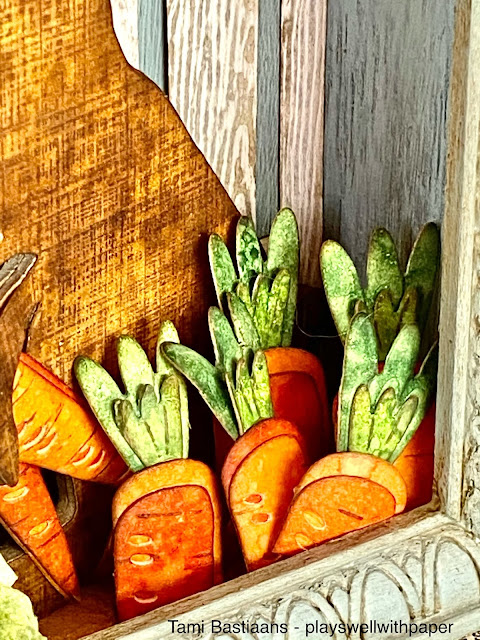
The carrots were very simple. I colored a piece of Mixed Media Heavystock with Crackling Campfire and Spiced Marmalade. Then I cut several carrots from it. I also cut the tops from some MM Heavystock colored with Peeled Paint.

Before putting the top of the carrots onto the base, I ran the Tonic Scorer across the Archival Ground Espresso pad and then lightly “scored” little lines into the carrots just to add a little detail.
Once they were done, I lightly edged them with Walnut Stain Distress Ink and then assembled them.
The cabbages were fun. I cut several bits of scraps into 2x2 squares and then colored them with Bundled Sage and Shabby Shutters Distress Ink. You can add bits of other greens until you get the cabbage color you are happy with.
I wet these squares, put some Collage Medium on them and then crumpled them into a wrinkly ball. Let these dry. 

Color a few other pieces of MM Heavystock with the same greens, and then cut several of the large Brushstroke Flower 2 out of it.

Get the flowers a little bit damp, crinkle them up, smooth them out and then add some Collage Medium in the very center.
Gently shape the flower around one of the green cabbage balls, slowly shaping it so that it sticks to the ball as it dries and the petals overlap a little to look like a cabbage.
This takes a little time and practice, so I recommend making several of these incase you have a few you don’t really like.
It is almost time to assemble the whole piece. Apply a little bit of Brushed Corduroy to several pieces of Kraft Heavystock then run them through the Intertwined 3D Texture Fade folder. Cut them into pieces that fit the sides and back of the Vignette Box, then adhere with Distress Collage Medium. Apply a thin layer of Collage Medium over the top and smooth it out by rubbing it in with your fingers. This also allows a bit of the Distress Ink to soak into the crevices and really make the texture stand out.
Now to start assembling, I adhered Mr Rabbit to a few wooden Bingo chips so he could be attached to the back of the box, but still stand out away from it. I put two of the carrots in his arms.
The rest of the carrots can be trimmed so only the tops are used, as if they are growing out of the ground. To attach them, I cut them a little longer than needed and then folded the extra toward the back. That will give you something to adhere to the bottom of the box.
Before you add the cabbages, attach the frame to the front of the Vignette Box with some Distress Collage Medium.

Once the frame is set, put a bit of Collage Medium on the bottom of the cabbages and tuck them in the corners on the bottom left of the Vignette Box.
Finish off the project by using one of the pieces of green paper used for the carrot tops and the cabbages to cut a four leaf clover from the Lucky Love Impresslit, which cuts and embosses. I tied some thin jute around the top of the box, and then punched a small hole in the top of the clover so I could put the clover and the lucky Story Stick on a Jump Ring. I tied the Jump Ring in the bow of the jute. 
The reason I added the Lucky part to this project is because Peter was very lucky both times he was in Mr. MacGregor's Garden, that he didn't get caught and baked in a pie by Mrs. MacGregor!
Lastly I added a Curio Knob on the top the box and it was finished.

Thanks for following along with this fun spring project!
Tami


I am an affiliate with Simon Says Stamp and Scrapbook.com so the links below send you to one of those stores depending on which logo you choose.  If you wish to purchase something from either store and use one of my links below, I get a small percentage of your order, at no additional cost to youThis helps me to defray the costs of this blog, the time, the ideas and tutorials I post here. Your help is greatly appreciated! Thank you!

Sunday, January 17, 2021

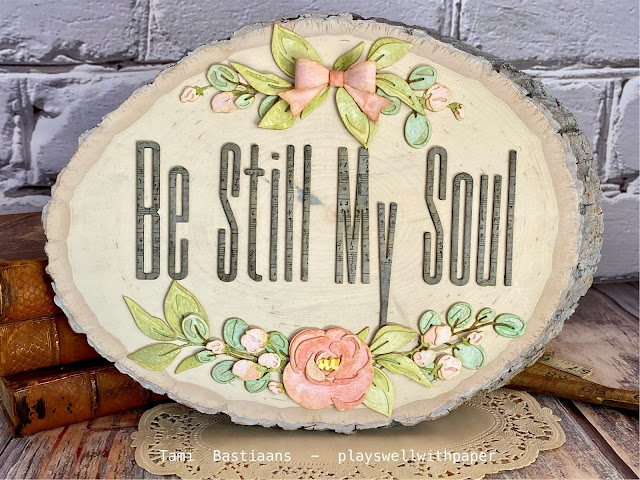
Be Still My Soul - Bloom

I think the Bloom floral die by Tim Holtz and Sizzix is so beautiful that I wanted an equally beautiful way to showcase it. So I made a home decor piece with a beautiful sentiment from one of my favorite hymns. Since I was in college it's been one of my go-to hymns when I am stressed, worried or anxious. If you want to hear it, here is a lovely rendition.
This is a very straight forward project so let's get started. 
I bought a large wood slice from Hobby Lobby, but felt like it was a little too rustic. So I broke out my Picket Fence Distress Stain. I still had this in a dabber top, but the spray stain works the same and you can apply it with a brush so either way it works.
In this shot you can see how dark the bark and edges were so I covered the entire front of the slab and all of the bark on the sides with the stain. I did this twice just to make sure it was white washed and softened.
As you can see from this angle it is so much softer and lighter and I felt like it was perfect that way. 
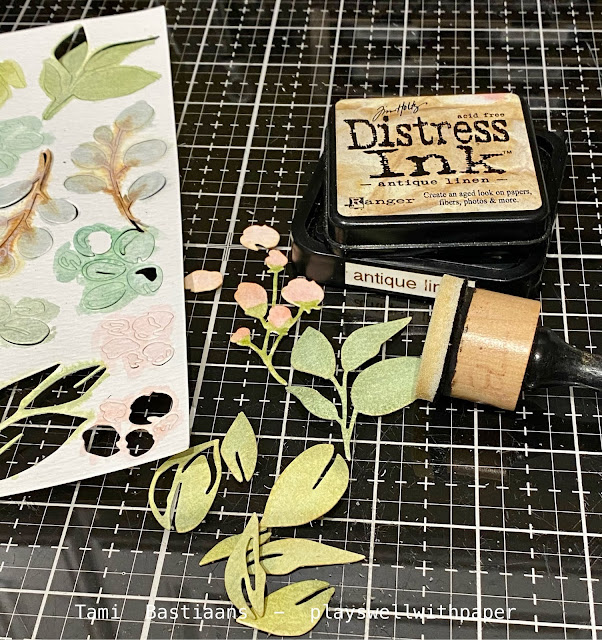
Cut out many of the die cuts from Distress Watercolor Cardstock. I left them in place and then watercolored them with Victorian Velvet, Tattered Rose, Shabby Shutters, Peeled Paint, Bundled Sage, Pine Needles, and Gathered Twigs Distress Inks and a Water-brush.
Once I was finished watercoloring the pieces, I edged them all with Antique Linen Distress Ink and then I attached them together.
I cut multiples of all of the pieces except the large flower. 
I only cut one of these to make sure it was a focal point.
I placed the leaves in different positions on both sides of the big flower so that they weren't mirrored. I didn't want them to be completely symmetrical, just slightly similar.

For the letters, I cut them all several times from black cardstock and layered them so they would stand out from the background. Then I made some music note paper by stamping the music from Music and Advert stamp set in Hickory Smoke archival ink, and then colored the rest of the paper with Pumice Stone and Hickory Smoke Distress Stain. Then I cut the final top layer of the letters out of it.
You can see some of the music notes here on the letters.
I think the Stretch upper case and lower case dies are a fabulous alphabet. I'm going to use it on many projects in the future!
To finish this piece, I added a few more leaves and cut apart the smaller round leaves and buds to just put a few on each side, then added a retired Fold-up Bow to the center. The Fold-up Bow is retired, but Tim did say it will be making a comeback soon, so keep your eyes peeled if you didn’t get it the first time it was released.

I hope you like this decor piece. It is a wonderful reminder when our souls get fearful and agitated to stop and be still.
Tami

I am an affiliate with Simon Says Stamp and Scrapbook.com so the links below send you to one of those stores depending on which logo you choose.  If you wish to purchase something from either store and use one of my links below, I get a small percentage of your order, at no additional cost to youThis helps me to defray the costs of this blog, the time, the ideas and tutorials I post here. Your help is greatly appreciated! Thank you!

Saturday, January 16, 2021

Cafe Colorize Frames

I think these colorize Cafe tea and coffee cups from Tim Holtz Sizzix Chapter 1 have such a cool mid-century modern feel to them. When I looked at them I immediately just felt vintage Disney vibes for some reason, so that is the inspiration I went with. I wanted to make some small framed decor pieces that I thought would go well in a tiered tray or in a coffee area. 
In going with the mid-century modern Disney inspiration, I always think of animator and imagineer Mary Blair. I took a photo of this piece of her artwork that hangs in the lobby of the Disneyland Hotel a couple of years ago. It is a fabulous example of her amazing use of color. She would combine colors that people really hadn't put together. Here she has indigos, sapphires, olive greens, golds, creams, browns and white. It's fantastic. So I used her use of color for my Cafe Framed Art pieces.

To begin with I cut two of the new Bubbling background dies from the White Heavystock paper. But I didn't use the Chrome cutting plate, I just used my regular old cutting plates and it didn't cut through which is what I was hoping! It just cut through the front so it left the impression or the pattern, but with all the bubbles in place. Many people would have thought it was a fail, but I thought it was perfect! I adhered both pieces to the back panel of the Mini Framed Panels. I put a nice layer of Distress Collage Medium on the panel and then pressed the Bubbling paper into it so it was flat and adhered all over the panel. Then put a thin layer of Collage medium over the top and lightly rubbed it in so it was smooth and there were no brushstrokes.

Once the Collage Medium is dry, scribble some Pumice Stone Distress Crayon over the whole thing.
Spray some water on it and rub the crayon down into all the crevices to make the Bubbling background stand out, then lightly wipe it off, leaving the crayon only in the crevices.

Then I took a piece of black Cardstock the size of the panel. I scored it so that it would be 1/8" smaller all the way around than the inside of the frame to make a mat to go on top of the Bubbling background. The background die doesn't cover the entire inside of the frame as it is a little smaller, so to make it look clean and finished, you need to mat it.

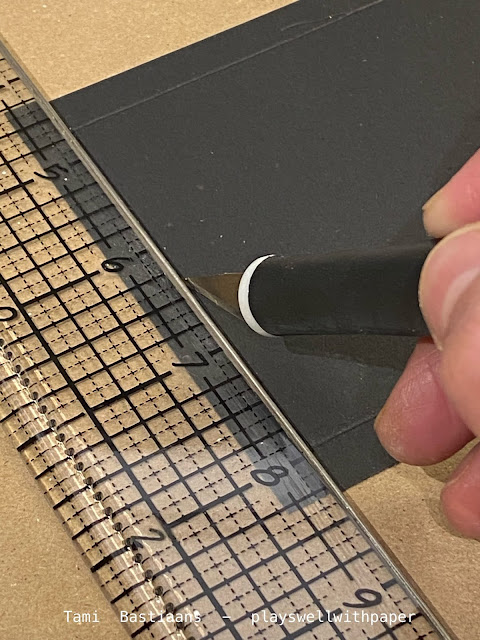
Once you have it scored, Use your Tonic Cutting Blade and trim right along the score lines to make your mats. You will need two of these as well, One for each frame.

Here you can see that I painted the frames with Hickory Smoke Distress Stain, then I aged them with a little Walnut Stain Distress Crayon before I adhered them to the background panel with the matted Bubbling piece.

The word tea was cut from the Stretch Alphanumeric lowercase. I cut one from Distress White Heavystock colored with Brushed Corduroy. Then I cut three more from black cardstock. I layered them together with Distress Collage Medium to make the words stand out.

Let's talk about the colors I used for the tea cup and the coffee cup. I used only a few colors, but the key is to use some of the colors full strength and others you lighten with water. So the very lightest color is the White Heavystock with hardly any Old Paper Distress Ink on it. Then the second lightest is Old Paper. The green gold colors are various strengths of Crushed Olive. The browns are Brushed Corduroy and the blue is Chipped Sapphire. It is easier to start with a lighter color and then add more if it needs to be darker since you can't take color away once you have added it.
I did the same colors and techniques for the coffee mini panel.
Here are those layered letters again.
And the coffee cup with those glorious Mary Blair colors. I love it!

These Cafe Mini Panels are really a straight forward, fairly easy project to complete and will be the perfect addition to a cute tiered tray or coffee area. 

All of the new release dies are listed below, as well as the Distress papers and such if you need a place to get them.

Thank you so much for stopping by! I hope you enjoy the new Sizzix Chapter 1 dies from Tim Holtz as much as I am.

Tami

I am an affiliate with Simon Says Stamp and Scrapbook.com so the links below send you to one of those stores depending on which logo you choose.  If you wish to purchase something from either store and use one of my links below, I get a small percentage of your order, at no additional cost to youThis helps me to defray the costs of this blog, the time, the ideas and tutorials I post here. Your help is greatly appreciated! Thank you!