Saturday, February 21, 2015

There is Sunshine in my Soul Today - MME Just Sayin Frame

As will all Design Team assignments, we are supposed to do a little something extra.  We had a frameable in our kit and I just felt like this one was calling to me to frame it. 
I remember this line from a hymn we used to sing at the Friend's Church when I was growing up, so I thought it would be a happy thought to have hanging on the wall.


I cut all the hexagon shapes out of the remaining pieces of Just Sayin paper and then adhered them to a piece of white cardstock I had traced and cut out that was the exact size of the frame.  Once all the pieces were positioned on the paper and secured, I sewed around the outside and inside edges, then adhered it to the wooden frame.

 I added one chipboard piece and a pink bow in the top left corner and that was it.  I kept it really simple, but I absolutely loved the outcome. It has such a soft, quilt-like feel to it and it just looked like something I would love to look at for a long time on my wall.

Friday, February 20, 2015

Marmee - MME Just Sayin

We also got to play with the My Mind's Eye Just Sayin line. I decided to scrap a picture of my feral mama cat, Lady Marmalade.  We call her Marmee after the mom in Little Women.


This layout is based on Sketch Savvy Sketch #90

There are no techniques on this page, just a simple layout based on a cute sketch.  Bright, fun paper line to work with.

Thursday, February 19, 2015

January Make n Take - Crackle Paint Ornaments

In January I did the Make n Take for my LSS's monthly crop. It was designed based on an idea I saw on Instagram from user Vintage Muse. She made a much prettier snowflake ornament than mine below, but it inspired me to try to do a simple one for a make n take.

Because we ended up doing this make n take in January instead of December, I wanted to try and show people how the same idea could be used for so many different holidays. So that is how the variations below came about.
Valentine's Day
 Spring/Easter
 Spring/Easter
 Summer
 Fall/Halloween
Christmas

I used a large variety of Tim Holtz Alterations dies from the Movers and Shapers line, as well as many of the shapes from his Bigz Alterations dies as well. Along with Distress Paints, Distress Rock Candy Crackle Paint, Distress Stains, Tissue Wrap, and odds and ends of Ideaolgy.

Wednesday, February 18, 2015

Christmas Decor Class - Tim Holtz Blue Prints and Stencils

In December I taught my first class in about two and half years, and my first class at my LSS in about 5 years. I took an idea I saw from a make n take Tim Holtz did and turned it into a decor class.
I used the Speckle stencil, Range Texture Paster, some Christmas Mini Blue Print Stamps, Tissue Wrap, Rock Candy Distress Glitter, and we water colored the stamps.
I also made a couple of cards with the large Christmas Blue Print stamps and used more texture paste on the backs of the cards with Speckle and Festive.

I really wanted to show everyone how many options they have for using the Blue Print stamps and Range Texture Paste with Stencils. So I made some new Christmas Decor for my blue and white bathroom and I LOVE it!


Tuesday, February 17, 2015

Be Merry Layout with MME Joyous

This layout was based on Sketch Savvy Sketch #92

 These pictures make me smile! We went back to see Santa at Disneyland's Big Thunder Ranch Jamboree, and the minute Santa saw Dad walking up he said in a loud jolly voice, "Oh ho ho! I remember you!" and then to the rest of us he said, "He was a lot of trouble when he was younger!"

 No techniques or anything on this layout, just a simple Christmas layout.
The wooden snowflakes are from Studio Calico.

Monday, February 16, 2015

Christmas Center Piece My Mind's Eye Joyous

Another Design Team project was to use the My Mind's Eye Joyous paper and make a layout and a decor/card/party piece.
This is my decor piece using a paper mache box, and two wooden stocking banner pieces from Kaiser Craft. 

 As you can see from the picture above, the green was very hard to match with glitter paper and I wanted to put some holly at the top of the frameables, so I had to make my own glitter using Distress Rock Candy Glitter, and Alcohol ink.
 Mix them together and voila!


Perfect!
 The poinsettias on the top were cut from the patterned paper, using the Tattered Poinsettia die, the edges were sanded and then all pieces were covered with Distress Rock Candy Stickles.


Sunday, February 15, 2015

Thanksgiving Design Team Projects

I am way behind on my blogging!  After my last blog post in October of 2014, I fell off a step ladder and had some recovery time and then the mess of the holidays and never got back to it. So there will be some untimely post from Thanksgiving through Christmas for this week until I get a little caught up.

One of our Design Team projects for my LSS last fall was to use Sweater Weather by Simple Stories. We are usually to make a one page layout and a decor/card/party piece.

 For my decor piece I decided to make place settings for a Thanksgiving table.  I remembered that Tim Holtz made these really cute Turkeys a few years ago using his rosette die so I combined it with his mini bag die and made utensil holders.
Here is his tutorial for making the Quirkey Turkeys if you want to try it yourself.
 http://timholtz.com/quirky-turkeys/


Saturday, February 14, 2015

Valentine's Day Decor using Distress

 This was a fun class I did for Valentine's Day at my LSS.
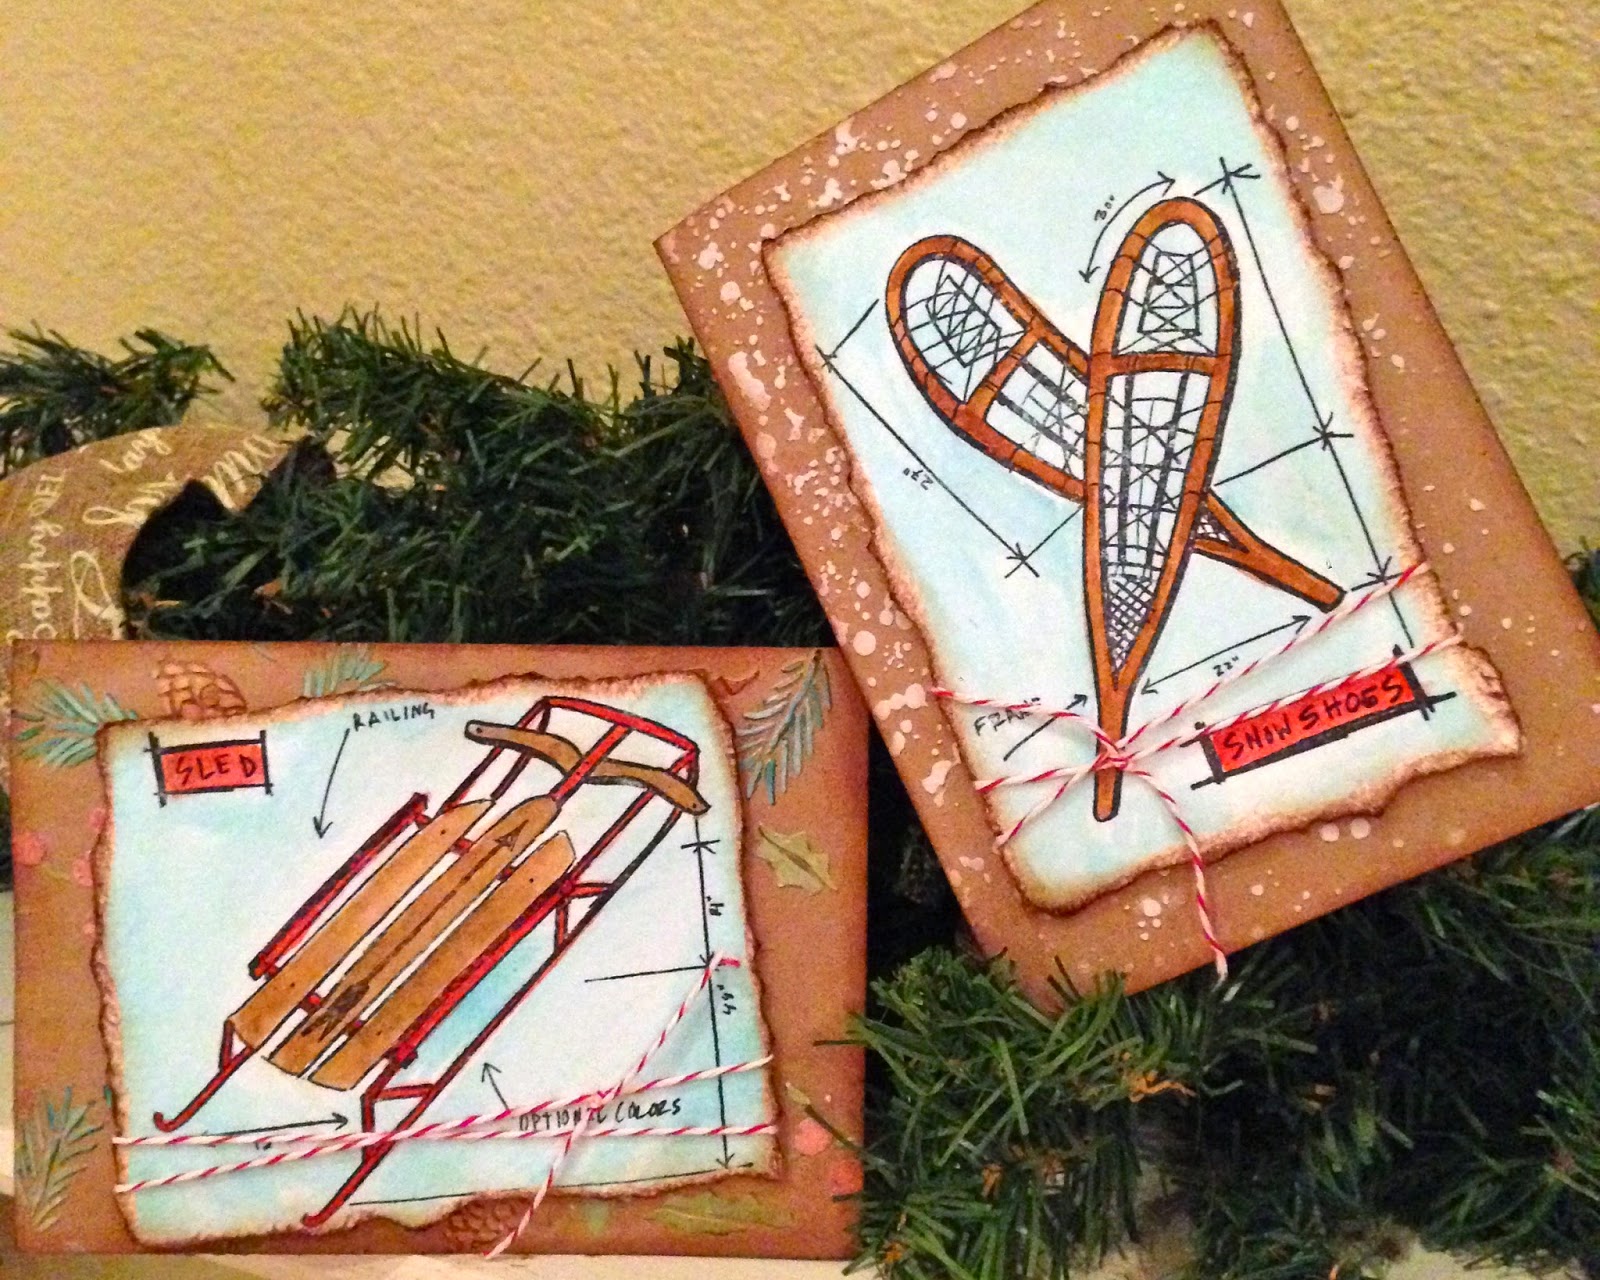
 We used Distress Paint, Distress Markers, Tim Holtz Sizzix Thinlets dies for the shapes on both projects as well as Tim's Blue Print stamps.
 The hearts were cupcake picks from the Dollar Tree that I dipped in melted Utee in my melting pot and glued a rhinestone to the front. The rose is pink felt cut from the Tim Holtz Tattered Pinecone die.
The cupids on the ends of the banner were just colored and cut from the blue print stamps.
 I stained the Tinsel Twine with Distress Stain and Alcohol Inks,
and colored the pink ribbon with Distress Paint and Distress Stain.


I  cut up some heart necklaces to tie into the junk bows on the frame and on the banner.
 It was really so much fun to just go a little over the top with this project.
In addition, I made a few cards so people could see how they could use the large blue prints as well.


We are also doing free make n takes on the Friday nights at my LSS and my week to design the make n take fell right in between my two classes. So I decided to make it go with my class so people would have an additional decor piece.  I frame my tags in Dollar Tree frames and set them around the house for additional decor.  They are cute and easy and allow me to use my fun tags.
Here it is framed and ready to set out with the other things.