Friday, November 24, 2017

Christmas in the Great Outdoors


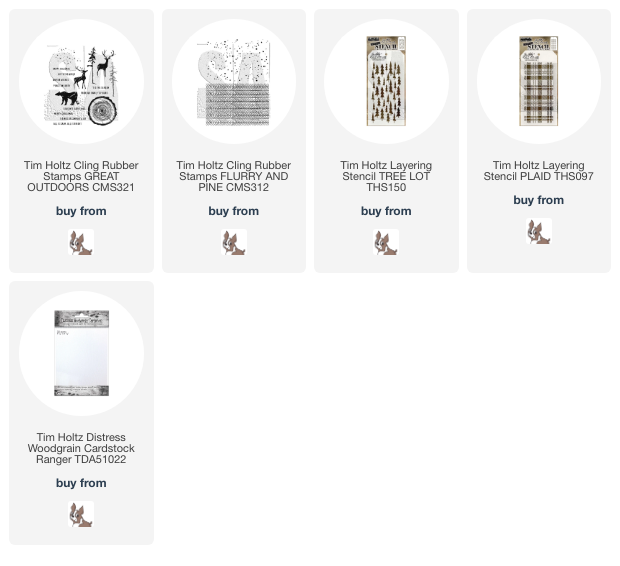
I really love the feel of the Great Outdoors CMS321 Stamp Set by Tim Holtz and Stampers Anonymous. It has such a great Frontierland at Christmas Time feel to it. So that’s what I was going for with this card. Something I could easily see fitting into the decor in Frontierland or Critter Country at Disneyland.

Tim designs not only great stamp sets, but great stencils too, and Stampers Anonymous manages to put such amazing details in them. It’s really incredible. So on this card I decided to put them both to work and use them with Distress Oxides to make my own paper.

The card started out with one of my new faves, the Distress Wood Grain Cardstock. I colored it with various Distress Inks and Distress Oxides in brown tones.

Then for the pennant pieces, I started with a couple of pieces of Distress Mixed Media Heavystock. Using a blending tool and the Candied Apple Distress Oxide, I colored the Heavystock red. Then I laid the Plaid THS097 Stencil on top of it and using a different blending tool, I gently worked the Black Soot Oxide down into the open spaces on the stencil. Then when you lift up the stencil, voila! Buffalo Plaid!

For the green piece, I lightly colored it with Lucky Clover using a blending tool. Then I stamped the Pine stamp from the CMS312 Flurry and Pine set in the same color. I love stamping the same color on the background. It looked great, but I felt it needed a little something more to tie it in with the rest of the card. After fiddling around with a few ideas, I settled on the Pines THS096 Stencil. I used the same technique as the plaid, worked Black Soot Distress Oxide into the pine tree spaces in the stencil.

For the focal point, I colored another piece of Heavy Stock with Antique Linen Distress Oxide. Then stamped the wood slice from the Great Outdoors set with Walnut Stain Distress Oxide. Once dry, I stamped the bear from the Great Outdoors set onto the middle of the wood slice.

To put it all together, I cut two pennant pieces from the plaid and trees and then popped the wood slice on top of them. Stamped one of the sentiments from the set and tied some Eclectic Elements Crafters Thread around the side.

This is really a pretty easy card to make, and if done in an assembly line style, would make a great Christmas card.

Have a creative day! 

Tami 

 I am an affiliate with Simon Says Stamp. The links below send you to their store. If you wish to purchase something and use one of my links below, I get a small percentage of your order at no additional cost to you. This helps me to defray the costs of this blog and my YouTube channel, the time, the ideas and tutorials I post here. Your help is greatly appreciated! Thank you!

Friday, November 17, 2017

Have a Totally Hip Holiday

The Hipsters are having a Legit Holiday Bash, and they are more than excited to get to be a part of the 2017 Tim Holtz Holiday Inspiration Series!  Don't worry, the hipsters are all about hanging out, so they want you to join in the merriment too!
 I was feeling inspired to make some fun, silly holiday cards and when I first saw the Carved Ornaments stamp set I just felt like they needed to get all mixed up with the Hipsters for the holidays.

It's really a pretty simple mix to do. Just add some of Tim Holtz's Stampers Anonymous Mini Carved Ornaments CMS31stamps as hats to a few of the Hipsters CMS288. For their clothing, just stamp the clothing portion of the stamps onto pieces of the Ideaology Christmas Kraft Stock and Christmas Paperie Paper Stash and cut them out by hand or with the dies so they have stylish holiday outfits to go with their cool yule hats.
The sentiments for all of the cards are from Tim's Watercolor Trees Stamps CMS317 stamp set and it is full of fabulous script sentiments for the holidays! You really should take a look at this set.
The snowflakes on this card were cut out with the Mini Paper Snowflakes thinlits CMS661599. These dies are tiny so they cut out VERY quickly and easily on my fave new tool, the Tim Holtz Alterations Sizzix Sidekick.
The holly garland on this card was cut from the Mini Holiday Greens thinlits 661597.  There are several single holly leaf die cuts in that set and like the snowflakes, I cut them very quickly and easily with the Sidekick.

I just keep being amazed at how quick and convenient this little Sidekick makes creating. I keep it on my work counter in my studio, not in the die cutting area.  My bigger die  ut machines are there for the big jobs, but I have to get up, out of my chair and walk across the room to use those. LOL! Definitely first world problems!
So I wanted to make some garlands out of a few small shapes, smaller than Tim's Sizzix punches, so I pulled out these thinlit sets and they both had tiny enough dies to work for my themed garlands.
As you can see, the holly leaves from the Mini Holiday Greens are just the perfect size, as are the tiny snowflakes from the Mini Paper Snowflake set. It took me less than two minutes to cut all the holly and snowflakes to sew together for banners for these two cards. It is the perfect tool for keeping in a handy location to grab and cut those small dies.  I'm so thankful to have it.


Wednesday, November 8, 2017

Winter Wishes

This Winter Wishes card is a sample card I made for Tim Holtz's Stampers Anonymous Christmas 2017 stamp release. I used both sets of Swirly Snowflakes, and a basic watercolor stamping technique using Distress Inks and Distress Watercolor Paper.
To make this card you need Distress Watercolor paper, three mini Distress Inks, the Tag Press, circle punches, and some Tag Press Rings.
I used the mini Distress Ink pads to apply ink to the large CMS319 Swirly Snowflakes on the background. I started with the lightest color first and applied it just to the center of the stamp.
Then I applied the second color around the first and closer to the edges of the snowflake.
With the darkest color, I applied it to the outer edges of the snowflake.
Once the inking was complete I spritzed the stamp twice with water and then stamped onto the Distress Watercolor Cardstock.
The bits of snowflakes showing in the tag embellishments were a mixture of the large Swirly Snowflakes and the CMS320 Mini Swirly Snowflakes.
Making the tag embellishments on this card was a snap with the Tim Holtz Ideaology Tag Press
I still have a very old similar tool, made waaaay back in the day by another company and it never impressed me. It was difficult to use, didn't press evenly, and frustrated me to ruin so many of the rings. 
Having had that experience, I wasn’t sure Tim's new and improved version was going to be much better, but because it’s a great price point, I figured I’d give it a try. I could tell right away that it was much better in quality and will readily admit that it didn’t disappoint. It was so easy to use and it pressed the tags down evenly with no trouble. Perfect results every time. And look at how cute it makes the embellishments on this card! 

If you are wondering how it works, look no further for a great tutorial on how to use the Tag Press,  than this one from Tim himself!

Have a creative day! 

Tami 

 I am an affiliate with Simon Says Stamp. The links below send you to their store. If you wish to purchase something and use one of my links below, I get a small percentage of your order at no additional cost to you. This helps me to defray the costs of this blog and my YouTube channel, the time, the ideas and tutorials I post here. Your help is greatly appreciated! Thank you!

Sunday, November 5, 2017

Holly Jolly Celebration -- and the Tim Holtz Sidekick is coming!

This Christmas card was inspired by the movie Elf.  Such a silly holiday movie! But when I started planning out a card using these cute little gifts from Tim Holtz's Tattered Christmas CMS318 stamp set through Stampers Anonymous, I got a picture of the scene in Elf where Santa's sleigh is stuck in Central Park. So I decided to pair the Tattered Christmas stamp presents with the Carved Christmas 3 CMS315 sleigh and the Great Outdoors CMS321 trees and snow to make Santa's sleigh over Central Park.
There is a LOT of fussy cutting in this card and a lot of work went into the background as well.  To make the background I lightly colored a Piece of Distress Heavystock with Picket Fence Distress Ink and Iced Spruce Distress Oxide. The key here is to keep it LIGHT.

Then I stamped the trees onto the background in Iced Spruce Distress Oxide. I added some spritzes of water to activate the oxide and give it texture as well as a feeling of snow.

The next step was to stamp the snow on using Picket Fence Distress Paint on the snow stamp from the Great Outdoors set.  I also stamped the Carved Christmas 3 sleigh onto the background in the Picket Fence Distress Paint so that the lines and speckles outside the sled would still show.  If you look you can see them in the photo.

The sleigh was stamped in Candied Apple Distress Ink and clear embossed before cutting it out. Then I adhered it to the card background over the white stamped image, but be sure to only put glue along the edges, not the in the center. You need to be able to stack those presents into the sleigh!


Ok, now here is where you can make it much easier on yourself than I had it at the time. LOL! I had to fussy cut every single package and ribbon on those presents by hand because I had the stamps before Stampers Anonymous and Sizzix made matching dies! Tattered Christmas Framelits 662437  How cool is THAT?

Once you have stamped several presents and a candy cane or two, watercolor the images with Distress Markers or Distress Inks and cut them out. Then arrange them in the sled and you are ready to go!

This brings me to the next exciting thing that has happened since I designed this card in August, Tim Holtz has paired with Sizzix in designing a new Sidekick that is perfect for cutting framelits and other thinlit dies.  It will make your cardmaking EVEN EASIER!! 'How can that be?' you might ask. "I already have a Vagabond, or Big Shot or Big Shot Pro, or Silhouette, or Cricut, (or several of the aforementioned) so I really don't need another cutter!" Maybe not, but the convenience and speed of this little Sidekick makes it...well, I was going to say, worth it's weight in gold, but it hardly weighs anything, so I'll say it far exceeds it weight in gold!

Here is a video I made showing why I love it, even though I have a Big Shot Pro and a Big Shot, and why I think it is definitely a must have.

Thank you so much for reading through this tutorial. I hope I gave you enough info to be able to make your own card. 

Have a creative day,

Tami

I am an affiliate with Simon Says Stamp. The links below send you to their store. If you wish to purchase something and use one of my links below, I get a small percentage of your order at no additional cost to you. This helps me to defray the costs of this blog and my YouTube channel, the time, the ideas and tutorials I post here. Your help is greatly appreciated! Thank you!

Saturday, November 4, 2017

Warm Winter Wishes


I was so honored to be asked to make some sample cards for Tim Holtz’s Christmas stamp release through Stampers Anonymous. You may have seen them on his Facebook Live reveal back in August, but I haven’t posted most of them yet. 
Since Tim is posting some Christmas Inspirations this month, I thought it would be a good time to start posting them. 
  
This is the Warm Wishes card using Distress Oxides and CMS313 Carved Christmas 1, CMS316 Holiday Postmarks, CMS206 Holiday Knits, THS093 Starry Stencil, and the Tag Press. 

I wanted to use a bright, nontraditional color palette for this card so it could be given to friends who celebrate Christmas as well as friends who don’t.
The Holiday Postmarks stamps have several that fit perfectly within the Tim Holtz Tag Press. You just stamp them, punch them out with of the matching Sizzix Alterations Circle Punches and then pop it in a ring and press. Voila! Quick and easy embellishment.

Have a creative day! 

Tami 

 I am an affiliate with Simon Says Stamp. The links below send you to their store. If you wish to purchase something and use one of my links below, I get a small percentage of your order at no additional cost to you. This helps me to defray the costs of this blog and my YouTube channel, the time, the ideas and tutorials I post here. Your help is greatly appreciated! Thank you