Tuesday, December 12, 2017

A Mid-century Modern Merry Christmas -

 This Christmas card evokes the feeling of a mid-century modern Christmas with the tinsel trees, and the mint green and pinkish reds with very clean lines and minimal decor.  I used several of my favorites from this year's Tim Holtz Christmas stamp and stencil release through Stampers Anonymous.
 The sentiment is from Christmas Classic CMS322 and the green Cracked Pistachio Distress Oxide background is made from the Sparkles and Christmas CMS324 stamp set.
The pinkish red background is the Starry THS093 stencil  made with the Candied Apple Distress Oxide.

All the the silver stamped images from Christmas Classic were stamped in Black Distress Oxide and heat embossed with Fine Silver Embossing Powder by Ranger.
The pine cone technique is the same one I used on a previous card to make holly leaves, and I used the same Festive THS029. You can see the technique on this post: Special Delivery.

Friday, December 8, 2017

A Christmas Memory Vignette Tray


I made this memory Vignette Tray using Christmas Ideaology and Sizzix dies in order to showcase some of my treasured Christmas memories.  I couldn't be more pleased with how it turned out.

When I was growing up, my family worked every December at a Christmas Tree farm in Central California called Friendly Pines. It was owned and managed by an older, retired couple from our church at the time. It was a Quaker church, also known as a Friends Church, thus the name Friendly Pines. Because this was a Christmas Tree farm in California's very warm San Joaquin Valley, in all the years we worked there there was never once so much as a single snowflake. Consequently it was always very green. That's why there is not a bit of winter snow in this vignette. 

The top of the large Vignette Tray is decorated with two Tim Holtz Tree Dies - Evergreen and Treeline. I cut multiples from these dies, inked them up and spritzed the with water to get the variations in color, then I trimmed them and popped them up and layered them to try and get them to look like rows of different sized Christmas trees on the lot. I used the Christmas Red Alpha Dice and added some pine branches from the Sizzix Tim Holtz Pine Branch punch and the pine cones are some Beaded Berries (another one of my favorite things from the 2017 Christmas release! I would love to have these beauties around all year long!)
The Wood Slices are one of my favorite things from the Tim Holtz Christmas Ideaology 2017 release. I especially love the ones with the little bits hanging off the sides that aren't perfectly round. My Dad cut slabs of burl wood and did tree pruning and cut the Christmas Trees when I was younger. Even at almost 80 he still prunes trees, and cuts small slabs of wood, usually for craft supplies for me and my mom. So when I saw the imperfect wood slabs I fell in love! They HAD to be part of my title for this memory vignette. I stamped the letters on them with the 
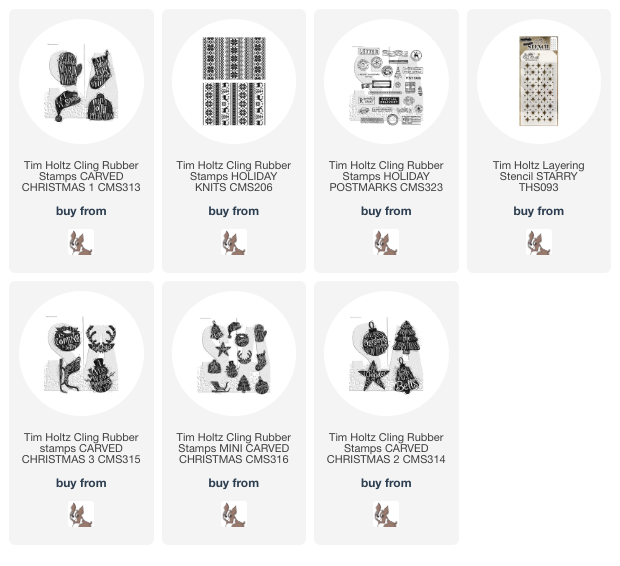
Ideaology Cling Foam Christmas Alpha stamps and Festive Berries Distress Paint. They, as well as the lights, are hanging from the Vignette Hardware screw eyes and hooks.
The Letterpress letters are painted with Festive Berries Distress Paint and then I lightly sanded some of the paint off once it was dry so the wood shows through.
In this part of the vignette, you can see I used the Christmas Paper Doll family. They represent the many families who would come to Friendly Pines to purchase their Christmas trees each year. The Christmas Paper Doll man with the tree represents my dad, who worked every weekend cutting trees for families and he would hold it for them and carry it to their car and help them get it tied down for the drive home.
The Christmas Baseboard and Christmas Ephemera represent some of the walls on the check out stand where they had tons of things posted.
The strings of lights represent the actual strings of lights that hung over the rows of trees so people could see at night when they were purchasing trees.

In this part of the vignette, the Christmas Paper Doll boys represent the kids who never stayed with their parents and ran around climbing on things and playing. The wood slices at the bottom represent all the wood slices from the bottoms of the trees that were everywhere throughout the farm.
The Christmas Paper Doll girl in the small Ideaology Vignette Box Top represents my sister, Melissa.  She was a serious seasonal entrepreneur. During the week my dad would help folks out by pulling mistletoe out of their trees around town. Then at night, my mom and sister would make clippings of mistletoe and tie it with pretty ribbons. The first year, my dad made her a sales booth out of a refrigerator box and they decorated it and handpainted a sign that said "Missy's Mistletoe." Mom put matching bows in her hair and she sat out in that box on the weekends and sold mistletoe for 25 cents a bundle and made a ton of Christmas Cash. No one could resist the cute little girl in the box selling mistletoe. Eventually she outgrew the box and sold it from a window in the Tree Farm sales booth. The decorations on the Vignette Box Top are from the Tim Holtz Village Christmas Time dies.
My job wasn't nearly as cute nor as lucrative. I was the greeter/parking lot attendant. I was tasked with sitting on a wooden crate and as soon as a car came down the driveway I said, "Hello! Welcome to Friendly Pines Christmas Tree Farm! You can park here, or in the parking lot further down. Have a Merry Christmas!" probably about a thousand times every Christmas season.
Thanks for taking the time to meander down memory lane with me as I described my thought process behind this memory Vignette Tray. When my mom saw it she said it perfectly represented our family  Christmas memories of the many Decembers we spent at Friendly Pines Christmas Tree Farm. one of the only things it is missing is that amazing fresh cut Christmas Tree pine scent that is hands-down one of my favorite scents of the season.

Sunday, December 3, 2017

Have Merry Frontier Christmas

 I don't know about you, but I have really enjoyed the Tim Holtz Holiday Inspiration 2017 series! There are so many amazing projects that I really want to try and make.  I'm so honored to have my Frontier Burlap Panel featured in the series today. This panel came about when I was just sitting and looking through this year's delightful holiday products, and I realized I wanted to make a decor item to go with my Disneyland Frontierland Christmas Tree.
 The first step was to open the Ideaology 6x8 Burlap Panel. The panel is backed with a piece of brown, leather looking chipboard.  I trimmed it down so that it was smaller than the panel, then using my Clear 12" Ideaology Ruler, I poked holes 1/4" apart all the way around the edge of the panel. Then using the Brown Eclectic Elements Crafter's Thread, I sewed a blanket stitch all around the edge.
 This made a solid background that kind of looked like hand-sewn leather. That was important to the frontier look of the panel and it added a nice layer of texture.
 Because it was going to be winter in the frontier, I added some "snow" by putting Distress Grit Paste through the Tim Holtz Speckles Stencil THS021. Let it dry and then attach the faux leather panel.
Next, cut two pieces of paper from the Christmas Paperie Holiday Stash. I used the white paper with black + symbols, and the red, white and black plaid, which is my favorite paper in this year's stash. I added machine stitching around the edge of the two papers with white thread.
 The metal elements on this panel needed to feel like something that would fit in the frontier, and when I think of pioneers I think of cast iron. So the Stars Adornments, Snowflakes Adornments, and the Ideaology Trophy Antlers were all painted to resemble cast iron.  I painted them with Black Soot Distress Paint. I dried them and pounced more black soot paint on them. You don't want them to have a smooth texture. Once they were dry, I rubbed some Frayed Burlap Distress Paint over them and wiped it off with a wetwipe.  I just wanted it to give them a dry dusty old cast iron look to them but not cover up the black paint.  The snowflake got an added bit of Picket Fence Distress Paint.
For the wreath, I used the Ideaology Wood Slices and stamped various snowflakes from Mini Holidays 3 and Winter Sketchbook CMS094
I stamped the snowflakes onto the wood slices with Ground Espresso Archival Ink. Then I arranged them in a two layered wreath in a circle around the Trophy Antlers and attached them all to the plaid paper.
I cut some of the Holly branches from the Holiday Greens. I inked the edges with a darker green and bent the leaves to give them some texture. Then I adhered some of the Beaded Berries here and there throughout the holly. I liked the accent of the white berries as opposed to coloring the red.
I did however color the Linen Ribbon with Candied Apple Distress Oxide.  
The last little touch is that I cut a label from the Tags Thinlets die set and trimmed off the end, added a Holiday Quote Chip, and then tied it on by wrapping some black Crafter's Thread around the plaid and tying it through the Label Tag.

That's it! I know this isn't a tutorial, but I hope that my explanations help you if you decide you want to try to make a Frontierland Christmas Panel.

Tami

P.S. Today's Christmas recipe is a family favorite. Almond Roca is best made in a cast-iron skillet, so I thought it would be apropos to share it with this project.

I am an affiliate with Simon Says Stamp and Scrapbook.com so the links below send you to one of those stores depending on which logo you choose.  If you wish to purchase something from either store and use one of my links below, I get a small percentage of your order, at no additional cost to you. This helps me to defray the costs of this blog, the time, the ideas and tutorials I post here. Your help is greatly appreciated! Thank you!

Friday, November 24, 2017

Christmas in the Great Outdoors


I really love the feel of the Great Outdoors CMS321 Stamp Set by Tim Holtz and Stampers Anonymous. It has such a great Frontierland at Christmas Time feel to it. So that’s what I was going for with this card. Something I could easily see fitting into the decor in Frontierland or Critter Country at Disneyland.

Tim designs not only great stamp sets, but great stencils too, and Stampers Anonymous manages to put such amazing details in them. It’s really incredible. So on this card I decided to put them both to work and use them with Distress Oxides to make my own paper.

The card started out with one of my new faves, the Distress Wood Grain Cardstock. I colored it with various Distress Inks and Distress Oxides in brown tones.

Then for the pennant pieces, I started with a couple of pieces of Distress Mixed Media Heavystock. Using a blending tool and the Candied Apple Distress Oxide, I colored the Heavystock red. Then I laid the Plaid THS097 Stencil on top of it and using a different blending tool, I gently worked the Black Soot Oxide down into the open spaces on the stencil. Then when you lift up the stencil, voila! Buffalo Plaid!

For the green piece, I lightly colored it with Lucky Clover using a blending tool. Then I stamped the Pine stamp from the CMS312 Flurry and Pine set in the same color. I love stamping the same color on the background. It looked great, but I felt it needed a little something more to tie it in with the rest of the card. After fiddling around with a few ideas, I settled on the Pines THS096 Stencil. I used the same technique as the plaid, worked Black Soot Distress Oxide into the pine tree spaces in the stencil.

For the focal point, I colored another piece of Heavy Stock with Antique Linen Distress Oxide. Then stamped the wood slice from the Great Outdoors set with Walnut Stain Distress Oxide. Once dry, I stamped the bear from the Great Outdoors set onto the middle of the wood slice.

To put it all together, I cut two pennant pieces from the plaid and trees and then popped the wood slice on top of them. Stamped one of the sentiments from the set and tied some Eclectic Elements Crafters Thread around the side.

This is really a pretty easy card to make, and if done in an assembly line style, would make a great Christmas card.

Have a creative day! 

Tami 

 I am an affiliate with Simon Says Stamp. The links below send you to their store. If you wish to purchase something and use one of my links below, I get a small percentage of your order at no additional cost to you. This helps me to defray the costs of this blog and my YouTube channel, the time, the ideas and tutorials I post here. Your help is greatly appreciated! Thank you!

Friday, November 17, 2017

Have a Totally Hip Holiday

The Hipsters are having a Legit Holiday Bash, and they are more than excited to get to be a part of the 2017 Tim Holtz Holiday Inspiration Series!  Don't worry, the hipsters are all about hanging out, so they want you to join in the merriment too!
 I was feeling inspired to make some fun, silly holiday cards and when I first saw the Carved Ornaments stamp set I just felt like they needed to get all mixed up with the Hipsters for the holidays.

It's really a pretty simple mix to do. Just add some of Tim Holtz's Stampers Anonymous Mini Carved Ornaments CMS31stamps as hats to a few of the Hipsters CMS288. For their clothing, just stamp the clothing portion of the stamps onto pieces of the Ideaology Christmas Kraft Stock and Christmas Paperie Paper Stash and cut them out by hand or with the dies so they have stylish holiday outfits to go with their cool yule hats.
The sentiments for all of the cards are from Tim's Watercolor Trees Stamps CMS317 stamp set and it is full of fabulous script sentiments for the holidays! You really should take a look at this set.
The snowflakes on this card were cut out with the Mini Paper Snowflakes thinlits CMS661599. These dies are tiny so they cut out VERY quickly and easily on my fave new tool, the Tim Holtz Alterations Sizzix Sidekick.
The holly garland on this card was cut from the Mini Holiday Greens thinlits 661597.  There are several single holly leaf die cuts in that set and like the snowflakes, I cut them very quickly and easily with the Sidekick.

I just keep being amazed at how quick and convenient this little Sidekick makes creating. I keep it on my work counter in my studio, not in the die cutting area.  My bigger die  ut machines are there for the big jobs, but I have to get up, out of my chair and walk across the room to use those. LOL! Definitely first world problems!
So I wanted to make some garlands out of a few small shapes, smaller than Tim's Sizzix punches, so I pulled out these thinlit sets and they both had tiny enough dies to work for my themed garlands.
As you can see, the holly leaves from the Mini Holiday Greens are just the perfect size, as are the tiny snowflakes from the Mini Paper Snowflake set. It took me less than two minutes to cut all the holly and snowflakes to sew together for banners for these two cards. It is the perfect tool for keeping in a handy location to grab and cut those small dies.  I'm so thankful to have it.


Wednesday, November 8, 2017

Winter Wishes

This Winter Wishes card is a sample card I made for Tim Holtz's Stampers Anonymous Christmas 2017 stamp release. I used both sets of Swirly Snowflakes, and a basic watercolor stamping technique using Distress Inks and Distress Watercolor Paper.
To make this card you need Distress Watercolor paper, three mini Distress Inks, the Tag Press, circle punches, and some Tag Press Rings.
I used the mini Distress Ink pads to apply ink to the large CMS319 Swirly Snowflakes on the background. I started with the lightest color first and applied it just to the center of the stamp.
Then I applied the second color around the first and closer to the edges of the snowflake.
With the darkest color, I applied it to the outer edges of the snowflake.
Once the inking was complete I spritzed the stamp twice with water and then stamped onto the Distress Watercolor Cardstock.
The bits of snowflakes showing in the tag embellishments were a mixture of the large Swirly Snowflakes and the CMS320 Mini Swirly Snowflakes.
Making the tag embellishments on this card was a snap with the Tim Holtz Ideaology Tag Press
I still have a very old similar tool, made waaaay back in the day by another company and it never impressed me. It was difficult to use, didn't press evenly, and frustrated me to ruin so many of the rings. 
Having had that experience, I wasn’t sure Tim's new and improved version was going to be much better, but because it’s a great price point, I figured I’d give it a try. I could tell right away that it was much better in quality and will readily admit that it didn’t disappoint. It was so easy to use and it pressed the tags down evenly with no trouble. Perfect results every time. And look at how cute it makes the embellishments on this card! 

If you are wondering how it works, look no further for a great tutorial on how to use the Tag Press,  than this one from Tim himself!

Have a creative day! 

Tami 

 I am an affiliate with Simon Says Stamp. The links below send you to their store. If you wish to purchase something and use one of my links below, I get a small percentage of your order at no additional cost to you. This helps me to defray the costs of this blog and my YouTube channel, the time, the ideas and tutorials I post here. Your help is greatly appreciated! Thank you!

Sunday, November 5, 2017

Holly Jolly Celebration -- and the Tim Holtz Sidekick is coming!

This Christmas card was inspired by the movie Elf.  Such a silly holiday movie! But when I started planning out a card using these cute little gifts from Tim Holtz's Tattered Christmas CMS318 stamp set through Stampers Anonymous, I got a picture of the scene in Elf where Santa's sleigh is stuck in Central Park. So I decided to pair the Tattered Christmas stamp presents with the Carved Christmas 3 CMS315 sleigh and the Great Outdoors CMS321 trees and snow to make Santa's sleigh over Central Park.
There is a LOT of fussy cutting in this card and a lot of work went into the background as well.  To make the background I lightly colored a Piece of Distress Heavystock with Picket Fence Distress Ink and Iced Spruce Distress Oxide. The key here is to keep it LIGHT.

Then I stamped the trees onto the background in Iced Spruce Distress Oxide. I added some spritzes of water to activate the oxide and give it texture as well as a feeling of snow.

The next step was to stamp the snow on using Picket Fence Distress Paint on the snow stamp from the Great Outdoors set.  I also stamped the Carved Christmas 3 sleigh onto the background in the Picket Fence Distress Paint so that the lines and speckles outside the sled would still show.  If you look you can see them in the photo.

The sleigh was stamped in Candied Apple Distress Ink and clear embossed before cutting it out. Then I adhered it to the card background over the white stamped image, but be sure to only put glue along the edges, not the in the center. You need to be able to stack those presents into the sleigh!


Ok, now here is where you can make it much easier on yourself than I had it at the time. LOL! I had to fussy cut every single package and ribbon on those presents by hand because I had the stamps before Stampers Anonymous and Sizzix made matching dies! Tattered Christmas Framelits 662437  How cool is THAT?

Once you have stamped several presents and a candy cane or two, watercolor the images with Distress Markers or Distress Inks and cut them out. Then arrange them in the sled and you are ready to go!

This brings me to the next exciting thing that has happened since I designed this card in August, Tim Holtz has paired with Sizzix in designing a new Sidekick that is perfect for cutting framelits and other thinlit dies.  It will make your cardmaking EVEN EASIER!! 'How can that be?' you might ask. "I already have a Vagabond, or Big Shot or Big Shot Pro, or Silhouette, or Cricut, (or several of the aforementioned) so I really don't need another cutter!" Maybe not, but the convenience and speed of this little Sidekick makes it...well, I was going to say, worth it's weight in gold, but it hardly weighs anything, so I'll say it far exceeds it weight in gold!

Here is a video I made showing why I love it, even though I have a Big Shot Pro and a Big Shot, and why I think it is definitely a must have.

Thank you so much for reading through this tutorial. I hope I gave you enough info to be able to make your own card. 

Have a creative day,

Tami

I am an affiliate with Simon Says Stamp. The links below send you to their store. If you wish to purchase something and use one of my links below, I get a small percentage of your order at no additional cost to you. This helps me to defray the costs of this blog and my YouTube channel, the time, the ideas and tutorials I post here. Your help is greatly appreciated! Thank you!

Saturday, November 4, 2017

Warm Winter Wishes


I was so honored to be asked to make some sample cards for Tim Holtz’s Christmas stamp release through Stampers Anonymous. You may have seen them on his Facebook Live reveal back in August, but I haven’t posted most of them yet. 
Since Tim is posting some Christmas Inspirations this month, I thought it would be a good time to start posting them. 
  
This is the Warm Wishes card using Distress Oxides and CMS313 Carved Christmas 1, CMS316 Holiday Postmarks, CMS206 Holiday Knits, THS093 Starry Stencil, and the Tag Press. 

I wanted to use a bright, nontraditional color palette for this card so it could be given to friends who celebrate Christmas as well as friends who don’t.
The Holiday Postmarks stamps have several that fit perfectly within the Tim Holtz Tag Press. You just stamp them, punch them out with of the matching Sizzix Alterations Circle Punches and then pop it in a ring and press. Voila! Quick and easy embellishment.

Have a creative day! 

Tami 

 I am an affiliate with Simon Says Stamp. The links below send you to their store. If you wish to purchase something and use one of my links below, I get a small percentage of your order at no additional cost to you. This helps me to defray the costs of this blog and my YouTube channel, the time, the ideas and tutorials I post here. Your help is greatly appreciated! Thank you

Friday, October 6, 2017

Spooky Halloween Ideaology Panel


This project was a sample for a class I taught earlier this month. It was so much fun to design with all the new Halloween Ideaology and I am honored that Tim Holtz highlighted it in his Halloween 2017 Inspiration Series. Below are the basic directions for making this project and there is so much opportunity for making this uniquely your own. 

1. The CANVAS:
You need a 12x12 burlap covered canvas. You can make one or purchase one. I used a District Market 12x12 canvas for my sample, but they have been discontinued. If you have one in your stash, great! Otherwise you can do an internet search and find one.

Cut four 4"x8” and one 4”x4” pieces of paper from the Halloween Paperie Kraft Stash. Lightly distress the paper by sanding it with a sanding block so some of the kraft core shows through.
You can slightly trim the pieces or tear the outside edges, or overlap the 4x8 papers when you adhere them to the canvas. I adhered mine with collage medium and just overlapped the paper enough to leave a burlap reveal all around the outside edges. To get them to fit on the 12x12, you need to lay one 4x8 piece horizontally across the top, then one vertically, then one horizontally along the bottom and one vertically. This should leave a square in the center for the 4x4.

2.    The COFFIN:  
Paint the inside and outside sides of the Vignette Tray Coffin (henceforth known just as the coffin) in Black Soot Distress Paint. Once completely dry, brush some Frayed Burlap Distress Paint over it and wipe off with a dry rag. This should give it an old, aged wood look.


Trace around the outside edge of the coffin onto scrap paper. Cut out the coffin template and make sure it fits inside your coffin. Trim as needed until it easily comes in and out of the coffin. Cover the template with more of the Halloween Kraft Stash. Add a 1” strip of Halloween Paperie patterned paper across the middle. Then trim the patterned paper to fit the template. Adhere to the inside of the coffin.
3.    Attach some Halloween Design Tape around the top edge of the coffin to cover the unfinished edge.
4.    From the papers in the Halloween Paperie Stash, choose some ads or images to go inside the coffin and cut them out.
5.    Pick a word from the Halloween Typography Words and adhere to the top of the coffin.

6.    The Halloween TREE:


Using your Tim Holtz Scissors, trim off the handles of a Trophy Cup to form an urn. Using the sanding block, sand off any remaining little pieces. Paint the trophy cup with Black Soot Distress Paint, This may take a couple of coats. Then when completely dry, brush on some Frayed Burlap Distress Paint and wipe off with a dry rag. Glue some foam in the bottom of the cup.

Spray a Woodlands Tree with Antique Linen Distress Stain. You may notice that the trees can get horribly misshapen with all the packing and handling they go through. Don’t fret. Spray the tree with a good amount of Distress Stain and set it aside to dry. The moisture reacts with the natural bristles just like humidity and curly hair. They will poof back out in no time! I also tried this with just water and my Distress Sprayer and it worked as well.
Once the tree dries, glue it into the Trophy Cup urn. Choose the side you want facing the back and trim it flat with scissors. Crinkle the Halloween Fringe by balling it up into your hand and then roll it in a circle like you are making a meatball or cookie ball. Add a tiny amount around the bottom of the tree. 


Decorate the tree with paper bats, punched laurel pieces, alcohol inked baubles, or whatever fun Halloween items you have in your stash. It’s a Halloween Tree. Have FUN with it! 
I punched laurels from the Alterations Large Laurel Punch then cut the pieces in half and inserted them into the tree between the bristles and glued them in.   
I put liquid glue on the back of the small bats from the Halloween Mixed Media die and then held them onto the very tips of the tree bristles until they stuck. 
Attach two larger bats from the Bats, Cross and Shield Movers and Shapers dies, back to back on the top of the tree with liquid glue to form a bat tree topper.
Tie a longish piece of the orange and black twine from the Halloween Trimmings in a bow at the top of the tree just under the bat then roll the hanging pieces tightly around a pencil to get them to curl. 


7.    Arrange the cheesecloth on the bottom of the coffin, adhere the tree and urn into the coffin. Arrange the Skull, Mini Pumpkins and large bone from Boneyard around the bottom of the urn.

8.    The FRAGMENTS: From the Halloween Paperie Stash, pick various words, images and patterned papers to go on the back of your Fragments. Add some Glossy accents to the back of a fragment then put it on the paper image you want to show through. Push down and move slightly until all the air bubbles are out. Allow to dry as you complete all the fragments. Once dry, trim the excess paper from around the outside.
9.    Lay the coffin on the canvas, then arrange the fragments as desired along the right side. Lay the Scroll die cuts on the top left and bottom right of the fragments. Once you get both positioned as desired. Adhere them in place. 


 10.The FINISHING TOUCHES:
Add various Halloween Shape Tokens, Halloween Adornments, Boneyard bones, die cuts, and keeping one for the top right corner medallion. You can add the small bone on one, some small words from the Halloween Paperie stash, words or phrases from the Halloween Clippings sheets, or even some Halloween Remnant Rubs


11.The last piece is to use the remaining Halloween Fringe trim across the top of the canvas and then in the top right corner, cut two circular shapes – I used the small seal in the Labels die set and the Large Seal punch, as well as the Large Banner punch to make the ribbons. Layer them with dimensional foam dots, adhere a Halloween Shape Token to the center and attach to the top corner.