The "wonder"ful new Distress color from Tim Holtz and Ranger Ink, Lost
Shadow, is a perfect addition to the Distress Family. We needed this new
color of light grey. It is perfect for this technique of turning
Idea-ology bits and pieces into stone statuaries. So that is the first thing I did with it!
This video focuses on
making the statues and not on a completed vignette. The completed piece
is in the works for a little later this spring. So stay tuned!
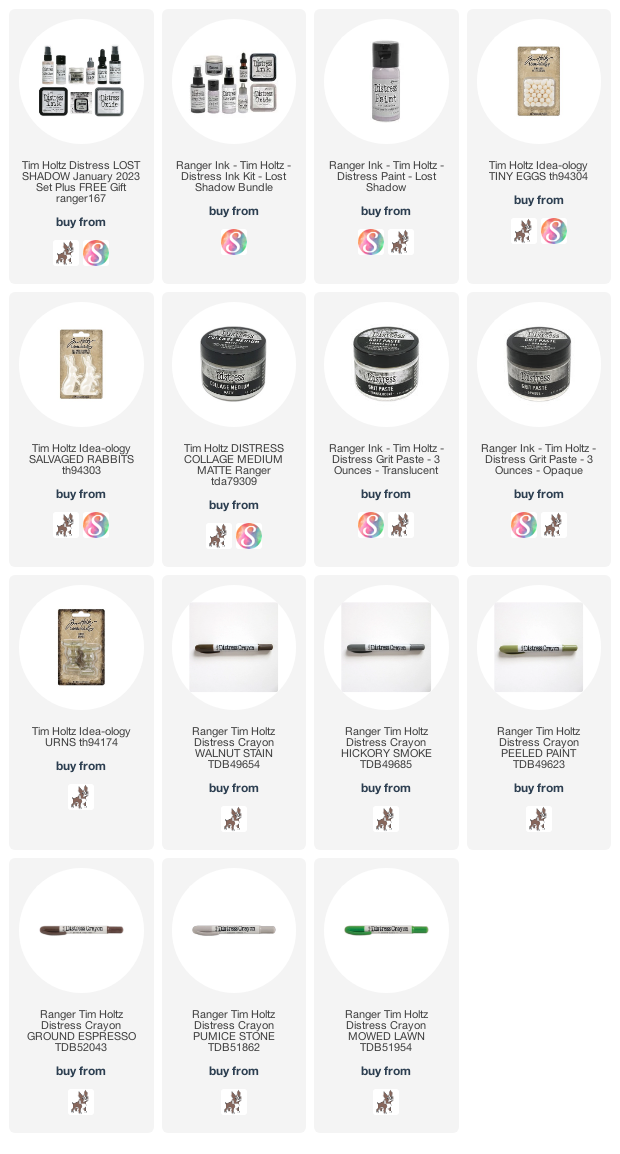
To make these particular statuaries you will need these products or something like them from your stash or local hobby store. Idea-ology Finials, Urns, Slavaged Dolls, Salvaged Rabbits, Tiny Eggs, Distress Grit Paste, Distress Collage Medium, Distress Paint in Lost Shadow and some Distress Crayons in browns, greys and greens.
Cut the top part of the small finial off and sand it flat. Use this as a tiny base for the Salvaged Doll. Attach with Collage Medium.
Attach the Rabbit and a few eggs to the top of the large Finial base with Collage Medium.
Attach one egg in the bottom of the urn with Collage Medium. Then attach the other three eggs on top if the first.
Once all the pieces are dry and secure using your finger and a tiny brush, pounce Grit Paste over the pieces so they have a weathered stone texture. You want the grit paste pushed down into the little crevices so the separate piece look like they were sculpted.
See how pushing the grit paste into the crevices makes all the pieces look like one?
Including the Rabbit and Tiny Eggs!
When the grit paste is dry you will want to paint the pieces with Lost Shadow. Two coats should do it but more if needed.
You want to cover the entire piece with Lost Shadow paint.
It should look something like this when it is dry and completely covered.
Then add layers of Distress Crayons to color the gritty bits to make them look like moss and aged stone.
I think they look great! I hope you like the close-ups and details in these still shots.
Here are some blog posts to check out for other statuaries I have made and used in projects in the past.
I hope you will try making your own statuaries with grit paste and Lost Shadow paint! Please tag me if you do. I love to see you makes!
Have a creative day,
Tami
I am
an affiliate with Simon Says Stamp and Scrapbook.com so the links below
send you to one of those stores depending on which logo you choose. If
you wish to purchase something from either store and use one of my
links below, I get a small percentage of your order, at no additional cost to you. This helps me to defray the costs of this blog, the time, the ideas and tutorials I post here.
There are some really gorgeous products in the new Idea-ology release and I wanted to showcase some of them in this project. I know most of you are used to some back story or inspiration behind my makes, but this is one of those that just celebrates the product for its beauty.
The base of this project is a Mini Etcetera tag. I tore the new Entymology Collage Paper into pieces and adhered it to the raw tag and tag reinforcer with some Distress Collage Medium. Put a thin layer of Collage Medium on the tag, press a torn piece of the Collage paper into it, gently flatten it out, then brush the top of the paper with Collage Medium. Repeat until the entire tag is covered.
Once it is completely dry, sand any excess Collage Paper off the edges, and get ready to use some Distress Crayons.
Begin by scribbling some Antique Linen Distress Crayon in a small area.
Then use your fingers to rub it in and smooth it out. Do the same two steps in another small area. Cover the entire tag in this manner.
Once the entire tag is covered, then take some time selecting some of the new Metallic Stickers and put them around the entire edge of the tag. They are very sticky, so be careful when you set them down because they are difficult to remove and reposition once they are down.
When you get to the top corner, trim some of the smaller sayings so they fit in the angled areas.
Here you can see cut the ends of the stickers on the sides as they ran into the angled part. Also when I was completely finished, I added some of the new Velvet Trims in black through the hole at the top and added an Antiqued Gem for a little sparkle.
One of the beautiful pieces that inspired this project was this rose and the urn from the new Engravings Layers. I knew they had to be together. They are backed on a piece of the new Idea-ology Wallpaper. It is a beautiful Pumice Stone color with little bunches of roses the same color. One of my favorite patterns from this release.I cut a thin gold Metallic Kraftstock mat for the wallpaper and then sewed around the entire piece with gold metallic thread,
I started by watercoloring the roses with my Finetip Waterbrush. You need to be patient when doing this, to endure that you do not use too much water. Go slowly and just enjoy applying color to the gorgeous engravings. I found that it really helped me to thoroughly dry the color in between applications when I was building up color. For this I used a variety of colors including Rusty Hinge, Crackling Campfire, Walnut Stain, Peeled Paint and Rustic Wilderness.
NOTE: Tim Holtz did a great tutorial on coloring these engravings by covering them with a layer of Frosted Crystal Embossing Powder first. You can see it here.
Once it was colored, I fussy cut around it to get rid of the wide, white outer edge around the image. I did the same to the urn, then adhered them together. It helps to attach them to something to make the piece dimensional. I used bits and pieces of some chipboard that I had.
Here you can see how they are set up and away from the tag. It adds great dimension. Also I added a whole piece of chipboard under the Wallpaper mat so that it also stood out from the tag.
I added one of the new Metallic Sticker labels with a sentiment adhered in the middle. On each side is an Idea-ology Hardware Head that was colored with Gold Metallic. I put some dimension foam squares under the label to make it stand out. Alcohol Ink.
Before adhering the focal piece, I cut a mat out of some of the new Kraft Cardstock in the color that looks like Forest Moss. Make it a thin mat because you just want the tiniest bit of green to highlight the leaves and balance them with the large orange roses.
This is not a difficult project, but I would say it is probably an intermediate level piece. You do need some knowledge of Distress Products. It also takes some patience to get the stickers picked so they go with the theme of the main sentiment and so that they fit.
Thank you for getting this far in the tutorial, for stopping by my blog and for your support. I never take it for granted!
Tami
I am an affiliate with Simon Says Stamp and Scrapbook.com so the links below send you to one of those stores depending on which logo you choose. If you wish to purchase something from either store and use one of my links below, I get a small percentage of your order, at no additional cost to you. This helps me to defray the costs of this blog, the time, the ideas and tutorials I post here. Your help is greatly appreciated! Thank you!
Today I am sharing another walk through of a tutorial I made for the
Sizzix Blog back in 2021 featuring Gertrude on a panel made with Doodle Art 2 die
cuts highlighted with Distress Crayons.
As with the other older tutorials, I have made a tutorial where I talk through the steps for those who find it easier to listen to instructions along with the written directions.
It is said that Giraffes represent confidence, peace and power. I wanted an art
piece that would show that bit of inspiration as well as to highlight Gertrude,
who exudes peaceful confidence.
Here is a tutorial for this Stand Tall and Rise Above
project.
Supplies I used for this project:
Gertrude
Doodle Art 2
Handcut Lower Alphanumeric
Framed Panel (approx 6.5x8.75 w 5.5x7.75 opening)
Distress Collage Medium
Distress Paint - Vintage Photo or Gathered Twigs
Distress Spray Stain - Walnut Stain or Scorched Timber
1.Paint the frame, back and sides of a Framed Panel with Walnut Stain Distress Ink. If you don't have one in your stash, there are lots of frames in the 6x8 ish range that you can easily substitute and then do all this on a piece of chipboard to fit into the frame when it is done.
Once dry, lightly sand the frame all over. Then scribble
some of the Walnut Stain Distress Crayon over raised areas on the frame and rub
it in with a damp finger.
2.Spray the frame with Ground Espresso Distress
Spray Stain. Set aside to dry.
3.Cut a 12x12
piece of patterned paper to fit the size of the back of the Vignette Frame.
About 6x8. Out of the remaining piece of the paper, cut two of the Doodle Art
2. The paper I used was from Idea-ology Wallflower, which is now re-retired, but something from Backdrops Volume 4 would work perfectly.
4.Take a few minutes to look at the patterns on
the Doodle Art pieces and determine an area on each that you want to trim to
fit in opposite corners of the frame. In this picture you can see where I
trimmed some scrap paper pieces first and I have them laying over the two cut
from the patterned paper.
5.Then using some detail scissors, carefully cut
away portions to make two corner décor pieces. You can see I have one that is
larger than the other.
6.Adhere the solid piece of paper to the back of
the frame with Distress Collage Medium. Use a brayer or bone folder to press it
onto the panel and to remove any air pockets.
7.Then apply a nice layer of Collage Medium across
one corner of the paper on the panel, and press one of the Doodle Art corners
into it. Then do the same in the opposite corner.
8.Cover the entire piece with a thin layer of
Collage Medium. You will notice that there will be some brush strokes. These
will dry into the background and if you like them, you can leave them to dry as
part of the texture.
9.But if you would prefer, use your hands to
smooth the Collage Medium gently using circular motions to rub it in and it
will smooth the surface.
1 While
that is completely drying, take a piece of Distress Woodgrain Cardstock, color
it with Ground Espresso Distress Stain so that it looks like dark brown wood.
Dry it with a heat tool. Using your finger, pick up a little bit of Crushed
Olive Distress Paint, then run the paint on your finger across the surface of
the Woodgrain cardstock. This should bring out some of the woodgrain.
11 Do
the same thing with Peacock Feathers Distress Paint and you should have a piece
of paper that looks a little like old, Distressed Wood. Use this paper to cut
out the sentiment you want. I chose the phrase Stand Tall and Rise Above which I cut from the Hand Cut
Lower Case Alphanumeric. I cut all of the letters a second time from heavy
black cardstock and adhered them together to make the sentiment letters a
little thicker making them stand out when adhered to the background.
12 I
used the same technique to smear some Scattered Straw Distress Paint on a piece
of Distress Cracked Leather Cardstock. Then sprayed it with Antique Linen
Distress Spray Stain. Once dry I cut it into 1/8” strips to form a frame inside
the wooden frame later on.
13 At
this point the panel should be completely dry. Pull some Distress crayons in
colors you want to use to form a blended background. I used Peeled Paint,
Weathered Wood, Peacock Feathers, Fossilized Amber and Crushed Olive.
1 Begin
by scribbling some of one of the colors over parts of the Doodle Art. Just
start in a small area at a time.
1 Then
using one of your fingers, push the crayon around and into the indentations.
Continue this in a few different places around the panel.
Continue
adding different colors and blending them as you go until the entire background
is covered.
Using
a Walnut Stain Distress Crayon, go around the outside of the piece and blend it
in to add depth to the colors around the edge of the piece and also the edges
of the Doodle Art pieces so they stand out.
Using
the Weathered Wood Distress Crayon, scribble it onto various areas of the frame
and rubbing it in to add interest to the brown frame and to tie it in to the
background. Then put some Collage Medium onto the back of the frame and put it
onto the panel. This takes time to dry, and needs to be held in place, so I set
it aside and put books or something heavy on top while it dries.
19 While
it is drying, it is time to put together Gertrude. I
used Distress Mixed Media Heavystock and I colored several pieces with
different colors of gold and brown and then cut them out. Sizzix already has a great
video for assembling her, so I’m not going to reinvent the wheel.
2. At
this point the frame should be dry. Use the thin Cracked Leather Cardstock
strips to form a frame about ½ - ¾ “ from the inside edge of the panel frame.
2. Adhere
Gertrude along the right side of the frame. I added a bit of chipboard
underneath her to give a little dimension.
22 Before
adhering the Woodgrain Cardstock sentiment, lay it out inside the Cracked
Leather frame to get the spacing correct, then adhere once it all fits.
Thank you so much for sticking with me on this rather long
tutorial. I just love Gertrude and her sense of self-confidence, so I wanted a
project that would celebrate that. I hope you are inspired to give Gertrude and
Doodle Art 2 a try on a project soon.
Have a creative day!
Tami
I
am an affiliate with Simon Says Stamp and Scrapbook.com so the links
below send you to one of those stores depending on which logo you
choose. If you wish to purchase something from either store and use one
of my links below, I get a small percentage of your order, at no additional cost to you. This helps me to defray the costs of this blog, the time, the ideas and tutorials I post here. Your help is greatly appreciated! Thank you!