Showing posts with label Distress. Show all posts

Sunday, November 8, 2026

Holiday Botanicals - Partial Front Cards

Hello Makers! I'm sharing two partial front cards that I made for the release of the Tim Holtz Stampers Anonymous Christmas 2026 release. This set is called Holiday Botanicals. It has three images in two different sizes, as welll as three sentiments.  

I made a process video for these cards and I do hope you find something to inspire you or an idea that helps you in your creative process.

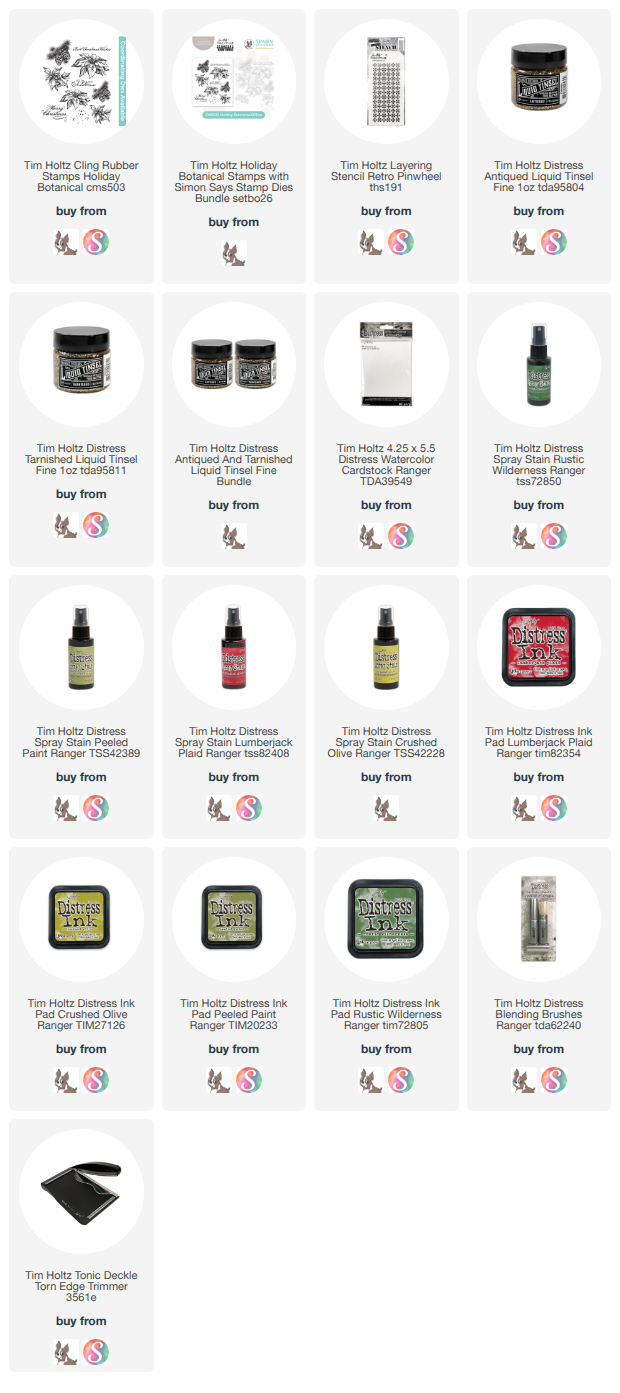
I decided to stamp the largest of two images with Distress Stains onto Distress Watercolor Cardstock. First I cut 1" off the right side of the front of two A2 Cards. Then I cut two 3x5.25 pieces of WC Cardstock with my Deckle Edge Trimmer, and two 1.25x5.25 pieces of WC Cardstock for the right side of the inside of the card. 
Stamp the image in Distress Stains - I used Peeled Paint and Rustic Wilderness. Then color the berries with Lumberjack Plaid. Stamp the splatter stamp around the edge in Walnut Stain Distress Ink and the sentiment below the image in Black Soot Archival. Add a bit of sparkle by painting some Distress Liquid Tinsel onto the holly leaves and berries. 
Put blend or brush some Peeled Paint and Rustic Wilderness Distress Ink onto the Retro Pinwheel Layering Stencil. Then spray with water and press onto the smaller piece of WC Cardstock. Dry and stamp with the splatter stamp. Thenn adhere to the right, inside of the card.
Do the same with the ponsettia stamp, but orient everything horizontally.
Stamp in Lumberjack Plaid and Crushed Olive Distress Stain. Add Liquid Tinsel and Stamp the sentiment in Black Soot Archival.
Stencil the Retro Pinwheel in Lumberjack Plaid and Crushed Olive Distress Ink on the small piece for the inside.
Sew around the stamped pieces and add a bit of 1/4 lace along the front edge for even more vintage flair.

That's it for today's cards. These would be very easy to make in multiples for a set of Christmas cards. 
Thanks so much for stopping by today!
Tami 

Below are the links to the products I used in this make. They are my affiliate links which means I get a small percentage of your purchase at no additional cost to you, if you click one of my links below to shop. I greatly appreciate it when you use my links! Thank you so, so much!!

Saturday, July 25, 2026

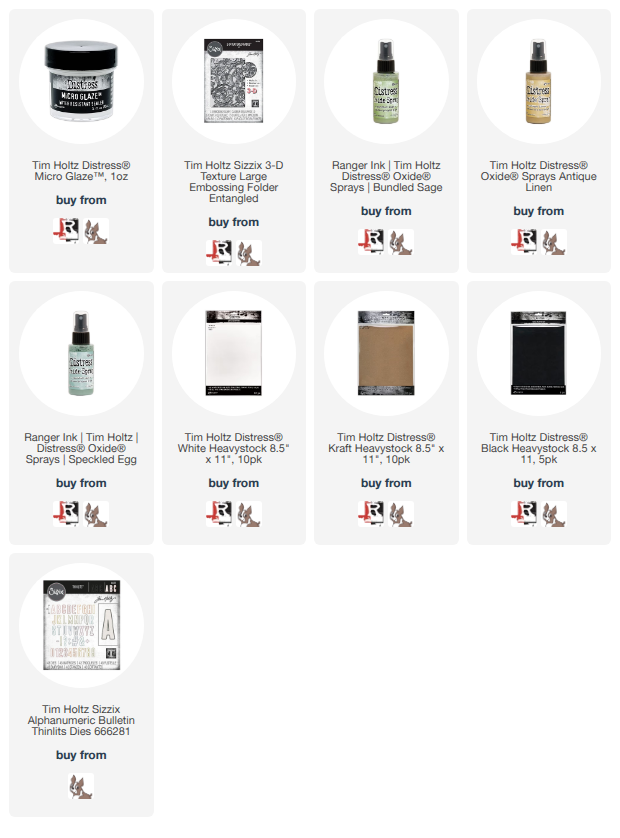
Distress Micro Glaze Embossed Resist Technique

Hello Makers! I am excited to be able to share this technique with you. I have the written instructions and step-out photos on the Ranger Ink Blog here. 


But of course I also made a video tutorial for those who find it easier to watch a technique. 

Below are just some close up photos of the cards I made with this technique and at the very end is a list of the products I used with my affiliate links. 
Thank you so much for looking! 
Tami
 
Below are my affiliate links for the products I used in this tutorial.  
 

Saturday, March 14, 2026

Making Paper Cabbages

Hi Makers! Recently Tim Holtz shared my paper cabbages on his Spring/Easter Live. I've had followers ask me for links to the tutorial. Well, I've been making spring cabbages for several years and have used a couple of different techniques to make them.  So I thought it would be helpful to gather the tutorials into one place for easy access depending on the look you want, so I have them linked below.

Video Tutorial Coming Soon 

I was also inspired to make a video tutorial of these different techniques for those who prefer a video to a blog tutorial. That is still in the works, so I will post that here as soon as I am finished editing. 

The first version was for a Sizzix Blog tutorial in 2020. I made a little spring garden cart and added some paper cabbages and carrots made from Tim's dies that were current at the time. 

That tutorial and Sizzix blog is long gone, but I searched through photos and found enough to add the paper cabbage and carrot step out photos to the old post here on my blog. You can see it here Garden Bunny Hop

This original version used Funky Florals, two colors of cabbages, and alcohol inked baubles. 

This version was from the Tim Holtz Chapter 1 release for 2021, and again, I used dies that were released for that chapter. 
 This version is the tutorial that Tim references in his YouTube Live and used the Brushstroke Flowers dies.
They were made with paper, Collage Medium, water and the patience to finesse the paper just a little to form a cabbage ball shape and the outer leaves. 
 
You can find the tutorial for this version here at Lucky Peter Rabbit

The latest version was for the release of the Idea-ology Bunnies and Eggs in 2023. I love the Idea-ology Salvaged Rabbits and Eggs! So I made this spring vignette with three garden scenes. One with carrots, one with flowers and eggs, and of course, one with cabbages. 
These cabbages were made again with baubles, but I tried a different technique with the baubles this time. 

This cabbage tutorial can be found here at Spring Vignette Divided Drawer

 I hope you found this to be helpful and that you have some fun making cabbages for your own spring creations.

Tami 


I am an affiliate with Simon Says Stamp. If you wish to purchase something and use one of my links below, I get a small percentage of your order at no additional cost to you. Thank you!


Friday, March 6, 2026

Wildflowers on Woodgrain - Stampers Anonymous

This tutorial focuses on making some woodgrain paper with Distress Crackle Paste and the Woodgrain Stencil.from Tim Holtz and Stampers Anonymous. The lovely Wildflower Silhouette clear stamps (or Mini Bouquet if you want Red Rubber stamps) make a beautiful focal point on this woodgrain background.

Here is my process tutorial if you would like to see how I made these cards.

This is a mini slimline card.
The woodgrain was made by tinting Distress Crackle Paste Opaque with a few drops of Gathered Twigs Distress Ink Reinker and then putting it through the woodgrain layering stencil. onto Mixed Media Heavystock.
Then I colored the Mixed Media Heavystock With Distress Spray Stain in Walnut Stain and Scorched Timber. I cut the woodgrain into 7/8" strips.
I inked the wildflowers with Mini Distress Inks and sprayed with water before stamping on Distress Watercolor Cardstock. Then I cut the flowers out with the coordinating dies for the red rubber stamp version of these wildflowers called Mini Bouquet CMS259. 
Here is a closer peek at the nail holes in the wood. I poked the holes with the Craft Pick from TIm Holtz and Tonic, them colored wtih Distress Markers (yest I still have them.
I tied the ends of the flowers into a bouquet with some bakers twine. 
The sentiment is from the Crazy Talk stamps.
This version is an A2 size and is the one I sent to Stampers Anonymous. 
The background woodgrain was made the same way but I used Lost Shadow Spray Stain to make a weathered barnwood look.
Again I poke "nail" holes with the Craft Pick and then colored them with a Rusty Hinge and Ground Espresso Distress Marker. 
I just love the look of the rusty nail holes.
The sentiment was from Crazy Talk again.

Thank you for reading through this. I hope it was helpful.
Have a creative day!
Tami 

I am an affiliate with Simon Says Stamp and Scrapbook.com. If you wish to purchase something and use one of my links below, I get a small percentage of your order at no additional cost to you. I greatly appreciate it! Thank you!

Sunday, March 1, 2026

Interactive Birthday Card

Hello Makers! I put the Simon Says Stamp coordinating dies to work this week by making this interactive spinner card.

Here is a video tutorial of my process for making this card. 

The Bold Sayings stamps can be used as is, or you can cut the words out and just use the words you want. 
I used the text stamps on both Professor stamp sets to make a 5x7 background .
The words for the spinner are from Tiny Text.
I layered several for the professor dies cuts and then after attaching the spinner I attached him to the guage with foam tape. 
The spinner was made by cutting the arrow from the Correspondence coordinating die set and using the Professor Suite dies to cut the goggles.
The background stamping was doen in Old Paper Distress Ink.

 If you wanted the background to be a complete circle with birthday options all the way around, you would need to make a 6x6 card base and stencil the green circle on a 5.5x5.5 piece of White Heavystock.

 I hope you enjoyed the process video in this card. It was fun to make!

Have a creative day, 

Tami 

I am an affiliate with Simon Says Stamp and Scrapbook.com. If you wish to purchase something and use one of my links below, I get a small percentage of your order at no additional cost to you. I greatly appreciate it! Thank you!