Hi Makers! This is the last of the Halloween Sizzix makes for this year. This was a bit of an unconventional build, but I think it turned out really well. I really enjoy working out the engineering on these pieces as I go and making the mistakes so you don't have to.
Here is the link to the video tutorial for Dead Mans Chest
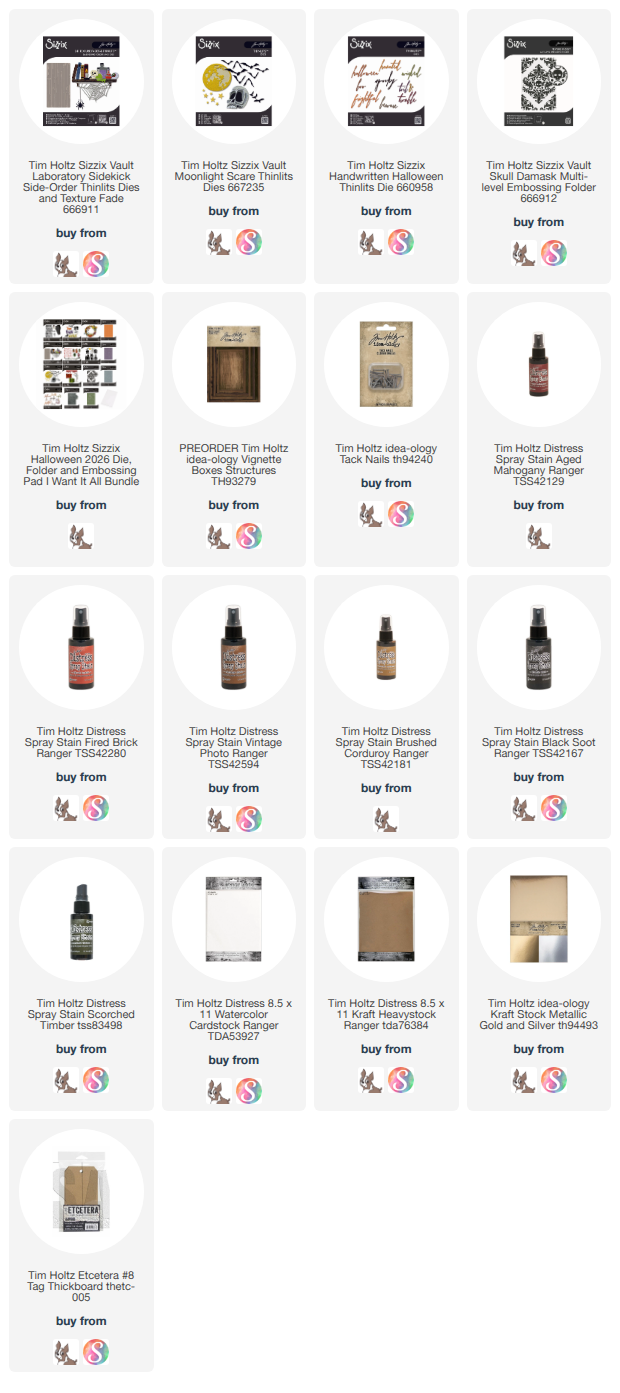
The handles and straps were made from 1/2" strips of Kraft Heavystock colored with Black Soot and Ground Espresso Distress Stain.
The sentiment is from Handwritten Halloween. I cut it out of Gold Kraftstock and Black Heavystock and then layered them on top of each other. The spiderweb is from the Vault Laboratory Side Order. Isn't the texture on the box lining so cool? it is embossed with the Skull Damask Multi-level Texture Fade.
The little mini Spencer skull is from Vault Moonlight cut out of Watercolor Cardstock and inked with Distress Inks in Blacksoot, Scorched Timber, Walnut Stain and Antique Linen.
The coinss were cut from a retire Vault Release called Vault Rosette. It cuts and embosses a circle that is perfect for a coin, To make these I found it easier to cut strips of the gold kraftstock wide enough for the coin die. Adhere them together kraft side to kraft side. Then cut out the coins.
Then you cut the top of the skull from the Vault Laboratory and adhere it to the front of the coin with Collage Medium.
Adhere the coins to the inside of the box with foam tape and foam squares.
The woodgrain is kraftstock sprayed with Brushed Corduroy and Vintage Photo Distress Stain. Then Run pieces through the woodgrain embossing folder from the Vault Laboratroy Side Order. Adhere it to the outside of the box.
Add details with the 1/2" strips of kraftstock colored with Black Soot and Scorched Timber Distress Stains. Glue the strips in place, make handles by bending small pieces and adhering them to the sides. Then add Tack Nails to add interest.
Thanks for stopping by! I hope you found this post and the video tutorial to be beneficial.
Have a creative day,
Tami
Below are my affiliate links to the products for this make. The Rosette Vault set is retired.
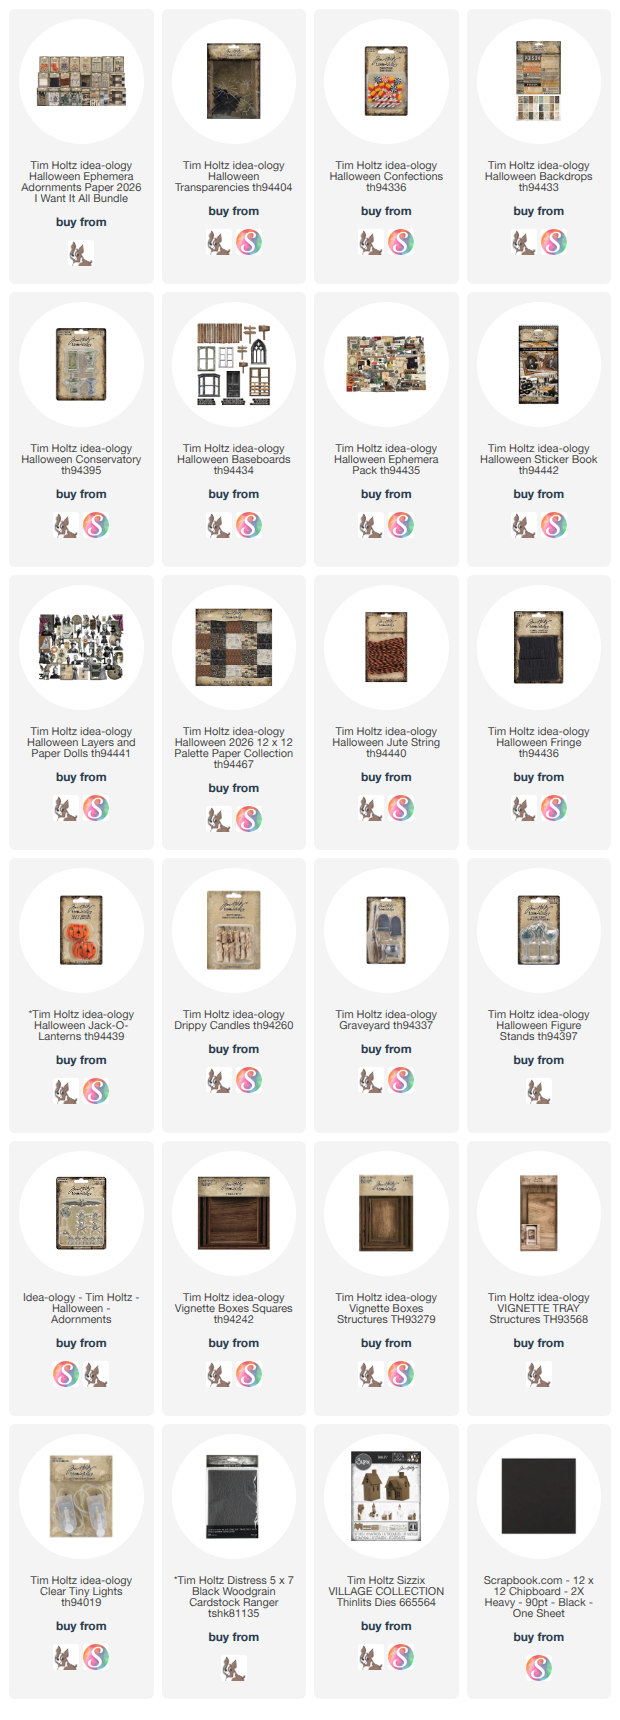
Please Take Only One, using Tim Holtz Idea-ology, was inspired by that old story of Hansel and Gretel. If you look closely you can see the demise of those who took more than one and the peril the little masked Trick Or Treater is in as she reaches for a second stick of candy...
I filmed myself as I made this. As usual it was hours long before the edit. I did speed up some sections so you could see the basics as I explained what I was doing. I hope it helps!
There was a family emergency room trip in the middle of this make that I discuss in the voice over. I left it in as a reminder that we all have those times when we are going through difficulties and that we are not alone. Just keep going, press on, as my friend Paula reminded me, stay in the boat (keep the faith.)
The top is the middle square Vignette Box. In the background you can see portrait sticker with a skull and some drippy candles. The raven represents many things in different settings. In this story he represents regret.
The top of the box I left flat and covered with Woodgrain Cardstock and I cut the little detail along the top with the woodgrain as well. That detail is from the Tim Holtz Sizzix Village die cuts and is part of the manor rooftop. You can also see the spider adornments on the corners that look like they are holding up the Fringe.
The girl in the window looks like she regrets taking more than one candy, even though she is still holding on to it tightly.
The doorway of the house was designed to lure little children to a terrible fate, so it is overflowing with candies and things to entice trick or treaters to defy the sign and take more than one.
On the top of the pointed roof I added the pumpkin from the Halloween Stands. Also added more fringe and spider adornments.
The roof was cut from more of that Woodgrain cardstock with the square roofing dies from the Tim Holtz Sizzix Village.
The inside and left side of the porch are covered wth the crackle paper from the Halloween Backdrops. I cut it into 3/8-1/2" strips to mimic old weathered, paint-cracked siding. I also added some moss along the bottom edge to cover any mess ups and make it look unkempt.
I put some styrofoam balls in the jack o lanterns and then stuffed them with Confections. For the one with the sticks, I cut the sticks in half so that it looks like more candy. One Jack-o-Lantern is on a pedestal.
I added a whole stick under the little girl's hand and attached her other hand to the Jack-o-lantern so it looks like she is grabbing one more. The mask is from the Halloween Sticker Book. The wreath is made from paper wrapped wire with some twine tied on in a bow to hold the moss and Candy Corn.
The Candy Corn were coated in some Rock Candy Distress Glitter.
The walkway is a bunch of the planks from the Baseboards that have been cut in half .
The Starlight candies were also glittered. I wrote the message on a Baseboard sign.
The large bottom Vignette Box holds the old lady, a calendar, drippy candles, and the curtains from the Halloween Layers.
Placing her close to the window so that it appears she is looking out anticipating her next victim.
In front of the house, the trick or treaters just thing the graveyard is a spooky decoration. The moss and bits of the broom look like weeds. The dead tree was made by gluing parts of the broom sparsely onto the top of the broom handle so they look like branches, and then adding bits on moss here and there too.
The extra creep factor is when you peek behind the tombstones and see the discarded bits of candy and you realize what she has done to those who take more than one...
Thank you so much for your interest in this make. I hope the photos, written info and the video all help you in your making process. I hope you enjoy this tutorial and if you make something inspired by this I would love to see it so please tag me!
Also, if you aren't already, be sure to follow me on my social media accounts, all are under the same name except my Facebook page which is playswellwithpaperkits because I used to make a bunch of scrapbook layout kits way back when I started the page and Meta won't let me change it.
Have a creative day!
Tami
I've listed the products I used below with my affiliate links. Thank you so much to those of you who use them. I truly appreciate it!
Hello Makers! Today I get to share the last in my Trio of Pirate Domes that I made for the Halloween 2026 release of Tim Holtz Idea-ology.Today I'm sharing the largest one, the Reliquary Dome.
I did make a video tutorial for this one as well, but remember that there are tons of steps to most Idea-ology makes as we apply layers of texture and color, or need to build things, so these tend to be more involved than a card. I speed it up when I can, but also want to give you information and let you see when I make mistakes or a design plan doesn't go the way I thought it would. It's all part of the process when you are making something for the first time while filming it.
This scene was also inspired by part of the large pirate make I did a few years ago. I had a cannon and cannon balls on top and had made a terrible mistake and poked a hole through a area of an adjoining box where it shouldn't be. I thought I had ruined it, but decided to embrace it and make it bigger so I could stick a cannon ball in it.
So I made a hole in the grate of the ship to look like a cannon had shattered through it.
I added the ravens this year because I love ravens but also because I thought it was creepy tho have them handing about on the deserted pirate ship.
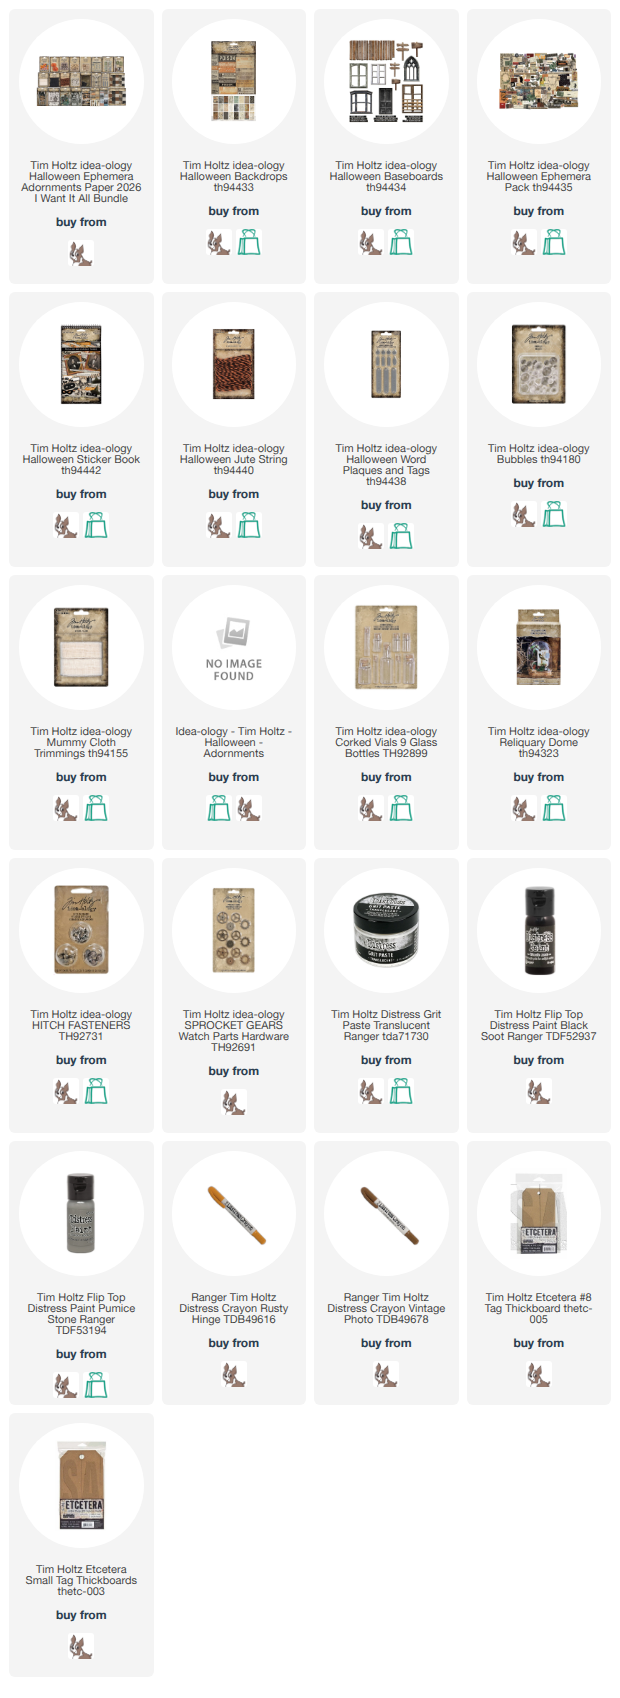
The cannon is made out of the largest Corked Vial and the front end of the cannon is a reinforcer from a #8 Etcetera Tag.
The wheels are reinforcers from the small Etcetera tags and then I put a Sprocket Gear in the middles and Fastener. I have a Hitch Fastener on the back wheel, but had to remove it from the front because it didn't fit under the dome.
The back of the vial has another Sprocket Gear and Hitch Fastener. The top middle of the cannon has a Skull and Crossbones from the Halloween Adornments Pack. Then I just have loads of Transluscent Grit Paste, Distress Crayons, Black Soot and Pumice Stone Distress Paint...the layers add all the character.
I covered behind the grate and the back of the grate with a grungy piece of Halloween Backboard paper.
Then I chose some Clippings from the Halloween Sticker Book to tell the story.
I hope you enjoyed this make as much as I did. I loved taking a large make and shrinking it down to smaller little scenes. Please tag me if you make one as I would love to see your version.
Have a creative day,
Tami
Below are my affiliate links for the products I used. Thank you so much for using them! It truly helps!
Inspired by a favorite childhood movie, The Goonies, where they go off
in search of the rich stuff to save the Goondocks, I made this pirate
treasure Display Dome for the Tim Holtz Halloween Idea-ology release.
In 2023 I made a large pirate inspired, four-sided vignette piece. that you can see called Avast Me Hearties. It was a
blast to make! However, since 2023, I have wanted to break that piece
down into smaller, more manageable pirate inspired scenes. Thus my trio
of domes for this Tim Holtz release.
I am going to share these domes one at a time so they are more
manageable.
I did film myself making the domes so I have a video tutorial of each one, however, there are a few things I missed when filming because
my phone either ran out of battery or storage. Hahahaha! But you get
most of it, so I hope that what I did capture is helpful.
One last thing, as we move along with Idea-ology video tutorials again, they
will always be longer than most other tutorials. These projects take
anywhere from a couple of days to a week in my studio and I try to edit
them down so you see the important bits, but don't end up sitting for a
marathon tutorial either.
I would really appreciate if you would like and comment on my videos on YouTube.
This really helps me as these free video tutorials take a lot of time to make.
Thank you so much.
This blog is not a tutorial. I will post close ups and still photos of each piece so you can see the details. I always find that helpful when I am making. Sometimes an instructor will think their directions are clear but they just don't click with others. So photos will often be beneficial as you can see details and it will help it make sense.
Thank you for stopping by. I hope the video and the still photos help inspire to make your own version of the rich stuff!
Have a creative day,
Tami
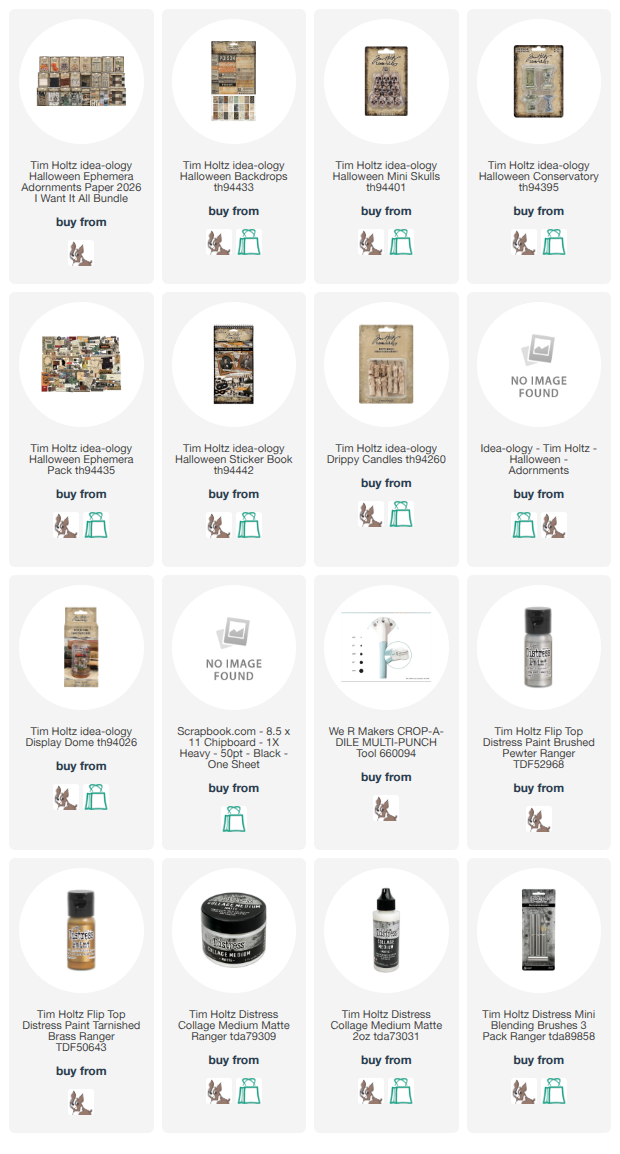
Below are my affiliate links: I'm incredibly grateful to each of you who shop through my links. I get a small percentage when you shop at no extra cost to you, and I truly appreciate your support!