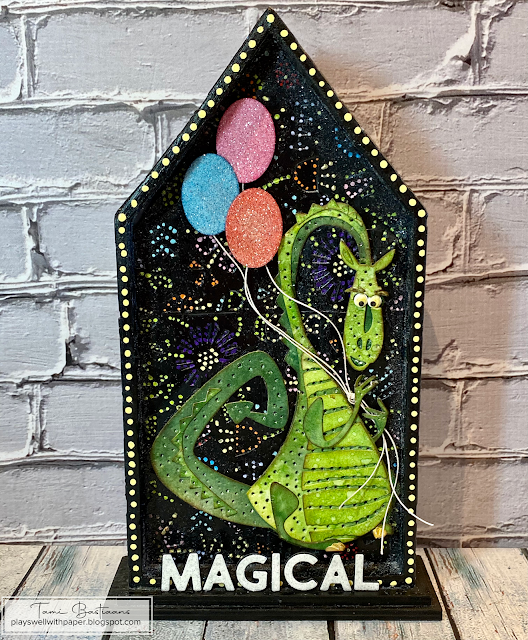
A year after the release of the Tim Holtz Sizzix Chapter 2 2021 dies, I
am finally posting a walk through of this piece. It was inspired by
Disneyland's Main Street Electrical Parade and I used the Rupert
Colorize die and the Folk Flowers die to make this.
I thought today would be a great day to post this video since it is once
again the return of the Main Street Electrical Parade for its 50th
Anniversary season, and the Elliot float, which inspired this make is on
much of the merchandise.
I didn't take too
many step out photos, so I hope that my explanations in this video makes sense. If not, feel free to contact me and I will do my best to answer your questions or clear up any confusion I caused.
Use the Vignette Shrines and a bone folder to etch the shape and dimensions on a piece of black cardstock.
Cut around the shape leavin about an inch on each side. Then miter the corners and fold it along the inside edge mark so you will be able to place this inside the vignete and have it stand away from the back panel by an inch to allow space for the Tiny Lights to be attached to the back panel.Cut the main shape of Rupert out of the center. Cover this with the Folk Flowers cut from black cardstock and collage medium so they fuse perfectly. then use your scissors and trim the flowers from the shape of Rupert. Don't worry about the ears, feet, etc. just get the main areas of the body so that when you adhere vellum, frosted sheets or translucent Yupo to the back of this piece, the entire center of Rupert is open and will allow light to shine through. Use a poker tool or tool of your choice and multiple colors of Distress Paint to apply dots to the Folk Flowers background;
Assemble Rupert and then poke large holes in him where you want the light to shine through him.
Cut a few of the Stacked Ovals from glitter paper, then attach string or twine to make balloons.
Adhere Rupert over the opening making sure the edges of his body are sealed all the way around to the background. That will force the light to shine through the holes in his body. Attachthe strings into his hands and adhere the balloons over his shoiulder.
Now is the time to adhere the shrine platform piece into the shrine. and finish off the front by cutting the word Magical (or Dazzle) from black cardstock multiple times, and adhere them together, The last layer should be some white glitter paper and lastly attach them along the front bottom edge of thte Vignette Shrine. They should stand up.
You will want to add yellow dots along the outside edge of the front of the Vignette Shrine.
Before you ever adhere the platform with Rupert intothe Shrine, cover the sides and back with pieces of Folk Flowers cut from black cardstock. Adhere it with Collage Medium, tnen pain the whole thing with Black Soot Distress Paint.
Using a poker tool or tool of your choice, again add dots to the Folk Flowers back ground in many different colors of Distress Paint. Be sure to drill a hole in the back of the Shrine to thread the Tiny lights through. Attach them to the back of the panel so they will shine through Rupert.
I am truly thankful for your support and that you took the time to stop by and check out this long overdue post about this make from last year. Thank you so much!
I hope you have a crafty day,
Tami
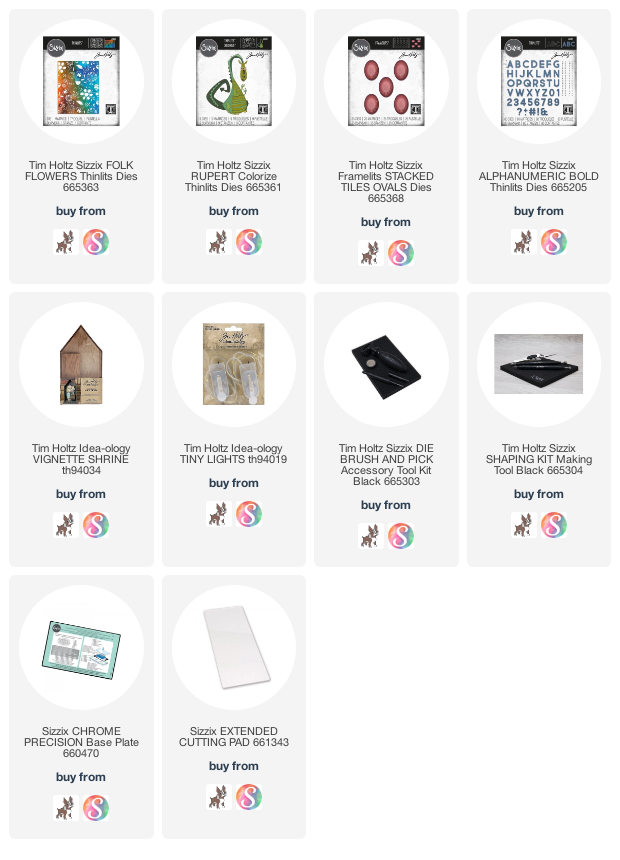
I am an affiliate with Simon Says Stamp and Scrapbook.com so the links below send you to one of those stores depending on which logo you choose. If you wish to purchase something from either store and use one of my links below, I get a small percentage of your order, at no additional cost to you. This helps me to defray the costs of this blog, the time, the ideas and tutorials I post here.
Your help is greatly appreciated! Thank you!


3 comments:
Your creations never fail to wow me. Love, love, love your Rupert and how you put him all together. So glad you are feeling better. Thanks as always for sharing.
You always do such an amazing job on your makes. Thanks for sharing!!!
This is Amazing!!! I love Rupert!!!
Post a Comment